
Leaking faucets pose a serious health and safety risk to anybody living or working in the building they plague. You should get a plumber to inspect your system regularly, have an expert assess your water pressure to see if it's too high, and get a water softener if you live in an area where hard water is common. If you take this action, you won't have to worry about the issues we discussed.
A leaking faucet is one of life's greatest annoyances. The sound of water continually dripping can be very bothersome and is a constant reminder that you're squandering water. So stop avoiding the issue and start fixing it! Repairing a leaking faucet is a project that can be done rapidly and cheaply. The most important requirement is knowing how to fix your type of faucet.
Faucets can be either a cartridge, ball, ceramic disc, or compression style. The valve seat is sealed with a rubber washer in a compression faucet. These washers may wear out over time and require replacement. For the remaining three varieties, the leaking can be fixed by replacing either the O-ring or perhaps the neoprene seal. In the following paragraphs, we'll discuss each of these issues in greater detail.
Before you begin, ensure the water shutoff valve under the sink is turned off. To prevent any parts from going down the drain, a towel should be placed over it, and they ought to have a designated area nearby where they can be organised in the sequence in which they were originally taken out. If you want to remove mineral deposits from a fixture without damaging it, tape the wrench jaws and have distilled white alcohol and a gentle scouring pad handy.
Advice on Fixing Leaking Fixtures
The most annoying sound is that of a dripping faucet. It has the potential to increase my water bill and keep me awake at night. It's always a good idea to fix a leaking leak as soon as you detect it. This is why. It's a simple DIY job that can be done with only a few instruments and some good direction. Remember that the method of fixing a leaky faucet will vary depending on the type of flow and sink you have, but these general recommendations will help you to stop a leak.
Why Is My Faucet Dripping?
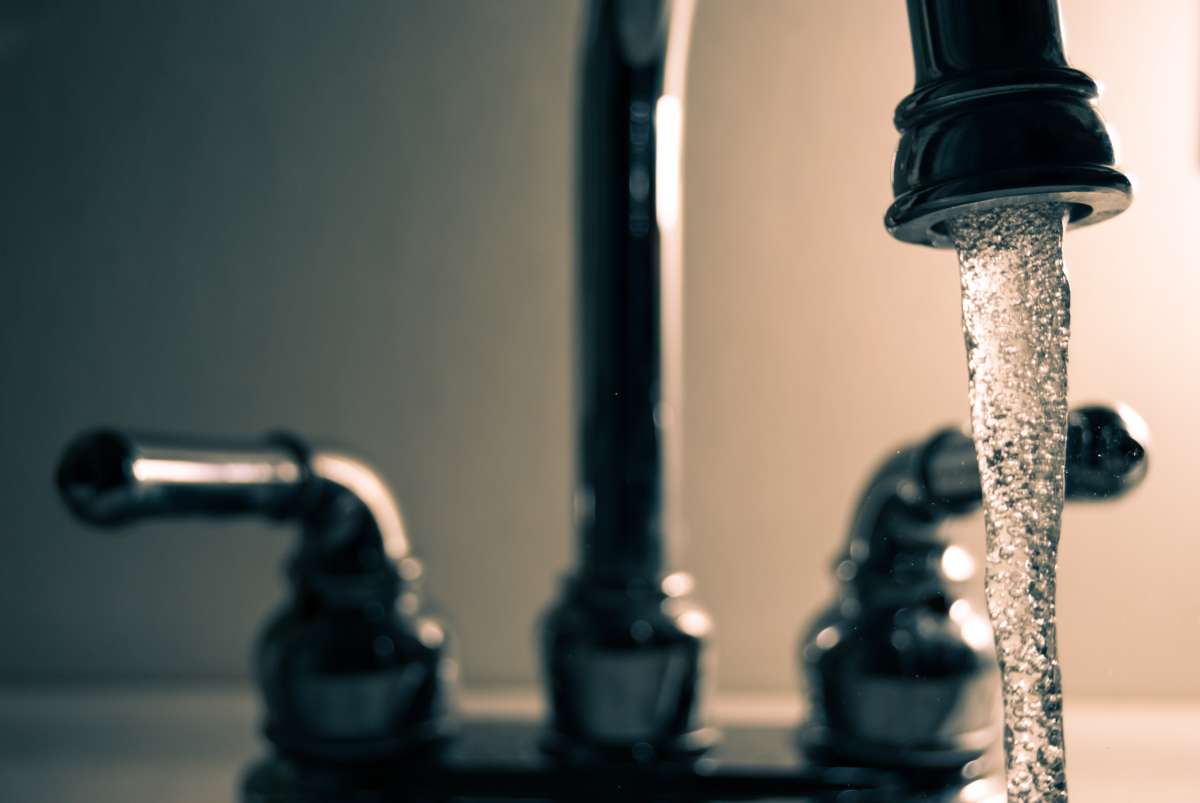
Keep an eye out for dripping faucets, as one can waste as many as twenty gallons of water every day. Check your sink carefully to see if you can discover where the water is leaking from. If water is gathering around the faucet's stem, either the O-ring or the packing nut needs to be changed or adjusted.
It's likely the handle is broken if water is dripping from the faucet's spout. You should now be able to identify the type of faucet installed in your house. The cartridge shower is the most prevalent form in modern homes, and its cartridge ought to be replaced at some point, as stated by The Spruce. Compression faucets, on the other hand, are more typically seen in residential properties than in more modern ones. Over time, the rubber seals on your faucet may dry out and need to be replaced in order to stop the dripping.
What Do We Need To Do?
Most of the tools you need to fix a dripping faucet are probably already in your toolkit. SFGate Home Guides suggests gathering the following items before beginning any project:
- To speed up the cleaning procedure, grab some rags.
- White vinegar for degreasing the pipe and removing gunk from the spout to improve the water's flow.
- You'll need a Phillips-head and a flat-head screwdriver to get the screw out.
- Substitutes for broken parts that can be substituted in their place
Fixing a leaky faucet on one's own can save money. Only the cost of materials will be your responsibility. A package of washers in Home Depot costs less than $3, so if you're handy, you can save money by swapping them out on your own.
An Allen wrench and an adjustable wrench are both useful tools to have on hand for loosening fasteners like valves and nuts. Slip-joint pliers can be used for the same purpose, and they'll provide you with a greater grasp on the faucet's tiny parts as you tighten them throughout the assembly.
Turn off the flow of water.
Your water supply should be constantly shut off before any maintenance is started. The shutoff valves are probably located under the sink. To make them unusable, turn them anticlockwise. Over-tightening can cause harm. Therefore, it's crucial not to use too much effort. If the shutoff valves are not located in the cabinet below the sink, users will need to locate and shut off the main supply of water.
The washing machine, dryer, & water heater are often situated on the lower level or in a nearby utility room in most homes. When cutting off the valves, open this faucet so that the water level can drain and the pressure can release.
To stop the leak, insert a plug.
You'll have to deal with tiny screws as you take apart the sink's spout. You definitely don't want any to go down the toilet with the waste. Cover or plug any gaps you locate to stop disasters from happening. A towel can be used to block the vent if that doesn't work.
Separate System Parts.
In a perfect world, you would only have to disassemble the handle to get to the problem, but it may be necessary to disassemble the entire faucet to get to it. According to the instructions at Lowe's, you should start by removing its set screw from the ceramic disc faucet, followed by the holding nut, and then the new cylinder. Removing the restraining clip or nut is an additional step when replacing the cartridge in a cartridge-operated faucet, but the process is otherwise similar to the one outlined above.
Care must be taken to preserve the correct order of the orientation of both components when disassembled. Reassembly will be much easier, thanks to your meticulous preparation. As a visual help, you can take photos of the parts as you remove them or set them aside in the sequence in which they were taken from the whole.
Check each component.
Silicone seals, elastic washers, and like O-rings on a faucet are often the source of a leak. Look for dents, scratches, and other indicators of use, such as a washer having been flat or grooves worn into the metal. If they look worn, it's time to get new ones. If you want to make sure you're replacing like parts, bringing the broken ones along when you visit the store is a good idea. As an alternative, you might install a new faucet with no built-in washer to help you avoid this issue in the future.
Maintain A Clean Work Space.
It would be very appreciated if you could please clean all the parts before reassembling. Following disassembling, the cylinders' seals and interiors should be scrubbed clean. Mineral deposits on the valves could impede this washer from being cleansed, leading to leaks if not caught in time. Wipe the surfaces with a cloth, soak the deposits using white vinegar to remove them, and then wipe them clean.
Rebuild the Spout.
The pictures you took before will be really helpful now. To reassemble, do the opposite of what you did to take it apart. Never force the faucet or its various components to function by pressing down on them.
Determine How Fast The Water Is Moving.
Once you've fixed everything that needs fixing, turn on the water again. After making sure the faucet is in the "on" position, Lowe's experts advise customers to reconnect the water supply slowly. If the faucet is turned off, and too much pressure is applied suddenly, it could crack the ceramic disc or do more extensive damage. Water flow should be allowed to return to normal.
What To Do If Your Faucet Is Leaking?
A dripping faucet is an irritation and a waste of water because of the constant trickle it creates. You can easily fix a leaky faucet on your own if you know what kind you have and where to find the necessary parts. There's no need to hire a plumber if you know how to fix a dripping sink. In order to fix leaks in the four most common types of faucets, the following guidelines should be followed.
How to Begin
Please turn off the faucet and make sure it stays off. If you want to find the pipes which lead upstairs, you need to look under the sink. If you follow these pipes, you should be able to locate a knob that shuts off the water to your sink. Just rotating the switch anticlockwise will turn it off. Put anything over or in the drain. If you don't have a rag handy, use the sink plug. The easiest way to ruin your day is for a screw or washer to go down the toilet.
Find out what kind of faucet is currently set up. Compression faucets are the simplest to recognise because they clearly denote hot and cold water with two separate screw knobs. You may adjust the temperature of the water coming out of the other three types of faucets by turning a single swivelling arm. There are internal mechanical differences at the bases of their arms. It's conceivable that you'll have to take apart your faucet before you can tell the parts apart:
- A ball faucet uses a ball bearing inside the fixture.
- A cartridge in a cartridge faucet is what makes it work. The cartridge can be fashioned from a number of materials, but most designs feature a decorative cap on the handle.
- A ceramic disc faucet actually houses a ceramic cylinder.
How to Use Compression to Fix a Leaky Faucet
- Take remove all the knobs. Pry off from the decorative cap, unscrew that, and afterwards, take the handle off if you need to.
- Cut the plant stem off. This will expose the thinner O-ring and the thicker seat washer.
- If the handles, versus the faucet itself, are leaking, it's time to replace the O-ring. Take the old one with you when shopping for a replacement one to save money.
- Remove the seat's washer and set it aside. A brass screw, inserted backwards, will hold everything in place.
- The seat washer needs to be replaced. There may be some variation in the sizes of these washers, so it's a good idea to bring the one you're replacing when you go to the hardware store. Before you put in the replacement, check the plumbing grease for any air bubbles.
- Reassemble all of the knobs and handles. It is time to fix any minor leaks.
Fixing A Ball-Style Faucet
- Get yourself a brand new basic set. Some parts of a ball faucet can be repaired without any special equipment, while others will eventually require having replaced. The faucet cam assembly can be replaced rather than the whole fixture. You should be able to find everything you need, such as the tools you'll need, in a kit that costs around $20 and can be bought in the sewage section with most home repair shops.
- To begin, unfasten the handle and take it off entirely. Remove the door's handle and place it aside.
- Pliers are needed in order to take off the cap or the collar. In addition, the tool included in your new package should be used to loosen the faucet cam. You'll need to disassemble the faucet by removing the cam, washer, and ball.
- This will look like a "ball and socket" joint within your body, but it'll consist of a white rubber ball that can be inserted into the socket to stop and restart the flow of water.
- Remove the device's intake springs and seals. You'll need a pair of needle-nose pliers or other means of accessing the mechanism.
- The O-rings need to be replaced. Plumber's grease should be applied to the new ones before installation, after which the old ones can be lopped off.
- Its cam washer, valves, and springs should be replaced if worn. They are the inverse of the method you just completed and should be part of your toolkit.
- Reassemble the handle. At this point, the leak should be sealed.
How to Fix a Cartridge-Based Faucet
- Get rid of the doorknob. The handle can be removed by prying off the ornate cap, unscrewing the screw, and tipping the handle backwards.
- If necessary, detach the holding clip. This plastic, typically spherical, the component has a threaded hole in the centre. You can use pliers to remove it from the cartridge once it has been used to secure your cartridge in place.
- You have to pull the cartridge to make it stand up straight. This is the position the cartridge will take after the water is turned off and the knob is turned all the way to the top.
- Remove the faucet's spout. Set aside, and locate the O-rings.
- The O-rings need to be replaced. You may get rid of the old ones by slicing them off with a knife blade, and the new ones can be lubricated with a plumber's oil before being put in place.
- Reassemble the handle. At this point, the leak should be sealed.
Using a Ceramic Disc to Fix a Leaking Faucet
- The disc cylinder can be removed by unscrewing its screws. This will reveal a number of neoprene seals that are concealed beneath the surface.
- Clean the cylinders after prying off the seals. White vinegar will work great for this purpose, especially if you've got hard water at home. You should soak them for a few hours to get rid of the buildup before deciding if they may be used again.
- If the seals need to be replaced, do so. If you notice any pitting, fraying, thinning, or other signs of wear, take them to a hardware store to be replaced with exact replicas. If you choose to play it safe, this could be your option.
- Reassemble the handle and gradually turn on the water. The ceramic disc could crack if the water is switched off and on using too much force.
Water Leaks From Faucet Handle
Most faucet leaks occur due to a lack of maintenance performed to plumbing systems over time, which causes fixtures such as faucets to leak water when turned on. Eventually, even the best faucets and sanitary sewers will need maintenance to remove debris, metal buildup, as well as other potentially harmful substances from their inner workings.
When a faucet springs a leak at its base when turned on, it may be because the "O ring," a very little disc linked to the stem screw, has become dislodged. A home can usually fix the problem on its own if they have enough knowledge and the right equipment. A Delta faucet can be repaired quickly and affordably by the homeowner, as spare parts are widely available.
After some time, the washers within the faucet will wear out, causing the faucet to leak. The washer is forced against the valve seat every time the faucet is used, which could cause wear and leaks if not remedied. A compressive faucet cartridge can replace the tattered washer and stop any additional leaks. Cartridge faucets, unlike standard faucets, do not require a washer to function. Cartridge faucets are less complicated to fix if the cartridges become damaged or the faucet springs leak than washer-based faucets.
How Can We Fix This Water Leak?
From an ecological standpoint, a leaking faucet is unethical because it increases water costs and wastes important resources. Keep an eye out for rust in the pipe bends and any other signs of corrosion as you investigate the pipes further. This compensates for the pipes' deteriorating state over time, which causes leaks. Most handle leaks on Delta faucets can be traced back to neglectful upkeep.
Don't try to save money by cutting corners on the plumbing. The most common source of water leaks/water damage is poor plumbing, in which low-quality materials are used, or the operation is not done by a professional. There is a high potential for life-threatening electrical shocks to result from water getting into electrical outlets in your home, which both raises the expense of repairs and poses a safety risk.
If your faucet is leaking excessively, you should not hesitate to call a professional plumber. Then, the water supply must be turned off to prevent further water from leaking. While most faucets may be fixed by those with a rudimentary plumbing understanding, even a single misstep can have far-reaching consequences for the rest of your home's plumbing system.
The leaky faucet may not appear alarming at first, but it may cause serious damage to your home and a big increase in your water bill if you let it go unchecked. The most efficient method of preventing water damage is the use of water troublemakers and water leak sensor devices. How do they work, specifically? These systems are installed in homes to protect the structure from flooding and other water-related disasters. It is possible for the water level in a given pipe to increase over the required minimum flow rate in extreme cases.
Water in pipes is more likely to freeze when outdoor temperatures are low, which increases the risk of pipe obstruction, pressure, and eventual pipe breakage, all of which can lead to floods. Sensors and devices that cut off water supply prevent such mishaps. They close the valve instantly whenever they sense a shift in the water's temperature or obstruction pressure.
FAQs About Faucet
The first thing that must be done is to pinpoint the nature of the issue. You will need to replace the washer that is located adjacent to the jumper valve if the tap continues to trickle after you have turned it off. It is necessary to replace the O-ring in the tap if water is dripping down the stem of the tap or at the base of the tap. If you're not sure which to choose, the good news is that you can simply do both at the same time.
The most frequent causes of a leaking faucet, such as a worn out washer or gasket, a loose O ring, or corrosion in the valve seat, are all easily diagnosed and repaired with the use of most faucet repair kits.
To successfully remove the handle, you will most likely require an Allen wrench. You should invest in a set of small Allen wrenches so that you are ready to deal with any kind of dripping faucet. In order to complete the majority of repairs, you will also need screwdrivers and a set of large slip-joint pliers.
The costs of fixing a leaky tap, Depending on the severity of the leak, expect to pay anywhere from $60-$120 for minor repairs and up to $250-$500 for major fixes like installing a new shower head or basin tap.
A leaking or dripping faucet is not normal, thus it must be rectified as soon as possible. If you ignore the fact that your leaking faucet is causing your water bill to increase and might potentially cause substantial damage, it is not only an incredibly annoying sound that gets on your nerves but it can also cause significant harm.