While attics often stay dry and warm, water can still enter yours if there is a leak in the roof or a pipe, moisture, or extreme weather. The ceiling, the insulation, and the wooden support beams of your home are all at risk from water in the attic. As mold and mildew thrive in damp environments, taking prompt action is essential to minimizing potential for costly repairs.
Air flow and eliminating the water's source are the two most crucial steps in getting your attic dry. Furthermore, a number of tools, including desiccants and dehumidifiers, can be used to hasten the drying procedure.
- Track down the water's origin! While you replace a leaking roof or pipe, catch the water using buckets. Turn on any available fans and crack open any windows to increase ventilation.
- Large, absorbent towels or a wet/dry vacuum should be used to remove any standing water.
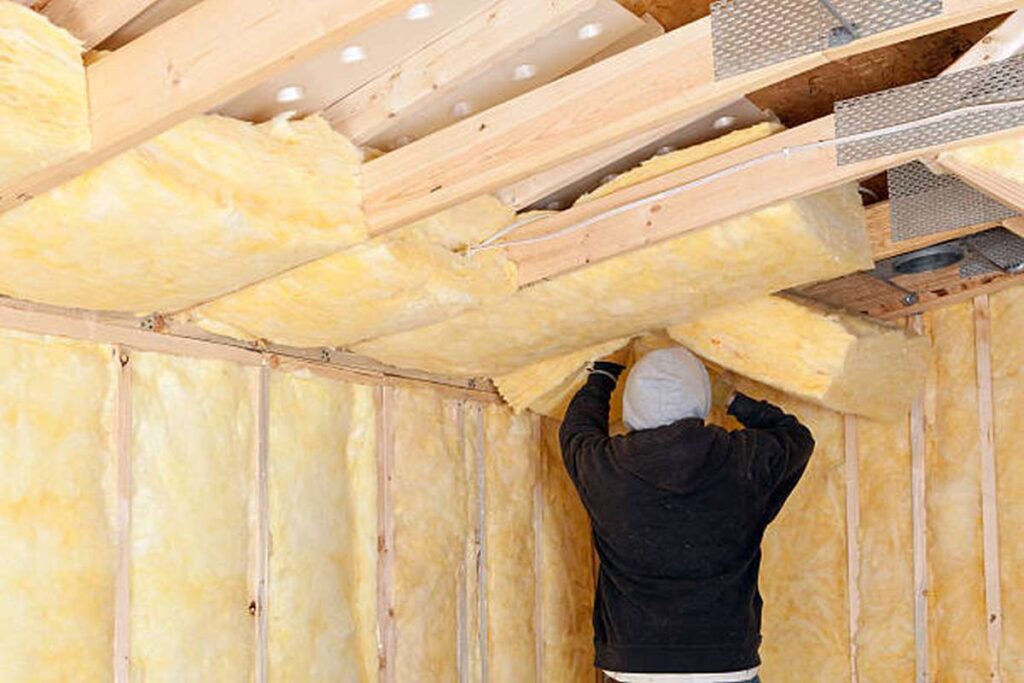
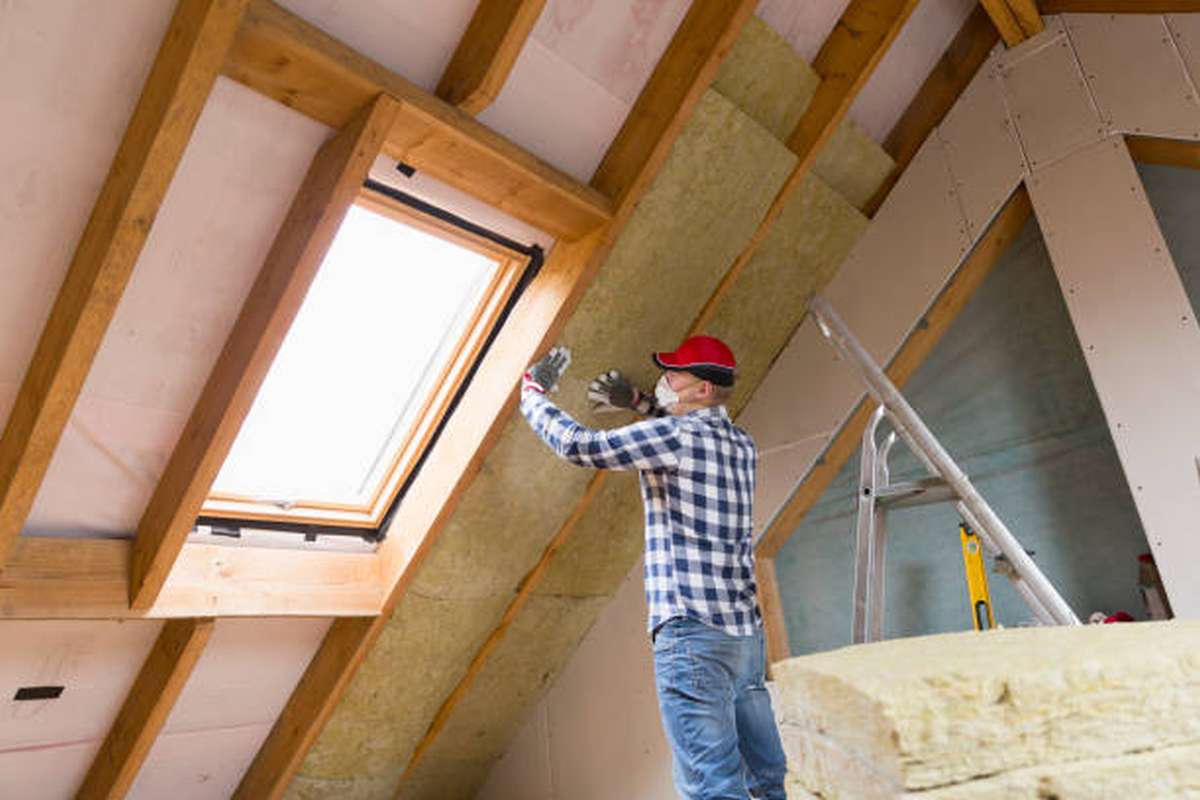
- It is important to use protective clothing, such as gloves, safety goggles, and a breathing mask, before commencing the process of removing wet insulation and disposing of it in the trash. Only then can the insulation be safely removed. When the attic is completely dry, you can put the insulation back in place.
- The drying time can be reduced by using a dehumidifier in the attic. Put a fan up in the attic to help circulate the air if you don't have a dehumidifier. The attic window should face outside if possible.
- Distribute silica gel around the attic to soak up any excess moisture.
There are a number of causes for a damp attic. including water seepage via the roof or uncovered cracks in the building's exterior walls. One of the most common causes of moisture issues in the attic is a poorly sealed entryway leading there from the rest of the house, while poor ventilation can also play a role. The wetness in your attic can be eliminated by installing proper insulation and venting.
Attic moisture can cause health problems throughout the house if it is not controlled. These issues may pose a threat to the citizens' health. Wood and other building materials can deteriorate if moisture problems aren't addressed, posing a threat to the house's structural integrity.
Symptoms of a moisture problem in an attic, such as wet or moldy insulation, can be observed visually. Look for signs of mold or mustiness, such as condensation on windows. When you find moisture, you should quickly open the windows and use fans to hasten the drying process. Quickly swap out any insulation that has become wet or mildewed. A dehumidifier is another useful appliance for making quick work of the moisture problem in the roof space.
Even after you've dried out the attic, you need still take precautions to make sure mold and mildew don't come back. Be sure there are no openings in the roof or walls that could let water in. To fix the roof, you can do it yourself or contact a professional. Whatever the case may be, roof repair is essential. Caulk should be used to seal around windows and other openings in a wall to keep water out.
Next, you should caulk and seal the attic floor to keep the moisture out. Raise the insulation off the ground to inspect for damage. Caulk or mastic can be used to fill any gaps you may see. Gaskets should be installed on the attic hatch or stairwell, and pipe seals should be used to block off openings around mechanical and plumbing components.
Exhaust fans in the kitchen and bathroom may also contribute to the buildup of condensation in the attic if they draw humid air from the living space below. If the exhaust ducts stop in the attic, you'll need to extend them. As a result, air from the fans can be released outside rather than being sucked back into the attic. Exhaust grills should be installed only when absolutely necessary; otherwise, existing vents should be connected to if possible.
Finally, make sure your attic has proper ventilation so that outside air may enter and help you reach your desired relative humidity levels. Vents along the soffits of the house are one way to let in fresh air, but other options exist depending on the building's design. If you want hot air and exhaust to have a better chance of leaving, you should install some vents along the ridge of the roof.
How does moisture affect the insulation?
Any Insulation That Gets Wet May Lose Some of Its Insulating Properties.
As insulation gets wet, it stops doing some of the things you need it to do, including blocking heat transfer. As much as 40% of the R-value could be lost if insulation is wet. Even though fibreglass appears to be watertight, humidity can be absorbed by the dense batt. Hence, wet fiberglass will start to lose its unique thermal resistance properties.
Cellulose loose-fill is mostly made up of shredded paper and fabric. Its insulation can also absorb a large quantity of water. When this happens, it loses the fluffy quality that makes it good at keeping the heat in your attic and keeping the drafts out.
In Addition, Mold Growth Is a Major Problem.
It's well-known that mold growth within a home can be a frustrating problem. Dust and mold spores in the air may easily be sucked up by fiberglass, which is why it is used in air filtration systems. Fibreglass insulation that has been exposed to moisture can develop mold on its paper backing. Cellulose insulation has fire retardants applied to it, and those chemicals help inhibit mold growth.
The cellulose, on the other hand, can soak up moisture and mold spores. Soaking up this water, the wet cellulose could then transfer the moisture to the timber framework, ceiling, and drywall. Because of this, the mould growth in various parts of your attic might spread and cause rot.
Taking Care of Damp Insulation
It's possible you're thinking of replacing wet insulation. It loses part of its efficacy when wet, but can gain some of it back as it dries out. Any insulation that has come loose or is damp from unsanitary water should be avoided. Wet insulation can be identified by the formation of clumps in the attic, as the fibers within it bind when they come into contact with water. When insulation is damaged in any way, whether by being crushed or by contamination, its effectiveness decreases. If this happens, you'll have to start over with new insulation.
It's imperative that you dry out the insulation if at all possible. Damp insulation in the attic can be dried with the help of a fan or a dehumidifier. It may be possible to remove damp batts from some attics and place them in a warm area to dry. If you want to be sure the insulation is still in good shape after a few weeks have passed, check on it. If the fiberglass has an unusual odor, it may be contaminated. Under these conditions, it's essential to install a newer, better type of insulation.
Fiberglass Needs to Be Kept in a Dry Environment.
Damp insulation in the attic is a bad symptom that should be avoided at all costs. Thin glass fibers will be filled with water instead of air. To counteract this, the insulation will lose some of its ability to dampen noise and keep heat in. The presence of wet insulation in a home is a serious issue that should not be ignored.
It's important to locate the sources of water and moisture. Wet insulation can be caused by a variety of issues, including leaky pipes, leaking roofs, and condensation. Roof leaks are a serious issue that should be addressed by a professional roofing service. After determining the source of the problem, you can remedy the water's point of entry.
Caulking and sealing all the house's cracks and crevices is essential in preventing the buildup of wet insulation in the attic. Any exterior wood sheathing that can let water in during a severe downpour should be sealed. Yet, even if most of the insulation has been treated with a mildewcide, mold can still form in a few spots once the moisture stops.
Insulation will be protected from further damage if holes in the roof or other sources of water intrusion are repaired. Get professional assistance in locating and repairing roof leaks. The presence of mold and mildew in damp insulation poses a serious health danger. If you find wet insulation in your attic, you need to find out what's causing it and fix it immediately.
Water damaged insulation presents a serious problem. In order to avoid further complications, it is recommended that you act swiftly to fix the situation. If your home's insulation has been compromised, you may be more at risk of being exposed to mold, mildew, and other toxins. Are you considering hiring Constructions Melbourne for high-quality carpentry services? It's unnecessary to continue your search. With Hitch Property, you'll be in excellent hands.
What Should Be Done About a Currently Damp Attic?
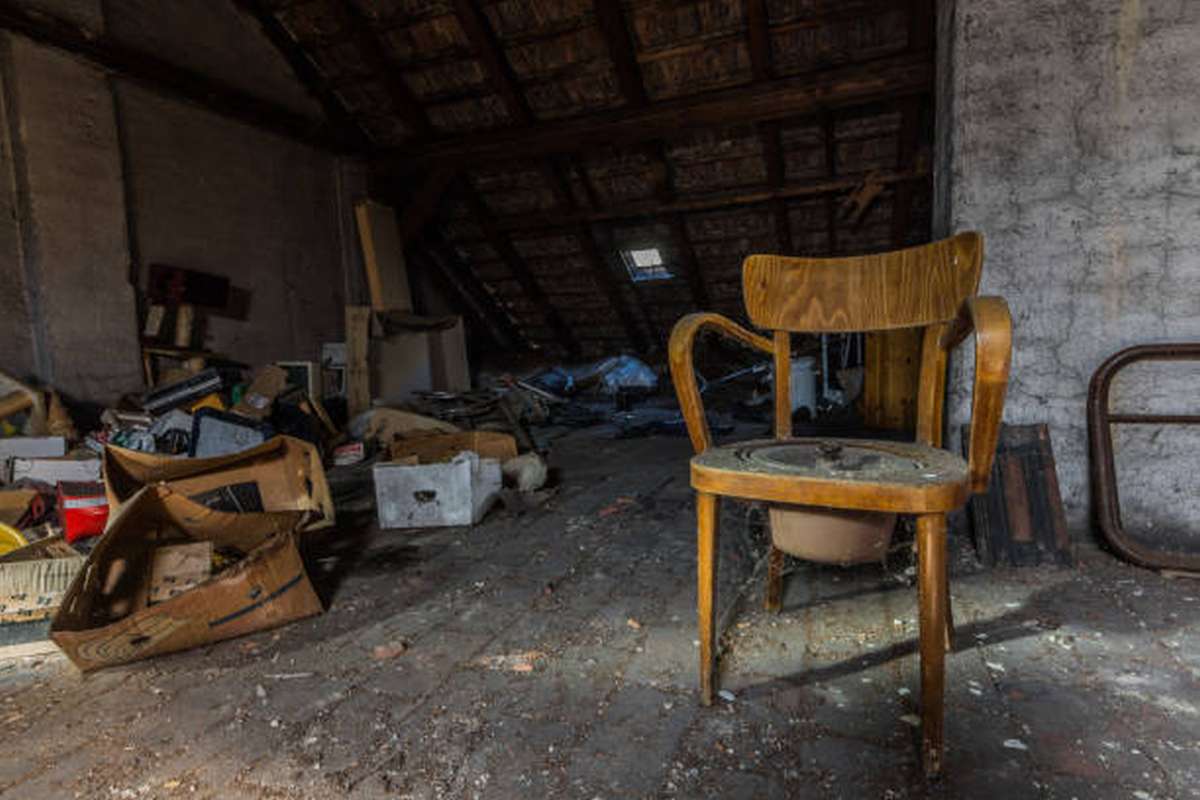
Several telltale symptoms point to the existence of water in the attic. Over time, prolonged contact with moisture will cause the roof sheathing to deteriorate. When it's time to replace the roof shingles is usually the moment of epiphany for the vast majority of homeowners. If leaks in the ceiling only occur in the spring, it's probable that ice collected on the sheathing over the winter and then melted all at once as the weather warmed up.
Water stains or mold growth on sheathing, rafters, or trusses might be spotted during an attic inspection. The insulation could be crushed or discolored by ice or water. Certainly, this is a possibility. Musty odors from the attic can permeate the home under certain weather conditions, especially during the warmer months of the year.
Increasing attic ventilation is a common fix for this problem. Not the right approach at all. In certain cases, the condition will get much worse if additional air is allowed to circulate through the attic. The best way to fix a problem with a damp attic is to seal off any vents or leaks leading outside. After this is done, the attic's natural ventilation should be more than enough to keep it dry.
Any air leaks in a heated home should be sealed off just like a chimney. A home, like a chimney, is an enclosed space that traps warm air inside while being surrounded by chilly air. Both tend to take in air at their bottoms and then let it out at their tops. During the colder months, a house's heating system will work tirelessly to push air through the attic ceiling. If you want to save money on your monthly energy costs and prolong the life of your attic, sealing up the air leaks is a must.
It is common for air to escape through cracks and other penetrations. Due to strict safety rules, many varieties of pot lights cannot be installed in the sealed ceilings of upper stories. The air in the house is vented to the attic through vents. Avoid using exposed bulbs or non-sealed pot lights on the third story.
Venting the exhaust from exhaust fans in the bathroom to the outdoors is mandatory. Make sure there's enough air flow by checking the vents. Ducts put in the attic should be made of firm metal rather than flexible ducting, and both should be insulated and slanted away from the building's exterior. In order to avoid condensation, don't wrap the insulation with plastic. Tapping or sealing the duct joints with mastic is an excellent method of preventing leakage.
It is usual for air to depart a building through vents like chimneys and plumbing stacks. It's important to close off the opening where these enter the attic. With older masonry chimneys or metal chimneys put inside a chase, you may need a professional's help to ensure proper sealing and the avoidance of any fire dangers. Backfill any voids left by the installation of the electrical line and cables.
Unbroken plaster or drywall ceilings don't allow much in the way of air flow or leaking. Several air leaks can occur at the ceiling's intersection with studs or load-bearing walls, as well as at the roof's exterior walls and the attic's or upper floor's ceiling.
Any breaks should be looked into, and if necessary, repaired. Try to find an alternative route. They're the main thoroughfares for air to get from the basement to the attic, actually. In most cases, a direct entrance to the attic will be hidden by reduced ceilings in the room below. Air flow issues may arise in the attic space of row houses due to the party walls being constructed of concrete block.
There are a few various methods one can look for these massive, unanticipated holes in the system. The blower door tester uses a powerful fan to artificially inflate the pressure inside a building, making any air leaks more noticeable. Perhaps it would be wise to investigate the attic at night for signs of light from below.
Even though such straining appears to occur less frequently with blown insulation, it is nevertheless a good idea to inspect batt insulation for filthy patches that may have been filtering air from below. Occasionally the gaps are big enough to peer down into the dwelling below.
Sometimes, HVAC (air conditioning) or heating (heat) ducting and/or equipment can be found in a home's attic. They are the most common causes of air heat loss and leakage in the attic. Information about how to seal and insulate these various devices can be found in Home Energy Magazine, which can be found in some library locations.
If you want to conduct a thorough job, you'll need to remove the floorboards covering the joists in the attic so you can inspect the ceiling below. This should be done across the whole attic, with the exception of areas directly under the ceilings of large rooms that are already finished.
Whilst it would appear that it will take longer, cleaning the average attic shouldn't take more than a day with just two people on staff. Do not forget to use high-quality dust masks. This task is best accomplished in the fall, when the attic temperature is more tolerable. While it's possible to get good results by focusing only on the obvious breaks in the insulation rather than removing it entirely, doing so raises the risk that important pathways for air leakage may be overlooked.
While you're up there, you might as well add some more insulation. Make sure you have at least 400 mm (12 in.) of loose insulation or batts installed. As insulating materials go, cellulose, rock wool, and fiberglass are largely interchangeable, with only minor differences. All of these solutions work best in enclosed spaces like attics.
Where Is The Water Main Leak Located?
There are several prime spots to check for water main breaks in a home. Leaks and breaks in the system often occur at the joints between pipes, such as around plumbing stacks or plumbing walls. Water main vulnerabilities can also be created at the point where an open attic slopes down from a cathedral ceiling. Search for any light fixtures in the lower ceiling, any balloon frame walls, and any chimneys that reach into the attic.
A water main break might also happen above any ventilation or heating ducts that have been cut into the ceiling. Leaks and cracks can also originate at the points where an extension meets an existing part of the house or the boundary structures. It is also important to carefully inspect the electric wiring, partition walls, and party walls. Moreover, water main breaks can occur in the juncture of two floors, in the area above a rounded corner or staircase, and above a pocket door. By inspecting these sites, both amateurs and experts can find and fix water main problems before they become costly disasters.
Cooling and Ventilating the Roof
The attic shouldn't need any more ventilation if you've done a good job of sealing it. You need to do a better job of sealing the attic if you haven't already. The importance of attic ventilation is overstated. In the winter, when exterior air temperatures are low, they are unable to absorb or transfer much moisture from the attic. A roof's color and how much sun it gets during the summer months are more significant than the attic's ventilation system.
There is no discernible difference in the relative humidity or temperature between an unvented and a code-compliantly ventilated attic, according to recent studies. According to simulated attic conditions, even though humid coastal environments have less ventilation than inland regions, attics may be drier.
The building codes usually specify that the attic must have enough ventilation. It's possible that good ventilation will be the deciding element in a close situation. How well an attic ventilates is largely dependent on how windy it is. Apertures installed at the gable end, ridge, or high on the roof surface, in addition to the soffits, can guarantee adequate ventilation. The minimum required size for an attic vent is 100/300. (or one square foot of vent size for every 300 square feet of attic floor area).
You should try to disperse the air in your attic as evenly as you can. This will improve the quality of the ventilation overall. It is not necessary to worry about meeting the exact criterion of 1:300. Vents should have screening installed over them to keep pests out. Installing soffit vents requires clearing a space between the attic insulation and the roof heating system. This will improve ventilation by opening up the area. Extruded polystyrene board, which can also be used in the form of commercially available plastic or cardboard shapes, is discussed in the ice damming section.
Accumulation of Ice
An ice dam is the massive accumulation of ice that forms at the roof's eaves or in the gutters. This ice dam forms as rain or (melting snow) runs down the roof and collides with the existing ice. The water can even back up under the roof shingles and into the attic of the house.
When there is a lot of snow on the roof, ice dams are almost inevitable. If the attic is above freezing, the roof sheathing will be warmed, and the snow on the shingles will melt. The impact is countered if the attic temperature is below freezing.
If this water keeps running off the roof, it will eventually collect in the overhang.
The water temperature will be the same as the surrounding air because the roof overhang is not warmed by the attic. When the air and overhang temperatures are both below freezing, water will freeze on the roof and cause an ice dam to form.
Conclusion
Although water rarely enters an attic unless there is a leak in the roof or a pipe, dampness or harsh weather can cause an attic to become a breeding ground for mould and mildew. Reducing the likelihood of extensive repair costs requires timely action. The drying process can be sped up with the help of a number of instruments, such as desiccants and dehumidifiers, but the two most critical processes are increasing air flow and removing the water's source. It's crucial to wear protective gear including gloves, safety goggles, and a face mask while getting rid of wet insulation in the trash. Dehumidifiers and silica gel, which absorbs moisture, can be placed throughout the attic to speed up the drying process. If not addressed, excess moisture in the attic can spread throughout the rest of the home and endanger the health of the residents as well as the stability of the building itself.
Steps to fix a moisture issue in an attic are outlined in depth, including how to deal with damp or mouldy insulation, condensation on windows, and exhaust fans in the kitchen and bathroom. Caulk should be used around windows and other openings in a wall to keep water out, the attic floor should be caulked and sealed to keep moisture out, a gasket should be installed on the attic hatch or stairwell, pipe seals should be installed to block off openings around mechanical and plumbing components, exhaust grills should be installed only when necessary, and proper ventilation should be provided. Also, moist insulation may be less effective than dry insulation. As insulation gets wet, it loses about 40% of its thermal resistance qualities. Because fibreglass and cellulose insulation can take in water and mould spores, mildew and fungi growth is another common issue.
Any damage to insulation reduces its efficiency, and the creation of clumps in the attic is a telltale sign that the insulation is wet. The insulation can be replaced if it becomes wet, but you shouldn't use it if it's loose or if it's been exposed to water that could be contaminated. In the attic, damp insulation is a major problem that needs to be avoided at all costs. The insulation should be dried out using a fan or dehumidifier, damp batts should be removed, the situation should be reassessed in a few weeks, and if necessary, a new, improved insulation material should be installed. Finding the plumbing leaks, roof leaks, and dampness that are causing the problem is also crucial.
Content Summary
- If there is water in your attic, it could damage the ceiling, the insulation, and the wooden beams that support your roof.
- The two most important procedures in drying up your attic are improving air circulation and getting rid of the water's source.
- Using buckets, collect water from a leaky roof or pipe until the problem can be fixed.
- The insulation can then be taken down without risk.
- Once the attic has dried out entirely, the insulation can be replaced.
- With the help of a dehumidifier, drying time in the attic can be sped up significantly.
- To eliminate any dampness in the attic, disperse silica gel.
- Several factors might contribute to a damp attic.
- Putting in the right insulation and venting will get rid of the dampness in your attic.
- Moldy or soggy insulation is one visible sign of a moisture issue in the attic.
- The presence of mould or mustiness can be detected by smelling the air or noticing moisture on the windows.
- If there is any insulation that has become wet or mildewed, it must be replaced immediately.
- Another helpful equipment for getting rid of moisture quickly in the attic is a dehumidifier.
- Check the ceiling, walls, and floors for any cracks or holes that could allow water to enter.
- You can either repair it yourself or hire a professional to fix the roof.
- Roof repair is important in any scenario.
- The attic floor should then be caulked and sealed to prevent water damage.
- To check for damage, the insulation must be lifted off the floor.
- You'll have to run new ductwork if the current exhaust system ends in the attic.
- Insulation loses several of its useful properties once it becomes wet, such as its ability to prevent heat transmission.
- If insulation becomes wet, it might lose as much as 40 percent of its R-value.
- As an added bonus, its insulation has a high water-absorption capacity.
- Also, mould growth is a major issue.
- It's common knowledge that mould growth in one's house can be a major hassle.
- Mold can grow on the paper backing of fibreglass insulation if it gets wet.
- Chemicals used as fire retardants on cellulose insulation also serve to prevent mould growth.
- Nevertheless, cellulose has the ability to absorb water and mould spores.
- This may lead to the fungus or mould that has been growing in your attic spreading to other areas and causing rot.
- Insulation Maintenance in the Face of Moisture
- You may be considering removing and replacing damp insulation.
- Ineffective when wet, it recovers some of its strength when dried.
- Avoid using any insulation that is either loose or wet from sources of unclean water.
- Crushing insulation or contaminating it in any manner reduces its effectiveness.
- Insulation replacement will be required if this occurs.
- If you can get to it, drying out the insulation is a must.
- Finding the places where water and moisture are stored is crucial.
- Wet insulation in the attic can be avoided by caulking and sealing all the gaps and crevices in the house.
- To find the source of roof leaks and get them fixed, contact a specialist.
- Health risks from mould and mildew in wet insulation are significant.
- Immediately investigating the source of the moisture and resolving the problem is necessary if you discover damp insulation in your attic.
- Insulation that has been ruined by water is a major issue.
- It's important to take immediate action to resolve the issue so that it doesn't escalate.
- Mold, mildew, and other poisons can more easily enter your home if its insulation has been damaged.
- In the long run, the roof sheathing will rot from being constantly wet.
- Ice and water have the potential to damage the insulation by crushing it or discolouring it.
- In humid climates and during the warmer months of the year, musty scents from the attic can penetrate the rest of the house.
- One solution to this issue is to install additional ventilation in the attic.
- If you have a damp attic, sealing off any openings that lead outdoors is your best bet for a solution.
- Similar to a chimney, any openings in a heated dwelling should be sealed.
- A home's heating system will labour mightily during the winter to force air through the attic ceiling.
- Many different kinds of pot lights are not allowed to be installed in the hermetically sealed ceilings of upper levels due to stringent safety regulations.
- Vents in the ceiling carry stale air from the living space down to the attic.
- On the third level, you should not use any lights that have exposed bulbs or that are not completely enclosed.
- Check the vents to make sure there is adequate ventilation.
- Chimneys and piping stacks are common exit points for a building's air.
- Sealing off the access point where they enter the attic is a must.
- Several air leaks can develop at the junction of the roof's outer walls and the attic's or upper floor's ceiling, as well as at the confluence of the ceiling with studs or load-bearing walls.
- Find a different way to get there if you can.
- They serve as the primary routes for air to travel between the basement and the attic.
- Most attic access points are concealed by lowered ceilings in the room below.
- The ductwork and/or equipment for a home's heating and/or air conditioning system may be located in the attic.
- These are the leading culprits in attic air leakage and heat loss.
- While it's feasible to achieve desirable results without completely removing the insulation, doing so increases the likelihood that critical air leakage routes will be missed in favour of the more evident ones.
- Look for recessed can lights in the basement, balloon framing on the upper floors, and vents leading to the attic.
- Any holes created in the ceiling for air or heat ducts increase the risk of a water main break in that area.
- The region above a rounded corner, a staircase, or a pocket door is also a high risk for a water main break.
- Roof Ventilation and Air Conditioning
- If you have successfully sealed the attic, more ventilation is not necessary.
- If you haven't already, you should put in further effort to seal the attic.
- Attic ventilation has been given too much attention and is not as important as it really is.
- Roof colour and summer solar exposure are more important than soffit and gable vents when it comes to attic ventilation.
- Regular attic ventilation is required by most building codes.
- In a nail-biting scenario, proper ventilation could prove decisive.
- Attic vents must be at least 100/300 in size.
- It's important to adequately distribute the air in your attic.
- In the end, this will lead to better ventilation.
- Soffit vents must be installed, which necessitates removing some attic insulation and maybe a portion of the roof's heating system.
- By making the space more open, ventilation will be enhanced.
- In the ice damming section, we talk about using extruded polystyrene board, which is also available in the form of plastic or cardboard shapes sold commercially.
- Condensation of Ice
- The huge buildup of ice at the eaves or in the gutters of a roof is known as an ice dam.
- There's a risk that water will seep beneath the shingles and into the attic if the drain is clogged.
- Large amounts of snow on a roof almost always result in the formation of ice dams.
- Water on the roof will freeze when the air temperature and the overhang temperature are both below freezing, creating an ice dam.
Frequently Asked Questions About Attic Leak
The bare minimum is two weeks, but it could take as long as four weeks in rare cases. Make sure that the source of the leak is addressed so that you can be certain that the issue is being resolved and not that you are simply spinning your wheels. After all, things are not going to get dry if there is still going to be rain!
The moist insulation that is contained within the wall cavities can only be dried out by opening up the wall. After that, you will need to use specialised drying equipment in order to inject dry air straight into the cavities of the wall. It is important to keep in mind that the wooden structure that surrounds the wet insulation will also become wet if the insulation becomes wet.
When it becomes wet, it loses some of its potency, but as it dries out, it can regain some of that potency. You need to be on the lookout for any insulation that is loose and has been exposed to unclean water. When insulation becomes wet, the fibres in it will bind together and form clumps, which may be seen in the attic. The efficiency of your insulation will decrease if it is either crushed or contaminated in any way.
If the insulation became wet from water that contained any contaminants, such as flood water or sewage, then the affected insulation and the wallboard are likely ruined, and both materials need to be removed as soon as possible. If the insulation became wet from water that contained any contaminates, such as flood water or sewage, then the insulation became wet from water that contained any contaminants.
Keeping Insulation Dry. When fiberglass insulation gets wet, water droplets displace the air in the spaces between the fine glass fibers which greatly reduces the material's thermal and acoustic insulating abilities.