Many older homes may still have walls and ceilings made of plaster instead of the more commonplace drywall or wallboard, and lath.
Plaster walls and ceilings are easily repaired if damaged by holes or cracks. Yet, it may need more effort and expertise than just repairing a hole with drywall. If you want to know what to do, read on.
What Exactly Is Plaster?
Plaster used for interior walls and ceilings is a versatile and nearly magical construction material if applied with care and expertise.
Ancient plaster was made by combining dry ingredients like sand, lime, and bovine hair (or straw, or dung) with water in order to produce a wet, flexible medium that cures & hardens because it dries.
Approximately 150 years ago, gypsum was added to a conventional sand and lime formula to speed up the plaster's curing period and improve its workability.
Repairing Loose Or Cracked Plaster
Plaster repairs are typically more efficient, less costly, and less time-consuming than removing the damaged surface, installing new drywall, and installing new baseboards.
A crack cannot be repaired by merely filling it with joint compound; the space eventually widens again. The trick is to restore the lath-and-plaster connection that has broken down.
Metal plaster washers have been used for this purpose for many years by both amateurs and professionals. With drywall screws, these are attached to the lath in order to draw the plaster tight.
Nevertheless, the washers & tape stick out of the plaster and must be covered with tape layer, and applying joint compound takes some practise and ability.
Plaster Wall Repair Procedures
- Cover the repair area's floors and walls with plastic drop cloths, and secure them using painter's tape.
- Bore holes in the plaster, but not the wooden lath, with a 3/16-inch diamond masonry drill. Drill holes around the damaged section of wall at regular intervals (approximately every 3 inches).
- Use a wet/dry vacuum to remove the dust from the crannies.
- Fill each opening with liquid conditioner and wipe away any excess with a sponge.
- Use a utility knife to cut off the tip of the glue tube. Then, push the trigger of the caulking gun to release adhesive into each of the holes.
- As soon as you've squeezed glue into to the pits, you may use a drill or screwdriver to screw one plaster ring in as many hole as you need to snug the plaster up against the lath.
- After the glue has dried, you can drill out the screws & plastic rings. Using a putty knife, remove the calls from of the wall if necessary.
- Using the 6-inch putty knife, scrape off any excess adhesive.
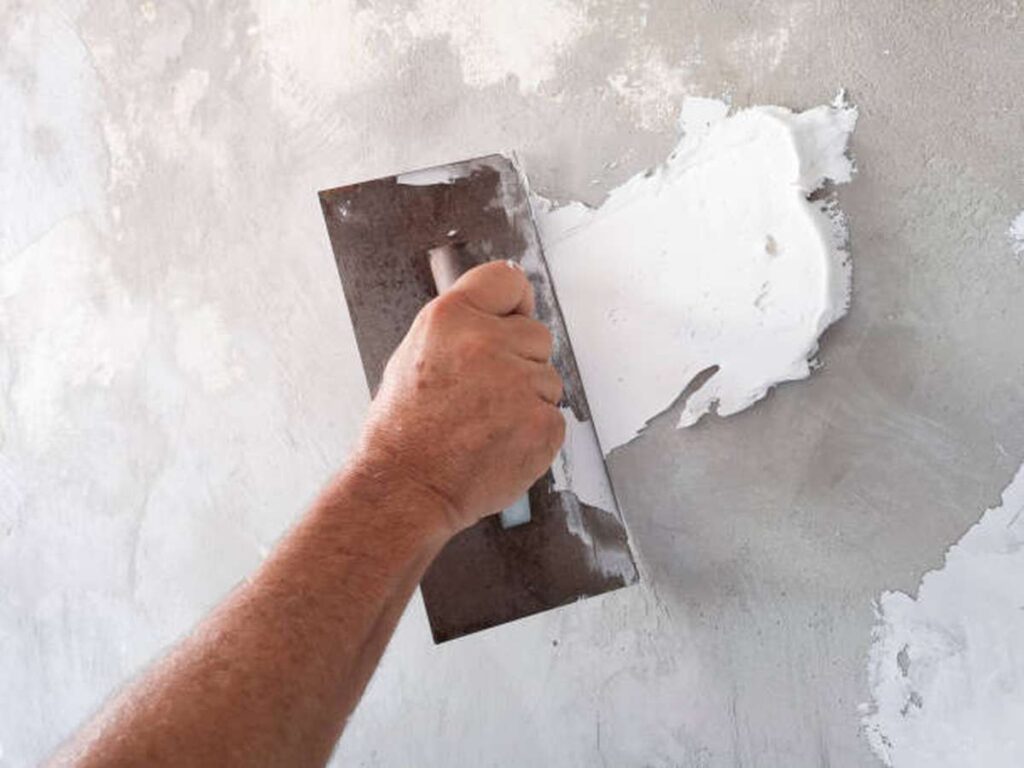
- Using the putty knife, put on a light coat of epoxy to the wall.
- Dry the compound mixture overnight, then lightly sand it with 120-grit sandpaper before applying a second, lighter compound coat.
- Apply primer and paint on the wall.
What Exactly Is A Three-Coat Plaster System?
Attaching lath, which can be thin wood slat or metal mesh, to the wall studs serves as the foundation for the classic multi-coat plaster method.
To the lath go on 3 coats of wet plaster: the scratch coating, a brown jacket, and also the finish coat.
Scratch Coats
Rapid application of the scratch coat is achieved. Then, the plasterer will force the thick mixture through the lath's openings to create "keys" that will harden and lock new skin in place after the mixture has cured. After the scratch coat has dried, the top surface is scored so that the second, brown coat may adhere properly.
Brown Coat
The brown coat is applied after the plasterer has finished smoothing out the wall and making sure the corners are square and plumb.
The Coat Of Finish
The final layer, which can be smooth or textured, is applied after the brown coat is dried. The finished product is a handcrafted wall surface of excellent quality that provides unexpectedly effective insulation and soundproofing.
Troweled smooth after three coats of plaster have been placed on either wood or metal lath, this is the subject of this article.
Moldings, on the other hand, are "run in place," with the profile made by pressing a template on wet plaster.
In order to create ornaments such as ceiling medallions, a mould must be made. Later on, it becomes possible to re-create earlier efforts, but that's a different tale.
What Exactly Is Drywall?
Drywall is a homogeneous panels of gypsum plaster placed between thick paper sheets, and it goes by many other names.
Although it's not as old than plaster, drywall does have a surprising amount of history, with its earliest variants appearing in the late nineteenth century.
Drywall, available in standard 4' by 8' sheets and thicknesses ranging from 14" to 58", is more simpler to install than plaster across huge areas. To attach it to studs, you can either nail or screw it.
Drywall can be painted or wallpapered after the seams have been taped & coated with joint compound.
Drywall is available in a wide range of types, including fire-, moisture-, and mold-resistant variants, as well as rock that may be used as a tile installation substrate.
This simplifies the process of installing drywall with the appropriate properties in regions prone to moisture or mould growth.
If the original plaster in your bathroom has been destroyed by water or time, green board is an ideal replacement.
Plastering Issues
Repair Of Cracks
Settlement of the foundation, insufficient joist size, changes in humidity and temperature, and shoddy repairs are all potential causes of cracks.
Cracks can be as fine as a hair or as broad as an entire finger. They may be installed inside a straight line along the wall surface or in a diagonal pattern to follow structural components.
Repairing holes in walls is an intermediate skill between plastering & drywall finishing. That is to say, a motivated beginner can undertake basic repairs and, with experience, move on to more complex tasks.
Cracks In The hairline
A hairline fracture that has been there for some time and isn't moving requires only the removal of the loose fragments and the application of one or two coats of joint or wood putty solution (or use an elastomeric product like Krack Kote).
After each coat has dried, sand it lightly before adding a new one. Use fine sandpaper on such a sanding block to smooth out the patch.
Larger Cracks
The tape and "float" method should be used for larger cracks or for repairing cracks when other methods have failed.
When repairing a fracture in plaster, it's important to first make sure the plaster isn't shifting. Next, you should observe if the damage is more prominent on one side than the other in terms of relief.
Map Cracking Or Deep Cracks
Sheets with adhesive-backed fibreglass meshes with an elastomer coating, such as Nu-Wal, should be applied to the walls in accordance with the manufacturer's recommendations if you have to deal with a widespread network of cracks or fissures in different patterns known as map cracking.
That once product is installed, additional steps like as tape and filling may be required.
Variable Cracks
A utility knife or crack opener is a small hand tool that can be used to excavate the gap just on high or loose side of a crack when the plaster shifts or when one side of crack appears visibly higher is relief than the other. Take away just enough to get to a usable layer of plaster.
Remember that plaster will continue to shift as time passes. Joint compound makes it easy to patch up any crack, but if the region around the repair isn't solid and well-insulated from adjacent weak spots, the crack will eventually reappear.
When filling up a crack, expert plasterers advise reinforcing the loose or elevated side with plaster screws, wafer-thin pierced disc (see below) which refasten plaster to a lath, and drywall screws.
To begin, drill a few tiny pilot holes at a distance of at least two inches on either side of the split. Use 2-inch screws to secure the washers.
Even when the screw is hammered in and the washers are flattened, they will still protrude slightly from the wall.
If you feather out the repair just few inches beyond than usual, you can get a practically unnoticeable patch in most cases.
Two Crack Repair Techniques
After the wall has been anchored, there are two options for repairing the crack. This list includes:
The Inverted V Technique
It is best to use a vacuum to remove any remaining debris after digging out the fracture in a V shape along its length.
The patch should be able to gain traction thanks to this. Then, if the crack is still intact, fill it and tape it just like you would a drywall seam.
Before applying the patch, moisten the lath and plaster around the cleaned crack (the old, dry materials tend to suck the moisture out of the new application before it can fully cure).
Then, apply a couple of coats of stiffly mixed epoxy to the crack to fill it in and bring the surface back to its original level.
Make sure the fresh plaster is securely attached to a lath by squeezing it through the slats. A successful repair depends on this.
Use two thin applications of joint compound and sand between coats to "float" out the crack.
Apply a final coat of joint compound like Easy Sand and do some touch-up sanding to complete.
The Bonding Procedure
Plaster bonding agent (PVA) should be applied to the frayed ends of the crack and the exposed lath before the crack is taped.
Instead of randomly wetting the old carpet padding and plaster to provide a good bond, this bonding agent to act as just an emulsifier to ensure a strong binding between the new and old plaster. Afterwards, finish the procedure up top. After each coat of plaster has dried, sand it down.
How To Repair Plaster Cracks
Prepare The Space
Put down plastic drop cloth and secure everything with painter's tape before you begin.
By placing drop cloths on the floor, you may prevent plaster or joint cement from getting on it and reduce the amount of dust you have to vacuum up afterwards.
If you don't want sanding dust to go into your HVAC system, seal off the space with plastic and painter's tape.
Practical Advice
You can get rid of the dust created by sanding with the help of a shop vacuum.
Patch And Smooth
Using the putty knife, smooth the area surrounding the crack and remove any loose plaster or rough edges.
The dust and dirt can be easily removed with a damp cloth. Then, use a spray bottle to lightly wet the area.
Mix dry plaster using water in a big bucket as directed by the manufacturer. And then transfer the application from of the bucket to the mud pan.
With a 4" wallboard knife, apply a coat of plaster to a crack until it is flush with the surrounding wall. Plaster restorations typically require only a single coat. Let it a full day to dry out.
Safety Warning!
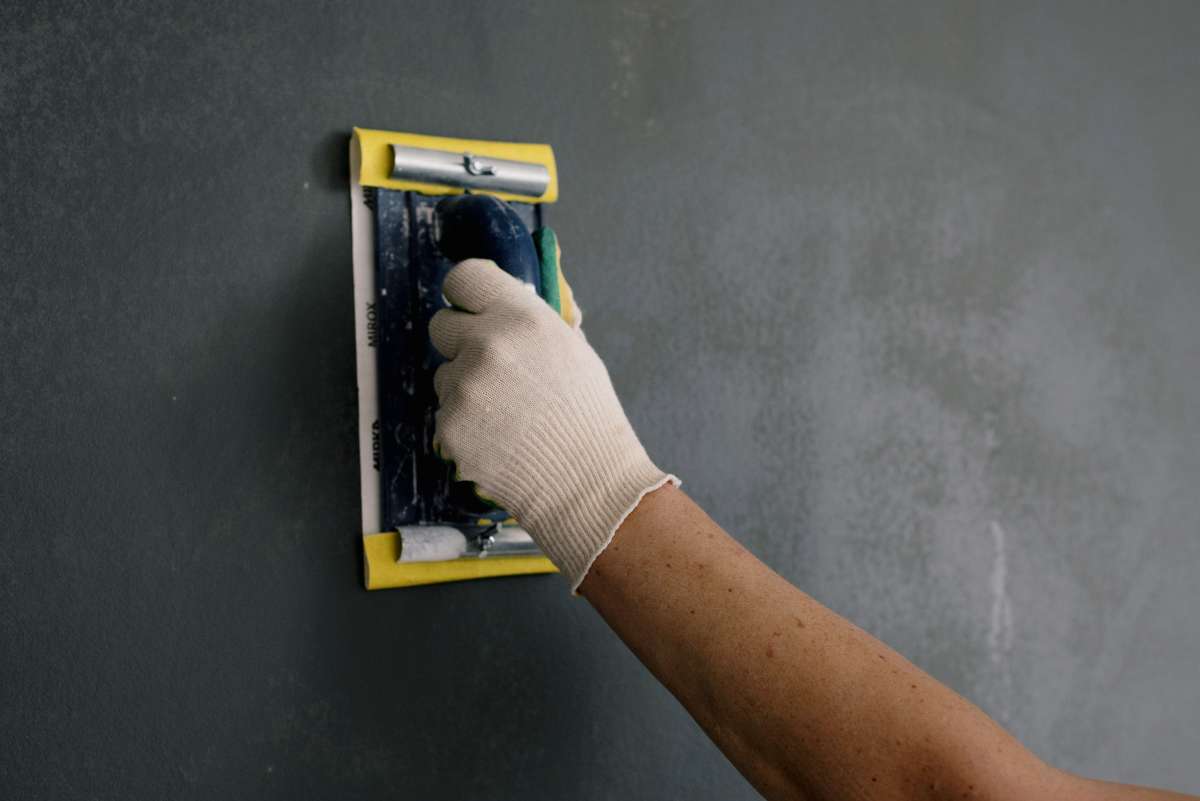
When plastering, it's important to protect your eyes and skin by donning safety goggles, a long-sleeved shirt, & cotton work gloves. Sanding respirators should be worn when breaking up dried plaster or combining to protect against inhalation.
Practical Advice
Fixing leaks or other sources of water in the wall or room many weeks before plastering is recommended.
Plastering is best done when the temperature is between 55 and 70 degrees. In order to plaster the walls successfully, it is recommended that they be kept at this temperature for a minimum of 24 hours beforehand. Maintaining this temperature is essential for the success of the plastering process and for the plaster to set properly.
Cracks can also be repaired using spackles or joint compound. Spackle is useful for filling even the tiniest of crevices.
Use a 2" putty knife to apply little amounts till the crack is filled. To dry the spackle, wait the time recommended by the manufacturer. Put it through the sander. Joint compound is useful for filling in bigger cracks.
Start by covering the whole length of the crack with a piece of self-adhesive fibreglass baseboard trim tape. This will aid in preventing further damage. The tape is then completely coated with joint compound using a 4" wallboard knife.
For a seamless look with the surrounding wall, feather out your coverage by about 3 inches on all sides of the taped area. After it dries, use fine-grit sandpaper to smooth any rough spots.
A coat of epoxy should be applied, and this time the joint compound should be feathered out 6" to 12" from the repaired region. It needs more time to dry before you continue.
Safety Warning!
If you need to sand a big repair area, make sure to protect your eyes and lungs with safety glasses and a face shield or respirator.
Sanding, Priming, And Painting
Sand the repaired area with fine-grit sandpaper until it is smooth. Remove dirt and grime by rubbing them with a moist cloth.
Use a damp sponge to clean the area, then paint it with True Value & wait for it to dry before proceeding with the paint base coat.
Tips For Patching Damaged Plaster
Take Out Any Damaged Plaster.
Chipping it off the wall with a cold chisel or a ball peen hammer should get rid of the damaged plaster.
If you chip too harshly, you could end up breaking the lath, revealing the wood behind the plaster. Fill up any rough spots around the hole using a utility knife.
Apply The Latex Adhesive
Applying a latex base coat to a strip and visible application with a paintbrush might help prevent the dried plaster and lath from absorbing too much moisture.
If you need help finding the proper binder for the plaster, stop into your neighbourhood True Value.
Plastering And Cross-scratching
A 10" wallboard knife should be used to patch the hole with plaster. Once the first layer begins to dry, cross-scratch it to help paint second coat adhere. Scratching or scoring the first layer with a putty knife or other bladed tool helps the second coat adhere more strongly by creating shallow lines (either vertically or horizontally).
The Second Layer Is Applied
Once the first application has dried for 24 hours, spray the surface down with water using a spray bottle. Apply a layer of plaster that is 3/8 inches thick over the repair and cross scratch it in the same manner as before. This second coat also needs 24 hours to dry.
Apply A Joint Compound Layer
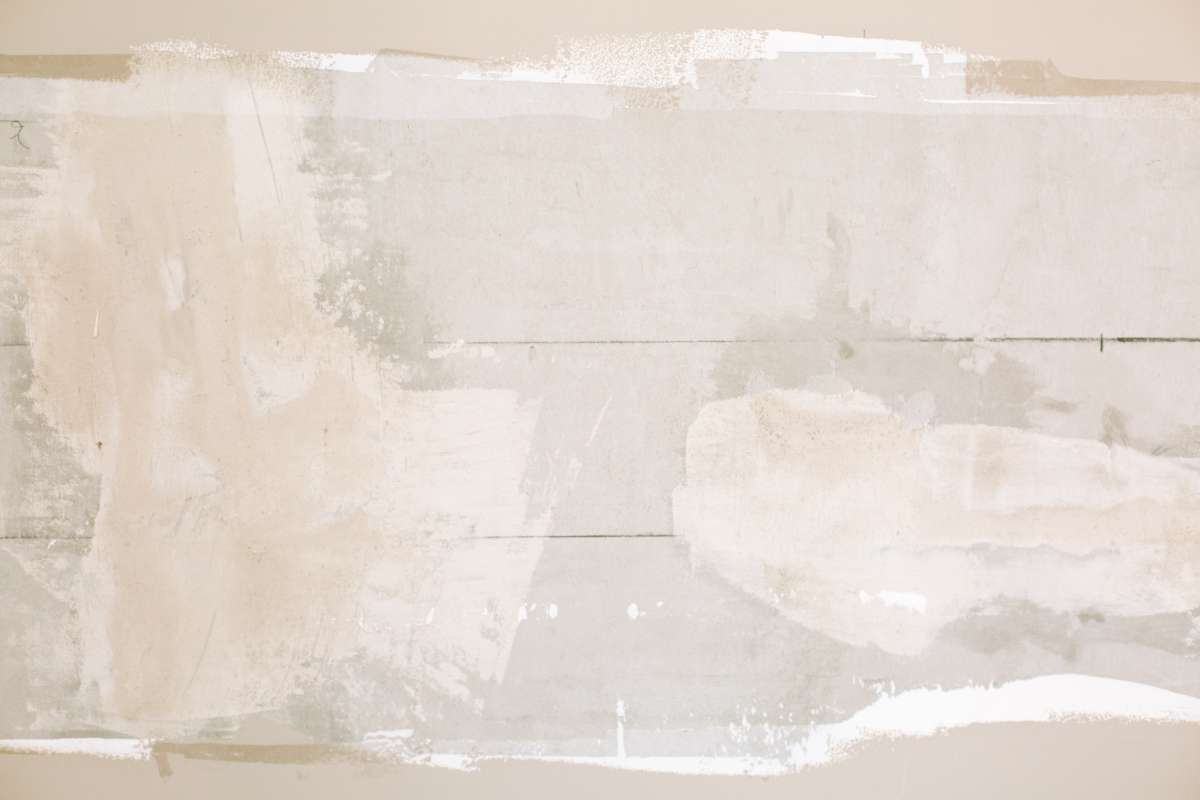
When the second coat of drywall compound has dried, apply additional joint compound using a 10-inch wallboard knife. Feather coverage, similar to that used to conceal a wall fracture, extends about 3 inches beyond the repair area to make it look like it was always part of the wall.
To make it smooth, wait for it to dry, and afterwards sand it with a fine-grit paper. After that, add another coat or joint compound then feather it out 6" to 12" from the mended area so it blends in even more. This final coat needs to be painted on thinly so that it blends in with the wall, and given a full day to cure. Once the area is dry, you may sand it down to a smooth finish with fine-grit sandpaper and a damp sponge. Prime and paint can be done now.
How To Mend A Lath
You may have to fix the wood lath that lies behind the damaged area. To do so, please refer to the instructions below.
Fill The Hole With Metal Lath.
If the lath is damaged behind the hole, remove it by cutting it out using a keyhole or saw similar instrument, or by chiselling it out and tapping it out with a mallet.
Put a wire loop in the middle of a strip of metallic lath, which resembles a hefty screen.
Pull the wire until the metal lath is placed firmly against the interior of the hole, then push it metal lath into to the hole while holding the wire firmly.
Plaster The Lath After Applying
Make sure the wooden dowel is firmly pressed against the wall and twist a metal wire around it. Apply a coat if plaster until it completely fills the hole, then cross-scratch it once it begins to set.
Make Joint Compound Available
Take out the wooden rod and use wire cutters to sever the wire after the area is dry. Spread a small amount of epoxy and wait 24 hours for it to dry. After sanding the surface and wiping it down using a wet sponge, the area is ready for painting or wallpapering.
FAQS About Plaster Walls
- Start the project by cleaning up the crack with the utility knife.
- Using the putty knife, apply a thin coat of joint compound to the crack.
- Apply mesh tape over the fresh compound.
- Immediately apply a second coat of compound over the top of the mesh tape.
Plaster can be easily painted with the same techniques as drywall. Even with a good coat of primer, plaster walls are notoriously thirsty for paint. Using a roller for open spaces and brushes around trim and borders, spread an even coat of your choice of paint. Don't try to completely cover the wall in one go.
Unless the house is very early or historically significant, a premixed joint compound like Murco Mud works fine. If there are multiple cracks or areas to patch, use a dry joint compound that can be mixed to a desired consistency, such as Durabond, available at most builder's supply stores and online.
- Remove Jagged Plaster Edges.
- Vacuum the Dust and Dirt.
- Apply Spackle to Small Cracks.
- Seal Large Holes.
- Sand to Smooth.
- Prime, Paint, and Let Dry.
Skim Coating
This is one of the best ways of getting a smooth plastered wall. Skim coating involves applying a thin coat of plaster over the existing plastered surface. The process begins with the application of a PVA bonding to stabilize the surface and prepare it for the skim coat.