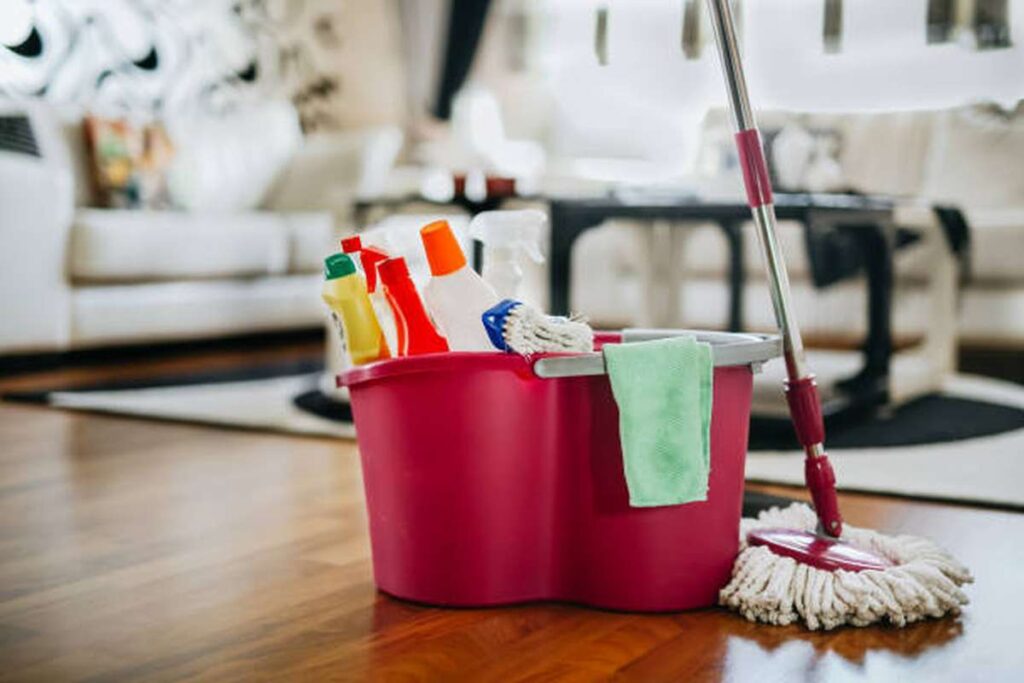
Vinyl flooring is durable enough to withstand heavy foot traffic, but it still need regular maintenance to look its best. Follow these steps to properly clean your vinyl flooring.
Among the many options for flooring in these rooms, vinyl is consistently voted the favourite. The question is, why is this happening?
Because it may be used in a variety of ways and is simple to maintain. Vinyl, besides being stain- and water-proof, is available in a wide range of styles, hues, and designs. Vinyl is more durable and scratch-proof than laminate, although the two materials are often confused with one another.
You are fortunate if your flooring is made of vinyl. There are a variety of floor maintenance methods available. Rather than using harmful chemicals, you can utilise things like vinegar that are already in your kitchen.
What Is Vinyl Flooring?
A resilient flooring material, vinyl is a composite of polyvinyl chloride (PVC) and other chemicals. By combining these, a wide range of patterns and hues can be achieved. They can be purchased as individual floor tiles or as sheets that are adhered to the subfloor using a specialised adhesive or mastic.
Vinyl flooring was developed as an alternative to rubber since it lasts longer and doesn't degrade when exposed to oxygen or alkaline dampness.
Vinyl flooring is popular in business spaces due to its durability and low maintenance requirements. It's available at a wide range of prices, so even shoppers on a tight budget have options.
Advantages Of Vinyl Flooring
Durable
Vinyl flooring is commonly used in commercial settings because it can withstand heavy foot activity for longer than other flooring options. Vinyl flooring, if properly cared for, has a potential lifespan of 20 years. A 15-year warranty is offered by some manufacturers.
It can withstand spills and moisture without being destroyed, unlike more vulnerable flooring options like laminate. Vinyl's resistance to water also makes it simple to clean; you won't need to rush to dry it immediately.
Simple to maintain
Vinyl flooring is extremely long lasting and simple to maintain. In contrast to, say, hardwood, it requires neither resealing nor waxing, so it's quite low-maintenance.
A mechanical sandpaper and chemical strippers are all you need to give your vinyl floor a thorough cleaning or undertake a complete renovation.
Affordable
Since vinyl flooring is manufactured at low cost, its end product can also be purchased at a low price.
Both the styles and the costs of products can vary widely between makers. The price is still high compared to other materials, but it's lower than that of hardwood and stone.
Vinyl flooring is simple to install and inexpensive. Because you won't have to hire an expert, this can help you save even more money.
Vinyl flooring is a great investment because it lasts a long time and looks great. It's a one-time expenditure that will yield returns through proper upkeep.
Styles Can Vary
Many homeowners choose vinyl because it comes in so many different colours and designs. Vinyl flooring, both tiles and sheets, can be made to seem like different materials, including wood, stone, concrete, and even terrazzo.
Some can be difficult to tell apart from the real without taking a close look at the sheeting or tiles. The variety of colours makes it simple to give your home a look that is uniquely yours.
Vinyl is a great alternative to marble for the master bathroom if you don't like the idea of having a porous surface there. It's a fun and creative method to show off your personal sense of style.
Faster Setup Time
Putting in new flooring is a huge project, and the time it takes usually necessitates staying in a hotel or with family for a week.
Vinyl, on the other hand, is easy to install since it can be affixed straight to an existing floor covering. This includes linoleum and older vinyl. Thus, you won't have to waste time tearing up the old floor.
Vinyl's ease of installation has made it a favourite among do-it-yourselfers; some have reported finishing the task in under 10 minutes.
Flooring That Is Very Soft
Standing and walking on hard floors like tiles and sandstone can be irritating to the feet and legs. Consider how frigid it can be in there during the winter. Vinyl flooring, however, is comfortable to stand on and walk on since it is made of a flexible PVC.
However, the vinyl isn't completely rigid since a thin layer of thought or foam is laid on beforehand. The longevity of the floor is increased by this additional protective layer.
How To Clean Vinyl Floors
If you need a low-cost flooring choice that is also long-lasting, consider vinyl. Discover the best methods for maintaining a vinyl floor and preventing damage.
Get a doormat.
Keeping your vinyl floors clean should be your key factor when it comes to cleaning them. Your vinyl flooring will thank you for using a doormat to keep out the dirt and chemicals that can damage it. More time spent sweeping up dirt that has been tracked in. Grit can be used to sand down your floor, just like sandpaper would. The chemicals in asphalt can seep into the floor and make it yellow, and they can also adhere to your shoes.
Repetition of sweeping is encouraged.
Sheet vinyl, like any other flooring material, may be kept in good condition with regular cleaning.
Vinyl will only last longer if you remove dirt before it is ground in.
It's a good idea to make it a habit, after putting the dishes in the dishwasher for the night, to quickly sweep the kitchen floor with a soft brush.
Remove hair spray with a shampoo
Vinyl flooring may be cleaned effectively using shampoo. If there is a buildup of hairspray on your vinyl floor, simply wash it off with a floor shampoo.
In other words, your hair will benefit from it. With a quart of hot water, add a few drops of shampoo. Use a wet mop to clean the floor, and then throw it in the washing machine.
Find out how to clean with minimal disturbance
Don't be tempted to use harsh chemicals to "blast away" grime. Instead, you should study the gentlest way for cleaning vinyl flooring.
Every night before bed, sweep or vacuum the area and immediately clean up any spillage. If there is filth that your broom or vacuum can't remove, use a mop wet with warm water, not hot water. If you've exhausted all other options, you can try using soap, but be sure to use soap that is made specifically for your flooring.
Cleanse properly.
What follows is a rundown on how to wax-free vinyl floor cleaning: Clean them in accordance with the manufacturer's instructions using a product designed for use on floors that require no wax.
Detergent and warm water can be used to clean older vinyl that has to be waxed. To remove the grime, wet a mop or sponges with the solution and gently scrub the floor.
If you rub off the wax, you'll need to reapply it.
No matter how what label on the soap says regarding the necessity of washing, always rinse with pure, cool water to avoid leaving a soap deposit on the floor. Keep an eye out for these additional poor cleaning habits that contribute to a dirtier home.
Water damage to vinyl is inevitable.
It's vital that you keep in mind that water isn't always the ideal choice for cleaning vinyl flooring. If you mop with too much water, it will seep into the joints and fray the surface.
Once that is, it can break away the vinyl's glue bond, leading to loose sections or curled edges.
Be sure to give it a good rinse to get rid of the soap.
While soap can effectively remove grime from vinyl floors, soap scum forms a film that attracts dirt and dust.
Keep using water to moisten mop until the floor requires more intensive cleaning. For optimal results while mopping the floor, a two-mop system is recommended: one for cleaning and one for rinsing.
Tend to the lustre
In this context, "no wax" indicates "don't wax." No-wax vinyl is coated with a transparent polyurethane that brings out its lustre and prevents it from needing to be waxed. When wax doesn't bond well with the coating, you'll end up with a mess that requires stripping.
To revive the lustre of your no-wax floor once it has dulled, use a polish of sealant designed for such surfaces. After cleaning the floor well, apply one or thin coats as indicated.
Floors should stay shiny for at least 18 months with just regular damp mopping. Wax when the floor loses its sheen whether you have an aged floor that has to be waxed, but don't use more than what's recommended on the wax container.
Put "feet" on your heavy furniture and appliances.
Vinyl flooring might get dents from the force of heavy furniture that are permanently placed in your kitchen. To avoid these dings, you could use the floor protectors that can be found in most hardware and home improvement stores.
Getting rid of the casters
Tiles are also vulnerable to this. To prevent damage to your vinyl flooring, replace the chair feet with felt pads.
Make a plywood ramp to carry large appliances and furniture.
The majority of the time, rather than lifting heavy devices, we drag or move them out across floor while making a replacement or relocation. This might cause damage to your vinyl flooring, though.
Push or "walk" the appliances out towards the plywood covering to protect the vinyl flooring. In the next section, you'll find eight tips that will make cleaning hardwood floors a breeze.
Best Tools For Cleaning Vinyl Floors
Vinyl is so durable and impervious to moisture, chemicals, and stains that it's hard to choose the incorrect product or instrument. But that doesn't mean there aren't specialised tools and materials that work well with vinyl.
Have a look at the methods we recommend for keeping your vinyl flooring in pristine condition.
Light Cleaning
Depending on how often you host guests, light cleaning could be something you do once a day or once a week. These items are crucial for quick cleaning and should always be on hand:
Brooms:
We find that a soft broom is the most efficient on vinyl flooring.
While the surface is stain and water resistant, it can be scratched with sufficiently abrasive equipment.
Dust Mops:
Dust, filth, and hair may all be easily swept up with a dust mop. It's more convenient than a regular broom because you don't have to sweep back and forth. In its place, you should glide it along the ground.
Vacuums:
Many property owners worry that vacuuming vinyl flooring can damage them, but this is not the case.
Vacuuming, however, does require some attention to detail.
Avoiding carpet attachments like beater bars is essential. They are made to penetrate dense fibres, however they may scratch if used improperly.
Deep Cleaning
You may be conducting a more thorough cleaning once a week or once a month, depending on how often you have guests. To do this, you'll first need to sweep or vacuum the area, and then you may clean up with a mop.
Vinyl, while water-resistant, is not waterproof, so keep that in mind. This means mopping should be reserved for actual spills.
Frequent mopping can wear down the vinyl's finish and eventually cause the glue to come loose. To make matters worse, even a trickle of water might seep in through the cracks if you use too much.
Keep In Mind
Mold and mildew can form in the foam or felt if water is able to penetrate it. These are the tools we rely on to properly clean vinyl floors:
Spin Mops:
We favour using a spin mop, like the O-Cedar, to clean vinyl flooring. You can quickly moisten a spin mop by wringing it out.
Spray Mops:
A spray mop, such as the Bona Stone as well as the more advanced Bissell Spinwave, is still another viable alternative. You can use these quickly and easily by spraying the area before you sweep. By following these steps, you can save time and effort by minimising the quantity of water left behind after mopping.
Vinyl Floor Cleaner:
Spray mops can be loaded with specialised cleaning solutions, such as Bona Stone Tile and Laminate Cleaner.
Homemade Floor Cleaner:
Like doing things on your own? In addition, you can make your own power-cleaner by combining water, vinegar, and your prefered essential oil.
Pour this mixture into the mop bucket if you're using a conventional mop. For a more thorough cleaning, add a few drops of liquid soap or indeed a vinyl tile cleaner to the water.
Keep in mind that using a specialised cleaner can aid in the finish's preservation efforts. It is also important to completely clean vinyl flooring after mopping, as dish soaps could leave a film or residue.
After mopping, a fresh towel is recommended for drying the floor. This will lessen the appearance of mop or cleaner streaks caused by hard water.
Is It Safe To Steam Mop Vinyl Flooring?
Cleaning vinyl floors with a steam mop is not recommended since it can ruin the tiles and the glue that holds them together.
Chemicals are unnecessary when using a steam mop since the high heat of the steam kills microorganisms and dissolves filth.
In other words, it's a green option for cleaning your house. Vinyl flooring, however, is particularly vulnerable to the hot steam.
Warping, bending, cupping at the edges, and bubbling beneath the boards are all permanent issues that can arise from improper installation.
The broken pieces would have to be replaced if this occurred. As a result of the dangers involved, steam cleaners are rarely covered by warranties.
Preventing Dirt And Damage
The first step is to take preventative measures to lessen the effects of dirt, stains, and abrasions.
The finish of any flooring, even vinyl tile or laminate, can be damaged over time by dirt and dust, so it's important to place a high-quality doormat or white rug at each entryway.
Another useful piece of advice is to protect your vinyl flooring from scratches and rips by placing a block of wood or panelling down before you move any heavy furniture.
Vinyl coasters can also be used to protect your floors from marks made by chair and table legs.
What Not To Do
While cleaning vinyl flooring, there are a few things to keep in mind and items to stay away from:
- Do not use a "beater bar" attachment on a vacuum cleaner on vinyl floors, since this can scratch the flooring.
- Scrubbing pads and steel wool are very abrasive, and should never be used.
- Cleaning agents such as detergents, abrasive cleaners, and "mop and shine" treatments can damage the floor's finish and should be avoided.
- Avoid using any polishes that contain paste wax or solvents.
- Cleaning vinyl floors with ammonia or solutions containing ammonia can damage the flooring's durability and deteriorate the substance.
Vinyl flooring, with a little care and maintenance, can last for decades without losing its lustre.
How To Clean Scuffs And Stains
In case your vinyl flooring is looking a little grimy, we've got some suggestions for you. A paste made from baking soda and water can be used to get rid of stains caused by acidic substances such as juice, ketchup, tomato sauce, or wine.
Use a soft towel to rub the paste onto the floor until the stain comes up. The next step is to use a solution of vinegar and water to remove the baking soda.
Using rubbing alcohol to the stain and scrubbing it with a soft bristle brush will remove even the most stubborn lipstick, crayon, paint, or ink stains.
Avoid using steel wool or other abrasive brushes on the floor. Remove the nail polish using nail polish remover instead.
Vinyl Floor Maintenance Tips
Vinyl floors are not suitable for paste wax polishes. Over time, they'll deposit a layer of film on the ground.
To make your floor sparkle without breaking the bank, try this: To make the cleaning solution we recommended previously, add a few drops of baby oil.
When thinking about how to repair vinyl flooring, preventative maintenance should not be forgotten. Any floor's finish can be damaged by filth and dust, so place doormats at all entrances to keep the grime outside where it belongs.
It's important to know how to clean flooring so that it retains its beautiful appearance and lasts for many years.
Conclusion
Due to its longevity and easy upkeep, vinyl flooring is frequently used in commercial settings. Floor tiles or sheets of this material, which is a mixture of polyvinyl chloride (PVC) and other chemicals, can be purchased and installed with the help of an adhesive or mastic. Unlike more fragile flooring options like laminate, it has a 20-year lifespan and is resistant to damage from spills and dampness. Also, it's cheap because it comes at a variety of price points. For its low initial cost and lengthy service life, vinyl flooring is a wise financial choice.
Wood, stone, concrete, and even terrazzo are just some of the materials that can be imitated. It takes less than 10 minutes to set up, requires no special tools, and is quite cheap. It has a thin coating of thought or foam on the bottom, making it soft and comfortable to stand or walk on. If a property has a vinyl floor, a doormat is a must for its upkeep and protection. Cleaning vinyl floors frequently is essential for keeping them in good condition.
A doormat helps prevent ground-in dirt and pollutants from entering your home. The floor can be roughed up with grit, and frequent sweeping is recommended. Vinyl floors that don't need wax can be cleaned with a product made specifically for floors like these. Mop or sponge the floor with the cleaning solution to remove dirt and grime. If you remove the wax by rubbing, you'll have to reapply it.
In order to prevent soap residue from being left behind after cleaning vinyl flooring, it is recommended to rinse the floor with clean, cool water. Even though water damage to vinyl is unavoidable, mopping with too much water can peel away the glue bond, resulting in loose areas or curled edges. Use a two-mop system, maintain the shine, "feet" heavy furniture and appliances, build a plywood ramp to transport large appliances and furniture, and ditch the casters to keep them from getting scratched or dented. If you damp mop your floors once a week, they should retain their shine for at least 18 months.
Among the information presented here, the eight suggestions for maintaining hardwood floors are the most vital. Light cleaning, vacuuming, dust mops, and deep cleaning are all recommended to keep the vinyl flooring in pristine condition, as is pushing or "walking" appliances out towards the plywood covering. In contrast to the once-a-day or once-a-week light cleaning, the more detailed task of vacuuming demands more frequent attention. Once a week or once a month, you should do a thorough cleaning that includes sweeping, vacuuming, and mopping. Mopping should be avoided unless there is a spill, as it might damage the vinyl's sheen and eventually loosen the glue.
If water gets inside the foam or felt, it might start to grow mould and mildew. If you prefer not to use water, you can clean vinyl floors using a spray mop like the Bona Stone or the more high-tech Bissell Spinwave. Cleaning solutions such as Bona Stone Tile and Laminate Cleaner can be inserted into spray mops for more thorough cleaning. The combination of water, vinegar, and essential oil makes for an effective homemade floor cleaner. Placing a high-quality doormat or white rug at each entryway is one preventative strategy that can decrease the impact of dirt, stains, and abrasions. Use a clean towel to dry the floor after mopping.
Scrubbing pads, steel wool, and other abrasive cleaning equipment should be avoided while cleaning vinyl floors, as should detergents, abrasive cleansers, and "mop and shine" treatments. Polishes with paste wax or solvents should be avoided since they reduce the flooring's resilience and shorten the material's lifespan. Only a few drops of baby oil and some doormats may make your floors seem like new without breaking the wallet. Because dirt and dust can scratch the finish of even the cleanest floor, regular upkeep is essential.
Content Summary
- If you want clean vinyl floors, try following these methods.
- If you're lucky enough to have vinyl flooring, consider yourself lucky.
- Vinyl flooring lasts a very long time and is easy to clean.
- Vinyl flooring is low-priced and easy to set up.
- The most important aspect of maintaining your vinyl flooring is keeping it clean.
- Vinyl flooring requires special care, therefore it's best if you learn the most gentle cleaning methods.
- The appropriate way to clean.
- No matter what the soap's instructions say about how often you should wash, you should always rinse with clean, cool water to remove any residue and keep the floor looking its best.
- Vinyl will always get damaged by water.
- Mop the floor as often as you like with a wet mop, and add water as needed until a deeper cleaning is required.
- To avoid scratching the vinyl floor, move the appliances to the edge of the plywood and push or "walk" them out.
- You'll find eight methods that will make cleaning hardwood floors a snap in the next section.
- Of course, this doesn't mean that there aren't specialised vinyl-friendly tools and materials out there.
- If you want to keep your vinyl flooring in immaculate shape, check out the solutions we provide.
- Use a clean towel to dry the floor after mopping.
- A steam mop is not a good choice for cleaning vinyl flooring since it can damage the tiles and the adhesive that keeps them together.
- The next thing to do is to wash the baking soda away with a solution of vinegar and water.
- Preventative upkeep should not be overlooked while planning for vinyl floor repairs.
FAQs About Vinyl Flooring
Problems include crumpling at the edges, as the adhesive has loosened, or, as in case of LVT, problems with abatement chemicals which can react adversely with these flooring materials. If you are installing click-lock vinyl planks, uneven substrate can lead to lifting of the flooring's edges and joints.
Vinyl flooring is known for being resilient. This means that most vinyl flooring is water-resistant and very low maintenance, with long-lasting durability. If it has a wear layer, vinyl flooring will usually not stain and can survive plenty of wear and tear, which makes it a good option for any highly trafficked areas.
Many businesses and households love that vinyl is durable and easy to maintain. Regular sweeping and weekly mopping is all you need to keep your floors looking great. With advances in vinyl plank flooring, you can find vinyl floors with rigid core construction, making them more dimensionally stable and sturdy.
Vinyl needs time to settle. We recommend waiting at least 24 hours before walking on your new floors.
Vinyl plank flooring is easy to clean and maintain. The best way to keep it looking like new is by regularly sweeping or vacuuming, followed by mopping with a mild detergent and warm water. For tougher stains, use a soft cloth dampened with the same solution and gently scrub the area until the stain disappears.