Some movies include a protagonist attempting to tile their flooring. It's not as simple as it seems, and they make some mistakes that make things even worse. There are a few common blunders that should be avoided at all costs when laying tiles.
Most Common Mistakes When Laying Floor Tiles
A Failure To Prepare The Ground
Preparation is the essential to success in any endeavour, and tiling is no exception.
One of the most typical hazards when tiling the floors or walls is not properly preparing the surface beforehand, which will result in an unsatisfactory finish in either case.
Tiles should be laid on clean, flat surfaces. Spending time fixing flaws larger than 4-5mm, such as cracks, dents, or bumps, is essential.
Gypsum board for walls or self-leveling screed for floors can be applied if the surface is especially uneven. Moreover, you should take care of any sharp edges by filing them down or removing protruding screws or nails.
Sweep away the dust and debris and wipe up any liquids, such as grease, oil, or other liquids. In the long term, the effectiveness of your tile grout may suffer if you ignore the cleaning preparation job.
To ensure you adhesive thoroughly bonds to the surface, you may need to prime it with special solutions before you begin tiling.
- Dry the surface of the drywall for at least 4 to 6 after plastering, and then apply a priming solution.
- Priming wooden surfaces with a paint based on polyurethane is recommended.
- You can either remove the tiles and re-skim the surface, or tile straight onto them, but before you do, you should check with your roofer or tile supplier to determine whether a special acrylic glue is needed.
- Using The Wrong Adhesives
Some people believe that any glue will do when putting down tiles, but that is not the case.
A common rookie error in tiling is using the inappropriate adhesive in some spots, which can compromise the durability of the entire surface. Because of how time-consuming and expensive it may be to fix mistakes, it's best to start with the proper adhesive.
Now the question is, how do you choose the best tile adhesive? Obviously, that is going to be determined by the surface area and tile material you're working with.
Adhesives that can withstand moisture are essential in wet environments including bathrooms, kitchens, and outdoor spaces.
This tile is perfect for tiling wet areas like bathroom and kitchen splashbacks, as well as outdoor patios and walkways.
Adhesives that are flexible enough to prevent cracking when subjected to movement are essential when tiling over a wooden floor or other surface that may expand and contract over time.
Fast-setting adhesives are the best option for installing big format tiles or natural stone because they cure quickly and provide superior slip resistance.
Its fast-setting solution securely anchors substantial stone or big tiles. In addition to curing quickly, many swift adhesives also feature elastic or waterproof qualities.
In order to tile around a fireplace or the space behind a wood stove without worrying about cracking, a heat-resistant glue is a must.
To save time and effort, inexperienced tilers can use a pre-mixed adhesive, which is recommended for ceramic wall tiles only. Wet locations require a waterproof ready-mix glue, so keep that in mind if you plan on installing ceramic tiles there.
Adhesive For "Dots And Dab"
This method entails dabbing or dotting adhesive over the back of the tile in strategic locations, such as the tile's centre or its four corners, before adhering the tile to the wall.
Employing this strategy will almost certainly cause your tiles to become loose over time and leaving you with a subpar appearance.
Moisture can seep in through the spaces between the tiles, wreaking havoc on the substrate and eventually causing tiles to come loose.
Using less glue may seem like a good idea at the time, but it will end up costing you more in the long run when you have to fix leakage and replace the tiles.
Instead, a notched trowel should be used to evenly apply tile adhesive to the surface in order to create suction grooves that will keep the entire tile in place and eliminate any gaps between the tile and surface, thereby preventing water from leaking in. It's a win-win situation because it helps you lay tiles more easily and achieves a smoother, more even surface.
Mistakenly failing to order enough tiles
DIY projects in general are notorious for requiring precise material estimation, but running out of tiles is a nightmare in and of itself.
More time and effort will be required to complete the task, and there may be variations in tile colour and pattern from one production run to the next.
This means that even if you buy same tiles once at later date, you could not obtain an exact match. Or, even worse, they may suddenly be pulled from circulation, leaving everyone high and dry.
Inaccurate measurements or failing to account for breakages, cuts, or other unforeseen disasters along the road are common causes of a tile shortage.
Getting precise measurements on your area and figuring out how many sq meters you need is the first step towards a solution.
Multiply the area's length by its breadth, using the larger measurement if the area isn't a normal rectangle.
To illustrate, let's say you're tiling a floor it's 3 metres by 6 metres in size; the result would be 18 metres squared. The area requires 18 square metres of tiles, though you ought to always order 10 percent more than you'll need in case of cuts or breaks.
Even if you wind up with leftover tiles, keep them around because they are useful for replacing damaged ones or for use in another home improvement project.
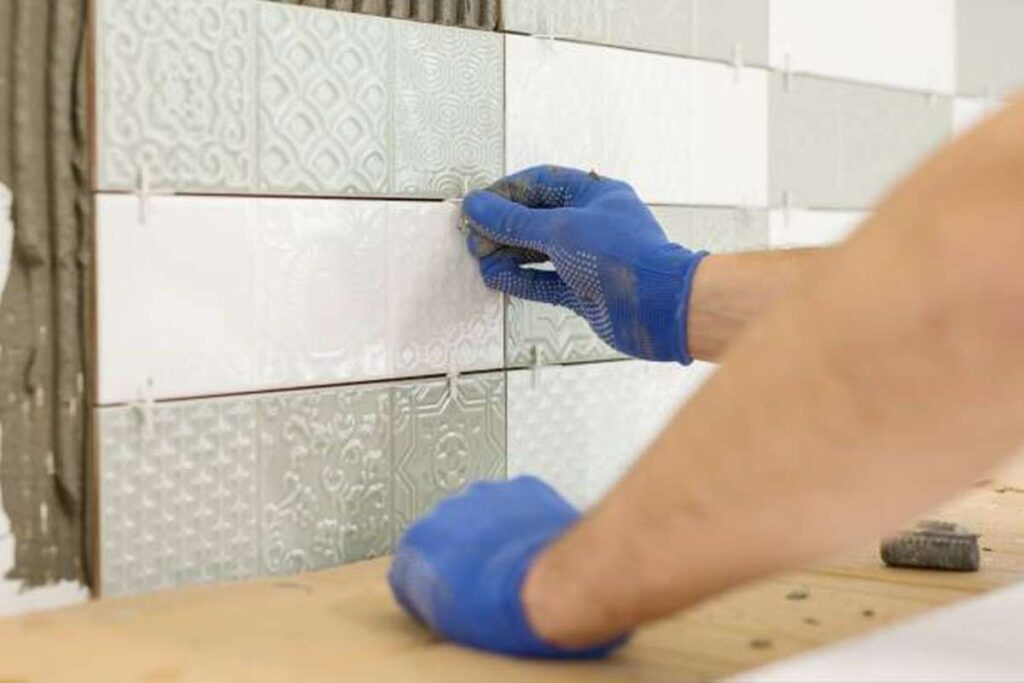
No Battens nor Markers Were Used
Don't make the rookie error of laying tiles without utilising markers of battens to get straight lines, no matter how excellent an eye you have. Using your vision or an existing item like a skirting board as a guide could result in uneven tiles plus a less than professional look because surfaces such as floors and walls are rarely completely straight.
This is why a spirit level is the only tool you should ever rely on to determine a real straight line. For the walls, find the centre and nail a narrow batten to it.
Now you will begin tiling in rows out with each edge, paying close attention to the vertical and horizontal alignment of the tiles.
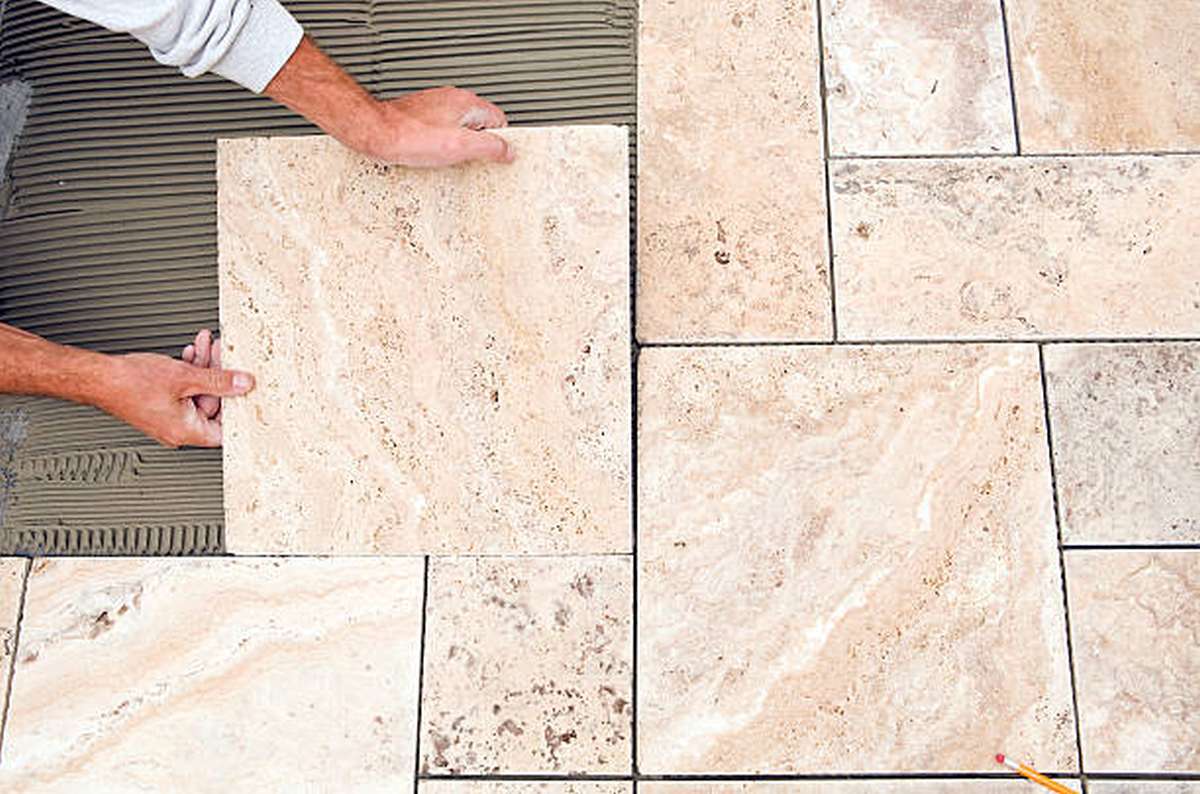
If you're tiling a floor, it's best to start in the middle of the room and work your way out to the edges, leaving the doorway area for last so you don't have to risk tripping on tiles that aren't yet entirely set.
To accomplish this correctly, measure the width and length of the room and make a mark at their intersection. After finding the exact centre of the space using chalk, you can begin laying your tiles in perfectly straight and level rows.
Misselection of Tile Size
bathroom with chevron floor tiles
The wide variety of tile sizes available now allows you to achieve any desired aesthetic in your house, from a 5cm x 20cm metro brick tile to a 60cm × 120cm large format alternative.
Yet, choosing a tile that is too small for the space might have a major impact on the final appearance and usefulness of the room.
Even if you have your heart set on a specific design or decor style, it's important to keep in mind the practical considerations that must be taken into account. Under the belief that they will be less cumbersome to lay, many individuals, for instance, pick small tiles for compact spaces.
Perhaps, but the increased visual noise created by grout lines in small tiles will make an already cramped space feel much tighter. So, larger tiles may be preferable to create the impression of a more spacious room.
Do not take this as proof that large format tiles are the best option for all and all flooring needs. Even though they're a common alternative, they might not be the ideal decision in other circumstances. When tiling a shower floor or wet room, for instance, using a larger tile can make it more challenging to achieve the desired cascade, leading to an accumulation of water on the room's surface.
If you're having trouble deciding on the right tile for your project, it's a good idea to consult with your tile dealer or tiler.
Failure To Have A Preliminary Plan For The Layout
One more common blunder when tiling a wall or floor is to not plan out the scheme or pattern beforehand.
Preparing a design mockup may seem like extra labour, but it will pay off in the end. For one, it will verify that you have the appropriate tile size for the area and help you determine how many tile cuts will be required
Whether you're utilising identical tiles of a single colour or patterned variants, don't let lack of preparation ruin your success.
When you start applying adhesive, plan out your designs to help ensure you're happy with the final result. You can experiment with the layout or pattern before committing to it on the wall.
Here you can find a wealth of information that will assist you in making the best decisions when selecting and arranging tiles for your home.
A Premature Grouting
It's natural to want to finish a tiling work as soon as possible after you've gotten started on it, but skipping the grouting step is a big mistake.
Because grout is used to seal the space between tiles, performing this job right is essential if you want your tile work to last as long as possible.
Too much pressure during the grouting procedure might lead the adhesive to dry too quickly, which in turn can cause the tiles to shift and give the floor an uneven look. Another problem arises when tiles aren't properly sealed and protected because the grout wasn't applied slowly enough to fill all the gaps between them.
To avoid this, use a grout float to slowly put the solution into each tile joint as you go.
Wait at least three hours for the grout to dry before cleaning the tiles; otherwise, you risk removing the mortar and having to reapply it if you wipe away the residue while it's still wet.
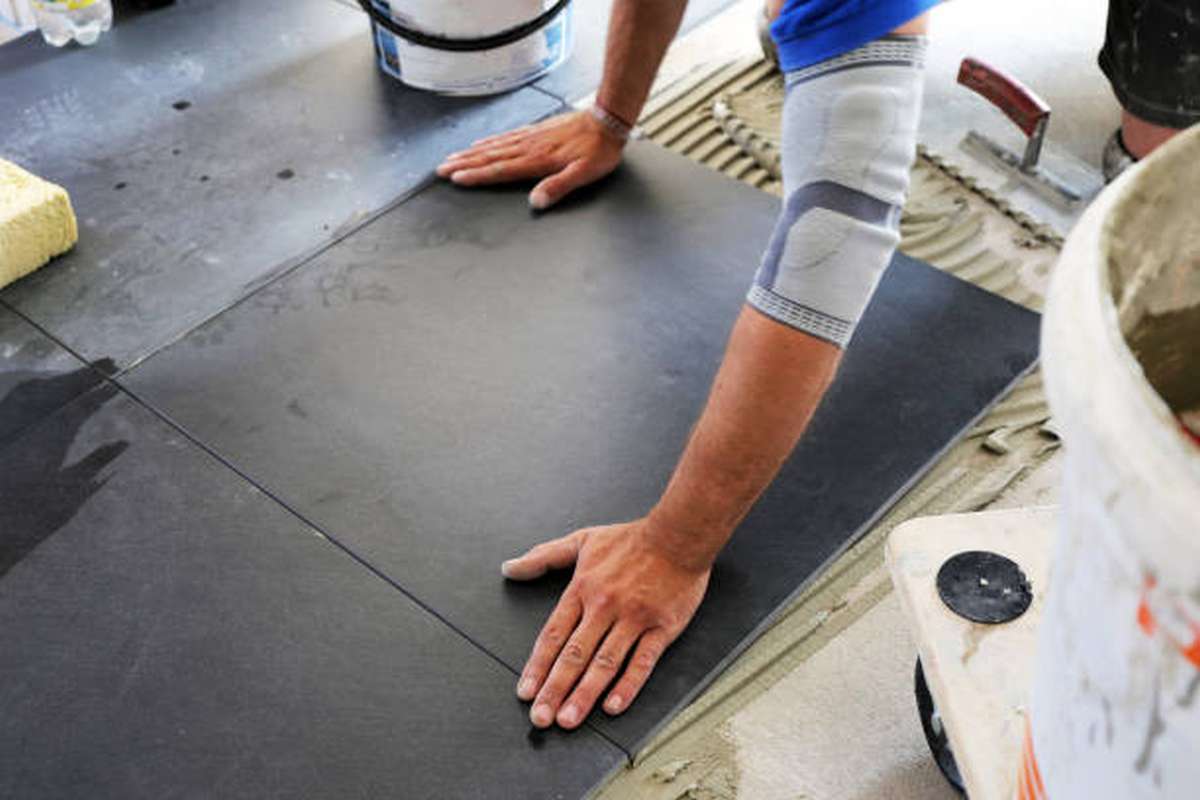
Wrong Trowel Size
When laying tiles, use a trowel that is proportional to their size. As a result, the thickness of the thin-set must increase in proportion to the size of the tiles used.
A trowel with shallow notches is required to make the deeper thin-set. Tiles can be adjusted as they are laid because of the deeper notches.
Look for phrases like "big tile" or "large format" on the thin-set you purchase. The larger tiles can be arranged in this thinner arrangement.
A half-inch trowel is adequate for tiling surfaces up to sixteen inches in size. Larger tiles require a notch of 3/4 inches or more.
Keep in mind that your thin-set consumption will increase as a result of your increased usage. A 50-pound bag with a 1/2-inch notch may cover an area 40 to 50 feet square. With the same 50-pound bag, you could cover 30 to 40 square feet with a 3/4-inch shovel.
Shattering the Ceramics
Tiles can readily break if they are constructed of brittle materials (like porcelain). If there are a lot of broken tiles, it can be inefficient and expensive.
There are certain preventative measures that can be taken to lessen the incidence of broken tiles. If you need to cut tile, a diamond wet saw is your best bet. Make sure to saw slowly and evenly to get a clean cut.
Take care when cutting tiles to avoid shattering them. The time and money spent replacing cracked tiles will add up quickly.
For cutting tile, a sharp wet saw is your best bet. Unlike other types of saw blades, diamond blades are extremely sharp and have no teeth.
Use a pencil to make a mark on the tile before you cut it. A standard lead or grease pencil will do the trick here.
Align the tile's line with the knife's edge by positioning it against the fence. After turning on the saw, you'll have to wait a while for the water to start flowing.
When cutting, apply consistent, steady pressure. Pull the two pieces back together as you near the conclusion of your cut. The tiles won't shatter if you hold them.
If the blade begins to slow pace as you cut, you are applying too much force. The slower your cutting speed should be, the more time you'll need to remove from the material.
Incorrect Subfloor
The tile is laid directly on the underlayment. You'll be much more successful if you start with a solid, level surface. The tile will slump and crack if you don't use this.
If the underlayment is unsuitable, a layer of cement board, between 1/4 and 1/2 inches thick, should be laid down first. You should follow this by placing your tile over the board.
Previous vinyl flooring that meets the necessary criteria can be tiled over. Of course, that's presuming the floor is sturdy enough to hold the tile.
First, measure the distance between two floor joists or beams by inspecting the subfloor. If the studs are 16 inches apart, for instance, you'll need 1-1/8 inches of cement board. Cement board should have been at least 1-and-a-half inches thick if it's being installed between floor joists that are 24 inches apart.
When adding cement board to a floor, keep in mind that you will be increasing the overall height. Vanity height and toilet ring extension are also required.
Laid The Tile Out Wrong
Tiling a diagonal pattern takes careful preparation. If your tile is squares, for instance, you can use it to find angles that are 45 degrees.
By using diamond tiles instead of square ones, the pattern you use to lay them is different. We'll begin by putting the tiles in a central position. When you're done, use a single layout line to ensure that all four corners are aligned.
Using this first size as a starting point for the rest of the design. Use a straight edge to double-check your work as you go.
Wrong Grout
Don't let shoddy grout detract from the aesthetic value of your tile. Grout lines that are free of dirt and debris will make your tile look brand new for much longer.
DIY tile work can be ruined by using the wrong grout or applying it improperly. You should aim for grout that is clean and uniform in appearance.
Use a trowel to blend the grout until it resembles peanut butter. If you want to weaken the grip, use a drill or paddle to poke holes in it.
It's important to wait at least 10 minutes after mixing the grout before using it. Inadequate grout that easily breaks down is the result of skipping this stage.
You Didn't Prepare
Before you can begin tiling, the surface must be cleaned and prepared. It's time to wash away the grime and fingerprints. Adhesive won't work until this is done before. This problem typically arises when tiling a kitchen or bathroom wall. You can clean the walls with a mixture of water and mild dish soap. A paint deglosser or abrasive pad can help remove stubborn spots and buildup.
No Backer Board
The Function of Joints While Grouting Tile A backboard is required if you are tiling near water. The rigidity of the backer board keeps water out of unwanted places.
Cement board is the strongest material for a backboard. Concrete and sand are the main components, with fibreglass reinforcing them.
Fibre cement board consists of cement, sand, and wood fibres for reinforcement. Similar to regular cement board, but with several restrictions on its use.
Wet regions are fine for glass mat gypsum, but never leave it in a pool of water. They're made of gypsum that has been coated with silicone and strengthened with fibreglass.
Wet-area drywall is a good choice for tiling around a sink. It can withstand brief exposure to water but will not hold up to a steady rain.
Bad Caulking
Caulking the joints is a crucial final step when tiling a bathroom. A straight line of caulk should then be applied along the border of the tub and each of its four corners.
Getting the Materials
Choose caulk that is designed for wet areas like the bathroom or kitchen. Mold and mildew growth is inhibited by the chemicals in this variety.
Choose between latex and silicone when you shop here. Despite its durability, silicone is more difficult to maintain. Although latex is easy to clean, it may not hold up as well over time.
You'll furthermore have to make sure you get the proper shade. Just white, clear, and pecan will be available at hardware stores. There are more individualised colour choices available from a flooring supplier.
Caulking It In
Get the best caulking gun you can afford. Doing so will allow you to caulk in a straight line. Using cheaper weapons will result in spots where your line is both too wide and too thin.
Use masking tape to line the area to be caulked. In doing so, you'll have a neat border on both sides.
Caulk squanders quickly, so adjust the nozzle size to the size of the hole. Doing so will result in a caulk line of the appropriate width.
Caulk a line, then use a damp finger to remove any excess. After the caulk has dried, you can finally remove the masking tape.
Lack of Tile Purchases
You did not plan well, and that is the main reason you did not purchase enough tile. Make sure you carefully measure everything and double-check your results.
First, determine the dimensions of the space you intend to tile. Finally, double your results.
You can use this to calculate the area. To determine how many square feet of tile you'll need, multiply the number printed on the tile box by the square footage of the room.
The number of boxes needed to completely cover the floor is as shown here. The next step is to figure out how much money was spent in excess.
The formula is as follows: Room number * 10% * Square footage of room. Then, quantify the result by using a single unit of square footage.
You now need to purchase this many additional containers. The extra containers serve as insurance against damage and loss in transit.
Tiling a Floor
The first thing you need to do while tiling a floor is to acquire the necessary tools. In order to spread the thin-set, you'll need a trowel with grooves of the appropriate size.
Cutting the tile without cracking it will require a diamond saw of the proper calibre. The proper substrate is then required for tiling.
Get ready for tiling by stocking up on materials and planning out your scheme in advance. Afterwards, you must grout the tiles.
Make sure your grout is the proper consistency and free of air bubbles by working it. Then, once you're done tiling, take these procedures to clean the grout and make it seem brand new.
Conclusion
Mistakes in floor tiling installation typically involve inadequate surface preparation, the application of an inappropriate adhesive, and a failure to devote sufficient effort to repairing imperfections greater than 4-5 mm. Priming the surface with particular solutions before tiling, drying the drywall for at least 4-6 hours, and priming wooden surfaces with a paint based on polyurethane will all help the adhesive stick properly. In damp places, adhesives with a high tolerance for wetness are a must. When tiling over a wooden floor or any surface that may expand and contract over time, flexible adhesives are needed to prevent breaking when the floor or other substrate undergoes expansion and contraction. Big format tiles or natural stone are ideally installed with fast-setting adhesives due to their quick curing time and increased slide resistance.
It is recommended that only ceramic wall tiles be used with a pre-mixed adhesive, which can be used by unskilled tilers to save time and effort. If you want to prevent water from seeping through your "Dots And Dab" tiles, use a notched trowel to uniformly apply tile adhesive to the surface, creating suction grooves that will hold the tile in place. If not enough tiles are ordered, the finished product could look shoddy. A tile shortfall can be caused by inaccurate measurements or by failing to account for breakages, cuts, or other unforeseen disasters. One step towards a resolution is to take accurate measurements of the area and calculate the required square metres.
Make a mark at the point where the room's breadth and length meet for the best results. The first step in placing tiles in exactly straight and level rows is to locate the space's centre using chalk. From a 5cm x 20cm metro brick tile to a 60cm x 120cm large format alternative, you can now create any desired style in your home. Tiles should be selected and arranged with practical concerns in mind, as the choice of a tile that is too tiny for the space can have a significant impact on the final appearance and functionality of the room. If you need help finding the proper tile for your project, talk to a tile dealer or tiler.
Another typical error when tiling a wall or floor is to not design the arrangement beforehand, which can make it harder to get the ideal cascade and cause water to pool. Before sticking anything on the wall, it's a good idea to sketch out your designs and try out several layouts. The most critical steps are using grout to seal the joints between tiles and increasing the thin-thickness set's in direct correlation to the tiles' dimensions. Use a grout float to carefully pour the solution into each joint as you go, allow at least three hours for the grout to dry before washing the tiles, and select an appropriately sized trowel to avoid this. Use of a diamond wet saw and caution when cutting tiles to avoid shattering them are two preventative steps that can be implemented to reduce the frequency with which tiles are shattered.
Mark the tile with a pencil, line up the mark with the knife's edge, and cut with even pressure. Cement board should be used as a base if the underlayment is inappropriate. If the pattern on the tiles is diagonal, use diamond-shaped tiles instead of square ones and align all four corners with a single layout line. Get yourself a straight edge and use it to check your progress periodically. If you're doing your own tilework, don't use the wrong grout or apply it incorrectly.
It is vital to wait at least 10 minutes after mixing the grout before applying it, and the surface must be cleansed and prepared before tiling. Tub seams should be caulked along their perimeter and at their four corners. It's best to use latex or silicone caulk in damp environments like the bathroom or kitchen. Caulking and tiling procedures make up the bulk of this text's instructions. Get the best caulking gun you can afford, line the area to be caulked with masking tape, make sure the nozzle is appropriately sized for the hole, and clean up any excess with a wet finger.
The initial stage in tiling is to gather the required equipment, such as a diamond saw of the appropriate calibre, a trowel with the appropriate-sized grooves, and the appropriate substrate. Be sure the grout is the right consistency and free of air bubbles before you apply it to the tiles.
Content Summary
- Tiling should be done on smooth, level surfaces.
- It's best to use the right glue from the beginning to avoid having to spend extra time and money fixing any potential problems later on.
- A heat-resistant adhesive is required for tiling around a fireplace or the area behind a wood stove.
- Instead, use a notched trowel to evenly apply tile adhesive to the surface, creating suction grooves that will keep the tile in place and avoid gaps between the tile and surface.
- One step towards a resolution is to take accurate measurements of the area and calculate the required square metres.
- The first step in placing tiles in exactly straight and level rows is to locate the space's centre using chalk.
- Yet, the ultimate look and functionality of the room could be drastically altered by selecting a tile that is too small for the space.
- Getting advice from a tile dealer or tiler might help you find the perfect tiles for your next project.
- Layout Without Preliminary Planning
- Another common mistake when tiling a wall or floor is failing to first decide on a colour scheme or pattern.
- Hence, the thin-set thickness should grow as the tile sizes expand.
- Tiles can be shattered less often if certain precautions are taken.
- Before you cut the tile, write a mark on it using a pencil.
- The tile is set up without any sort of spacers.
- The next step is to position your tile over the mat.
- Avoid having poorly applied grout diminish the beauty of your tile.
- A backboard made of cement board is the most durable option.
- Line the caulking area with masking tape.
- Find out how big the area is that you plan on tiling.
- Calculate the square feet of tile needed by multiplying the number on the tile box by the square footage of the room.
- When tiling a floor, the first step is to gather all of the equipment you'll need.
FAQs About Tiling
Ensure that all the safety measures should be provided to tiler and worker of tiling. First-Aid measures should be available on the site where tile installation is being carried out.
Tiling is a time-intensive DIY project. It's not hard but it requires a lot of steps. It's important that you lay the tiles evenly the first time because tiling is almost impossible to reverse if you make a mistake. You might be able to adjust some tiles slightly after they have set.
But once the job is finished, there is a curing process to follow. The curation generally occurs in about twenty minutes; however, the tiles should not be walked on for a solid 24-hour time frame to allow them to set fully.
The most common cause for falling tiles is water infiltrations. If water gets behind the tiles and in the grout, mildew can grow and it will cause the adhesive to deteriorate. This is not just a threat for your tiles, but also for your health.
Moisture. Moisture may affect the finished appearance of your installation by causing efflorescence, which results in deposits of salt on the surface and in the grout lines. The tile itself may cause efflorescence, but the concrete substrate and the mortar cause the condition in most cases.