Do you need answers to your queries about structural timber repair? If you need some guidance, read this post. Nail pops and loose knots are easy repairs, but more serious damage usually requires the help of a contractor. Some of the most prevalent issues with structural timber are rot, termites, decay fungi, wood-boring insects, and carpenter bees. In addition, carpenter bees are a frequent issue. In this piece, I'll define these terms and explain how to remedy them in the event that you ever experience any damage.
What Reason Did You Have to Fix the Timber on Your Property?d
Timber repairs are often necessary because the wood has deteriorated due to a variety of factors, including dry rot, wet rot, or woodworm infestations. Timber rot occurs when the wood absorbs too much moisture for too long.
The structural timbers of a building might deteriorate due to poor planning or shoddy repairs.
Timbers used in construction are just as vulnerable to the effects of time and the elements as any other material. One plausible explanation for this problem is that the structural timbers are too heavily loaded. For instance, the roof timber might not be able to withstand the weight of large tiles if it was designed to hold slate.
Fixing Bad Timber in Buildings
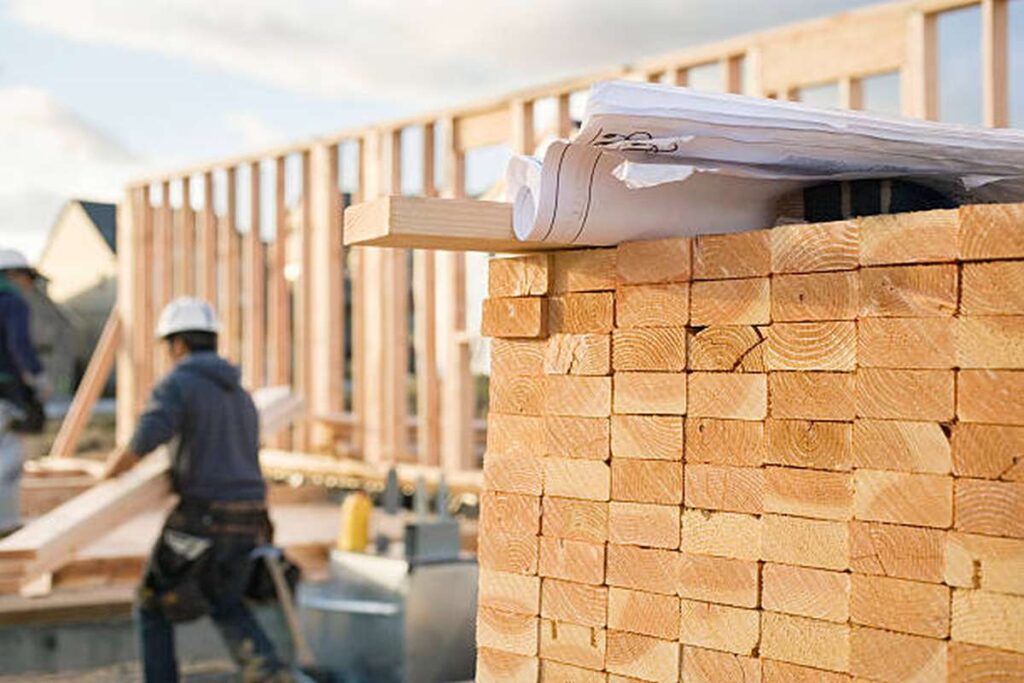
Timber has been used for hundreds of years to construct roofs, floor beams and joists, window and door posts and lintels, and even whole wood-framed buildings (with load-bearing walls and screen barriers).
Due to the slow evolution of different types of joints, frames, and tools over the years, archaeologists can use timber fragments and telltale evidence of how they were fashioned to date ancient buildings. Ingenious wooden details contribute to this effect. Timbers are an important part of the building's historical and archaeological worth, regardless of whether or not they are on show. Timber framing can deteriorate owing to termite infestation, excessive weight, or improper installation and repairs.
Most water damage is caused by either a leak, a lack of maintenance, or condensation. Insects and fungi that devour wood are then able to easily invade the weakened timber (like woodworm and deathwatch beetle). An example of this is dry rot.
Structures can have its parts crack, distort, or even be crushed if they are overstressed. It's possible that they're overloaded because of poor or inexpensive construction, or because they were originally built to hold different loads than the ones they're currently supporting. Wear and tear from repeated use or old age could also be contributing to the overload. A roof structure meant for lighter materials like thatch or slate can collapse under the weight of a tile roof.
It used to be a time-consuming and expensive process to replace rotted timber in a building's framework. If the wood lintels or massive tie beams in a barn renovation project couldn't be spliced or bolted together with new material, the old material had to be thrown away. Even if they could have bolted on a new piece of timber, the bolt overlap in many cases was so significant that it was almost as if they had to replace the entire amount of timber. This was the case, despite the fact that other options existed.
As such, and as a part of the overall project, we are ecstatic to be able to use a groundbreaking new tool, a Timber Resin Splice System, to repair structural timbers.
Solutions Other Than Replacement
Repairing rotted timbers is not a new concept. Since the beginning of time, people have been employing carpentry skills and blacksmith-made splints, brackets, and ties to fix objects. The building's history and charm are enhanced by the renovations made to it centuries ago.
Recently, we've started strengthening structures with state-of-the-art materials. Examples of such materials include steel, epoxy resins, carbon fibre rods, and wire rope. Instead of using the same rotten timbers, new timbers can be utilised to make the necessary repairs, or alternative materials like steel or reinforced concrete can be used in a sympathetic fashion. Both of these options are open to you.
Secondary buildings and in-fills, like brick panels or packing-up under partially decaying timbers, may also be able to lighten the loads.
The nature of the damage played a major role in determining the efficacy of various repair methods. No one method may be considered optimal; rather, the ideal method will depend on the specifics of the structure at hand. A struggle arises in attempting to identify it.
As a rule of thumb, below are some guidelines to follow while dealing with historical structures:
- For a building to have structural integrity, every beam, column, and joist must be able to hold the maximum anticipated and accidental weight.
- When renovating a historic structure, it's best to avoid replacing too much of the wood and to perform only necessary repairs and improvements. The amount to which other structural components could be harmed, as well as access concerns, the viability of relocating the timbers in order to restore them, and so on, must all be carefully considered before any repairs are made.
- Any alterations you make shouldn't compromise the fabric's integrity and should be easily reversed.
- Respect the original by using the same processes and components whenever possible.
- For the sake of honesty, it's not enough to provide a straightforward response; the solution also needs to be aesthetically pleasing, technologically advanced, neat, or barely perceptible. It's illogical to assume that contemporary repairs won't share the same appealing, individual characteristics as their antecedents.
- It is important to take pictures of the fabric before any conservation work is done, and then to take pictures of the conservation work as it is being done.
- When deciding on a plan and a method of repairing it, you should think about all of the information at your disposal. This allows one to identify both the failure type seen and the underlying cause. For instance, find out what's producing the extra loading and why the beam end keeps becoming wet. When inspecting a barn's second-story end, look for a cracked beam; this will indicate an insect weak spot.
It's crucial to rule out roof leaks, overflowing gutters, and other potential sources of moisture in the wall when the wood has been firmly embedded in the masonry. It's important to consider whether or not the higher floor is being expected to handle loads that are getting heavier or aren't ordinarily there.
From time to time, the barn can have extra hay or straw. Another possibility is that a repair post is adding extra weight to the beam. The roof might have sagged after a change in roofing materials.
The cumulative impact of each fix should be taken into account. What percentage of the fabric do you think would be lost or damaged if the lumber were moved?
The task of making these sorts of observations, making these kinds of decisions, and coming up with these types of architectural solutions is often delegated to expert consultants like structural engineers and building surveyors. Hence, it is essential to choose a specialist who is conversant in using historic construction methods and materials and who can devise sympathetic solutions that involve as little intrusion as possible with the historical fabric. The importance of the building's historic fabric makes it all the more important to choose the right expert for the job.
Yet, it should be stressed that employing the proper contractor to carry out the task at hand is of great assistance. If the engineer is working with a conservation contractor who has experience with similar fixes, everyone will be more productive.
Hiring the incorrect individuals might lead to uncomfortable and costly solutions or the loss of irreplaceable historical artefacts.
Repairing Rotten Wood Using a Resin Splice for Timbers
The Timber-Resin Splice System allows for the removal of old timber without removing the structure from the ground. This bodes well for the long-term health of the repaired area.
Yet, how does one go about doing this? Of course, we've simplified things to increase the likelihood of success for this project.... but not by a huge amount! These newly treated timbers can be installed with less effort and delay thanks to a recent advancement.
The logs aren't stacked neatly in one spot. A rafter may be reached without disturbing the ceiling or walls below, while a floor joist requires raising the floor. As the rafter is situated in such a way, this is the case. Accessible from any angle, Property Repair Solutions has perfected a wide range of methods for restoring structural timber.
The simplest approach, as seen in the pictures below, is working on a joist that is accessible from the ground. We are on the ground floor in a bedroom with a lath and plaster ceiling.
- Slots drilled through a sizable chunk of wood in the wall joists were definitive proof that the timber was rotting.
- Remove the weakened joist from the structure.
- The joist is removed from the wall, given a coat of fast-drying adhesive on both ends, and then reinserted into the wall. The rods that were inserted into the new joist we installed were repaired.
- Repair rods are placed into both the new and old joist sections before they are joined together.
- In order to permanently join the two halves of an existing joist and prevent them from drifting apart, resin is injected into preexisting grooves in the wood.
Repairing Wood That Has Cracked, Broken, or Shaken
The building's stability will not be affected by cracks in the timber beams. Oak beams with cracks can be admired for their pleasantly rustic character. Real wood may be recognised from synthetics in part because of the grain, but also because of these fissures.
Wood that has become warped, twisted, or splintered must be replaced. This may necessitate the replacement of a beam or rafter. To get around this obstacle, however, an epoxy resin can be injected. We suggest consulting a structural engineer as soon as possible to prioritise the necessary repairs to your building.
As wood dries out and shrinks, it develops imperfections including cracks, rattles, warps, and fissures. This could be due to either a shift in the equilibrium moisture content over time, or the drying process itself. Timber used indoors should have a moisture content of 9-14%. Maximum fibre saturation is achieved in construction softwoods at about 28% moisture content.
Cracks and splits that are at least 5 mm wide can be patched with Mouldable Epoxy Mortar. Nonetheless, if the split goes more than a third of the way through the wood, you'll need to "stitch" the two pieces back together with dowels or epoxy-glass bars inserted across the filled part.
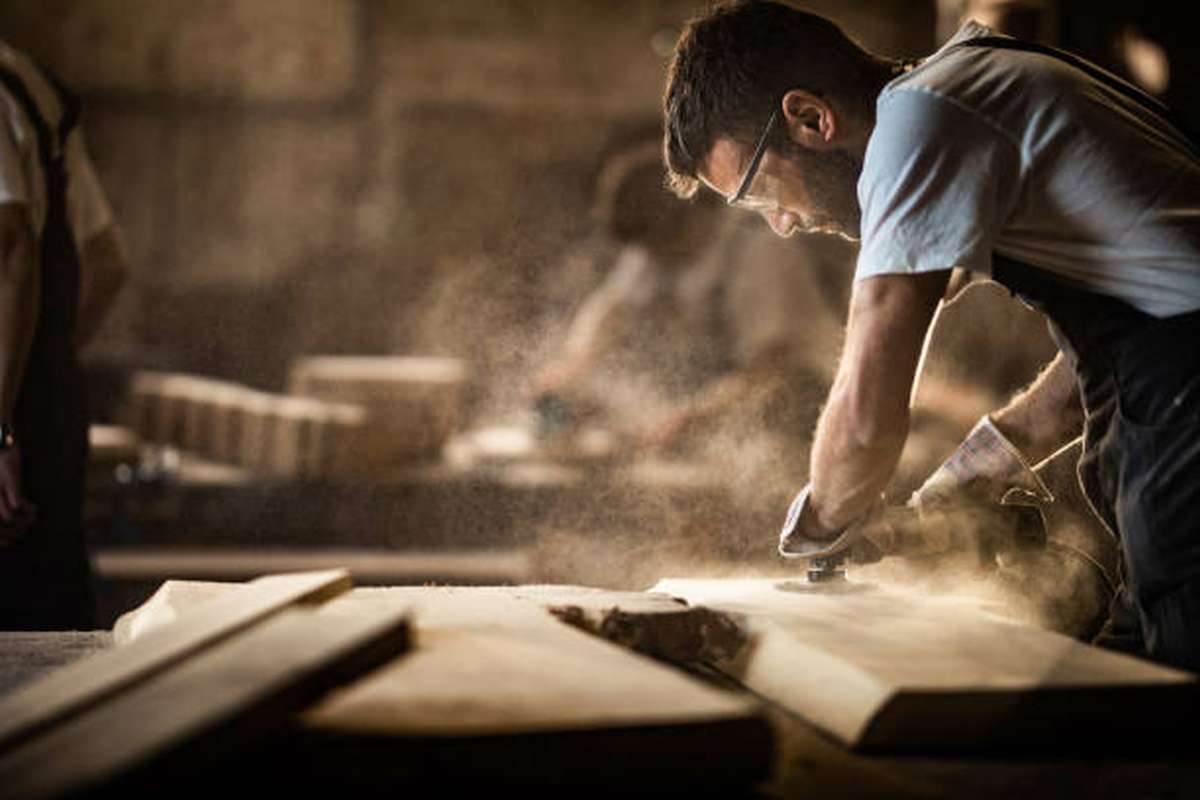
Splits and cracks can be removed with a saw, and the sawdust can be sucked away in a vacuum. Afterwards, you can fill the holes with Mouldable Epoxy Mortar.
Once the mortar has set, you can drill holes through the epoxy and into the crack's rear. Hole sizes of 6 mm are highly suggested. You can either blow the dust away or vacuum it up to get rid of it. When Thixotropic Epoxy Injection resin has achieved the flow-out stage, it can be injected straight into the hole. Epoxy mortar, which can be moulded to meet the exact specifications of the injected material, can be used to seal the holes when the injection procedure is complete.
To keep the wood looking like new, sand off the mortar and apply a stain or paint. Infusion of a Thixotropic Epoxy To repair the split, holes can be drilled across it and epoxy-glass or steel rods inserted into them using resin.
Possible Substitutes for the Primary and Secondary Structures
Leaving existing timber in place is usually more cost-effective and convenient than installing a new structural section to handle the weight. To prevent a roof truss from spreading, you can add a second collar to the truss or reinforce a rafter by affixing more timber to it. Both of these tactics are examples of strengthening an already present framework.
A new structure built around or over the current one may be the most viable option if the roof has experienced substantial damage. While the consequences of this conservation technique may be evident and unpleasant to the untrained eye, the original fabric is maintained and the operation can usually be undone.
Where beams or joists lack the necessary depth for the weight they are supporting, excessive bending, bouncing floors, and maybe cracks might occur. Adding more lumber to the top of the component achieves the desired objective of improving the component's stiffness and increasing its effective depth.
The beam's width can be decreased by fastening the floorboard material directly to its top. If you execute the steps in this strategy, you will reach your goal. However, repairing the adjacent flooring can be difficult.
When the ends decay or the beam or its support slips, leaving insufficient bearing, it is important to reinforce the connection between the beams and the joists. The beam and its support have not shifted, but this remains true.
To continue the wood past its existing end, it is not necessary to rely entirely on side-planting or splicing in. The bearing length can be extended in a number of ways: by bolting a piece of steel or wood to the underside of the beam; by forming and attaching a steel shoe with a complete box section; by installing a full-height timber, steel, or masonry post under the end of the beam; or by constructing a corbel on the wall beneath the end of the beam out of wood or steel. A built strap can be utilised in the same manner as a joist hanger to retrieve a beam that has been detached from its neighbour.
Overstressing a structure can cause purlins to crack, necessitating these simple splints in an unusual spot. Side-planting and fixing steel pieces or timbers over the failure and linking them to sound timber is typically sufficient to make a successful repair.
Substitutes for Steel and Plastic
Connecting flitch plates anywhere along the length of a beam provides additional support. Firstly, a slot is carved into the lumber, and then the beam is made out of a metal and wood hybrid. The plate might also be used to make a T shape, either vertically at the top of the beam or horizontally at the bottom, depending on your preference.
The most efficient technological approach is to allow the steel segment to enter the bottom of the beam and then permanently fasten it there. This means that the largest part of the T could bear the greatest tensile load. Nevertheless, practically speaking, these repairs are difficult to accomplish on the spot since they require overhead slot cutting using many drillings or a chain-mortiser or chain-saw. Doing the risk evaluation requires significant thought.
Stainless, though more expensive than plain steel, is a fantastic choice for this repair since it is corrosion-resistant in oak timbers and has a superior strength-to-weight ratio.
To some extent, the aesthetic quality of parts constructed from any type of steel will always be inferior to that of similarly functional alternatives. Yet with some forethought and planning, you can come up with clever responses. The ends of the brackets can be rounded off, or the nut and bolt heads can be recessed and the holes filled with wood. Putting some flair in the blacksmith's manner elevates the repair to a far higher level, maintains the repair's "honest" appearance, and sheds light on the item's past. Wherever the ends of the fasteners will be visible in the wood, square plates can be welded to the threaded bar or boltheads for a more visually acceptable finish.
While renovating old buildings, it is necessary to replace some of the damaged timber. Removing the timber's face and using it as a veneer on top of a newly fitted piece is one way to keep its unique characteristics.
When a beam has decayed to within an inch of its life, a laminated resin and wood beam can be built on the spot to save the day. If you have restricted access or are concerned about damaging the plaster surrounding the beam, this is a viable option. Finally, the beam can be reattached after resin has been injected into the beetle flight holes to fortify the face. While generally effective, these solutions are usually excessive for the vast majority of maintenance problems.
Resin-bonded steel or carbon fibre rods mixed in with new wood to reinforce old, rotting wood can be effective in many situations. Some retailers even sell prefabricated replacement parts that may be inserted into the cut end of a failed timber with minimal effort. After welding the rods into place, these components will be ready for use.
Resins enable fixes that would be impossible without them, and they come with a slew of other advantages, such as little fabric loss, gap filling, flexibility, and repairability. Its main drawback is that they aren't highly reversible and often fail when exposed to moisture.
Towers That Taper at the Top Instead of the Top at the Tapering
There may not be enough ties or degradation has occurred at the eaves level if the A-frame is spreading. By installing shorter collars (tie beams) between roof trusses or rafters, the outward pressure on the walls can be substantially reduced. Again, wood is employed, but this time steel wires are used to tension and join the wood for further strength and functionality.
Increase the strength of your building by bolting plywood gussets to the truss or rafter next to it and the ceiling joist below it. With this, the roof is triangulated for further stability. This method is ideal for use in roof areas, when raising collars to create more headroom is necessary. Another sensible solution that is better off being kept under wraps.
When the juncture of the trusses and the collars has become weak or slipped, a Y-shaped steel plate can be put in place to stabilise the structure.
Stainless steel wire ropes aren't your only option when it comes to preventing motion on the side. After all the rafters are racked, the peak of the roof will move laterally, perpendicular to the truss line. Putting up tensioned wires across the rafters at an angle can create a triangle framework and put an end to the swinging. As an alternative to using lumber or solid steel straps, which can be utilised in a similar manner, wires are typically a cleaner and easier to install solution. Yet, the wire's tensile strength must be sufficient to handle the loads it will face in service; otherwise, the wire would stretch and no longer serve its intended purpose.
Possible answers to this issue abound. Ideally, the finest choice is one that satisfies not just the needs of the structure but also those of the customer. The most important conservation principle is to minimise your impact on the environment.
Although every approach and material has its advantages and disadvantages, we have discovered that adopting a "less is more" philosophy typically results in a solution that is not only cost-effective but also respectful of the neighborhood's heritage. Even if this makes the repair visible, at least it's being honest about it, and with a little ingenuity, it can be made neat and aesthetically pleasing.
Conclusion
Renovating historic structures should be done with state-of-the-art materials and respect the original by using the same processes and components. The most important details are to consider roof leaks, overflowing gutters, and other potential sources of moisture in the wall, and to choose the right expert for the job.
Property Repair Solutions has perfected a range of methods for restoring structural timber, such as removing a weakened joist, installing repair rods, and injecting epoxy resin into preexisting grooves. Mouldable Epoxy Mortar can be used to patch cracks and splits that are at least 5 mm wide, but if the split goes more than a third of the way through the wood, dowels or epoxy-glass bars must be inserted to "stitch" the two pieces back together. Adding more lumber to the top of a beam increases its stiffness and depth, but repairing the adjacent flooring can be difficult. Substitutes for steel and plastic include flitch plates and built straps. The most efficient technological approach is to allow the steel segment to enter the bottom of the beam and then permanently fasten it there, but this is difficult to accomplish on the spot due to overhead slot cutting and risk evaluation.
Content Summary
- Learn how to use a timber resin splice kit to make in-place repairs to structural timbers.
- Most water damage is caused by either a leak, a lack of maintenance, or condensation.
- As such, and as a part of the overall project, we are ecstatic to be able to use a groundbreaking new tool, a Timber Resin Splice System, to repair structural timbers.
- Recently, we've started strengthening structures with state-of-the-art materials.
- The nature of the damage played a major role in determining the efficacy of various repair methods.
- When deciding on a plan and a method of repairing it, you should think about all of the information at your disposal.
- It's crucial to rule out roof leaks, overflowing gutters, and other potential sources of moisture in the wall when the wood has been firmly embedded in the masonry.
- The importance of the building's historic fabric makes it all the more important to choose the right expert for the job.
- Yet, it should be stressed that employing the proper contractor to carry out the task at hand is of great assistance.
- Accessible from any angle, Property Repair Solutions has perfected a wide range of methods for restoring structural timber.
- Remove the weakened joist from the structure.
- Repairing Wood That Has Cracked, Broken, or ShakenThe building's stability will not be affected by cracks in the timber beams.
- We suggest consulting a structural engineer as soon as possible to prioritise the necessary repairs to your building.
- Cracks and splits that are at least 5 mm wide can be patched with Mouldable Epoxy Mortar.
- Nonetheless, if the split goes more than a third of the way through the wood, you'll need to "stitch" the two pieces back together with dowels or epoxy-glass bars inserted across the filled part.
- Adding more lumber to the top of the component achieves the desired objective of improving the component's stiffness and increasing its effective depth.
- The beam's width can be decreased by fastening the floorboard material directly to its top.
- However, repairing the adjacent flooring can be difficult.
- When the ends decay or the beam or its support slips, leaving insufficient bearing, it is important to reinforce the connection between the beams and the joists.
- Connecting flitch plates anywhere along the length of a beam provides additional support.
- The most efficient technological approach is to allow the steel segment to enter the bottom of the beam and then permanently fasten it there.
- The ends of the brackets can be rounded off, or the nut and bolt heads can be recessed and the holes filled with wood.
- Putting some flair in the blacksmith's manner elevates the repair to a far higher level, maintains the repair's "honest" appearance, and sheds light on the item's past.
FAQs About Structural Timber
structural timber means timber used or intended for use in a loadbearing capacity in buildings where the strength of the timber is the primary consideration.
A bonded timber repair splice is often the quickest method to repair in-situ timber beams, trusses and structural timbers. This method allows sections of reclaimed pitch pine to be fixed onto the existing truss or beam leaving a concealed, seamless joint.
Types of Defects in Timber as a Construction Material
- Wind Cracks in Timber.
- Shakes in Timber.
- Twisted Fibers in Timbers.
- Upsets.
- Rind Galls.
- Burls.
- Water Stain.
- Chemical Stain.
No parts specified.
- Check that the fragment fits well into the break in the furniture.
- Apply glue to both the fragment and the furniture.
- Insert the wood fragment into the glued spot on the furniture.
- Wipe away any excess glue using a damp rag.
- Clamp the two pieces together.
Pre-treated timber is now generally used by builders for any internal building work. Dry rot happens when spores which are airborne come into contact with dampened timber which is unprotected by a fungicide and has a moisture content of more than 20%. These spores can then germinate and cause white rooted strands.