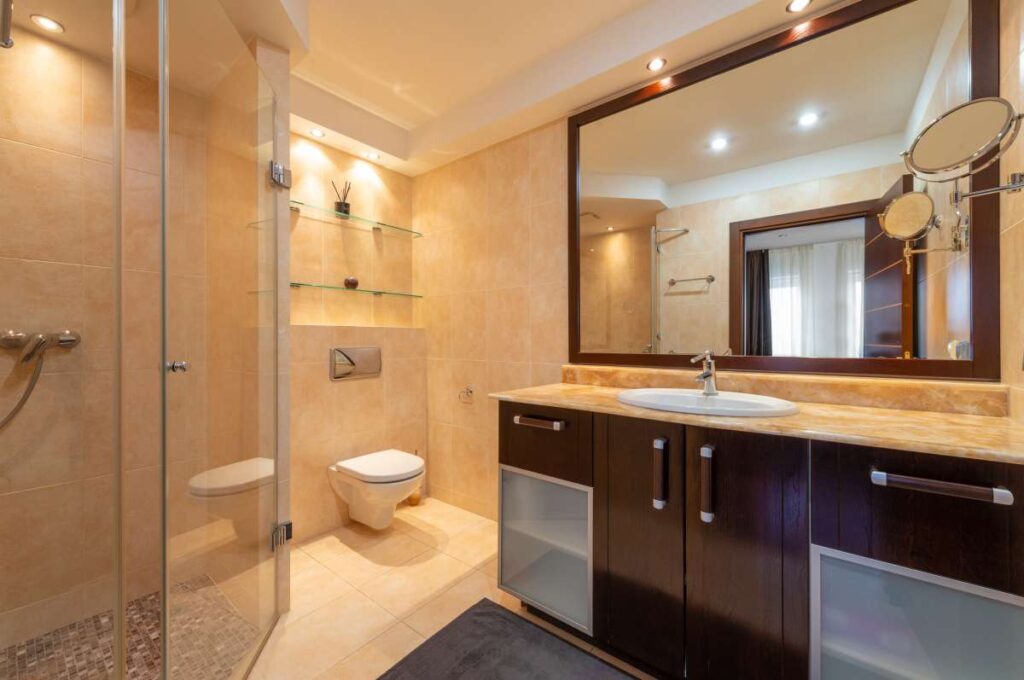
The tiles in a shower need to be watertight and aesthetically pleasing. When tiling a shower wall, it's important to ensure that the floor, seams in corners and niches, and fasteners are all waterproof before installing tiles.
Setting the porcelain wall tile in a running bond or brick pattern is the next step in making sure it looks beautiful and stays put. Hitch Property Constructions provides a wide variety of carpentry services to fulfil all of your building and repair requirements in Melbourne.
You can easily tile your own shower, and the finished product will increase your home's resale value and aesthetic appeal. Preparing a leak-proof battery correctly requires numerous steps. If this is your first time tiling a shower, it's probably best to get some professional advice first.
The tile should be centred and symmetrical in every configuration you create. The idea is to avoid thin tiles at the bottom and top of the structure. Since most ceilings aren't precisely flat, it's best to avoid utilising all of it up there. Joint width can be kept uniform around the room by trimming the top course of tiles on all three walls.
Think about two other niches. Size and position them in advance so that the top and bottom picture-frame trim tiles fall on the horizontal seams between complete wall tiles, guaranteeing that they will be symmetrical. This produces ceiling and shower pan courses that are nearly identical in width, at 6 inches.
Use latex-modified thin-set mortar, not mastic, when tiling a shower wall or other moist area. Tiles may break and come loose from the wall if mastic turns to liquid when exposed to water.
Instead of spreading thin-set on the wall, use a 1/4-inch notched trowel to butter thin-set onto the back of each tile. The less mortar that gets into the joints, the easier it is to grout, and the cleaner the work area stays.
FAQS About Shower Tiling
Porcelain and ceramic tiles are popular choices for shower walls due to their water resistance and durability. Natural stone tiles such as marble and granite can also be used but require additional maintenance.
It is recommended to use a cement-based, epoxy, or urethane grout for shower tile installations. These types of grouts are more water-resistant and less likely to crack than traditional grouts.
It is recommended to seal the grout lines of shower tile to prevent water penetration and staining. Some types of tiles may also require sealing to protect them from damage.
Regular cleaning with a mild detergent and water is recommended to keep shower tile clean and free of dirt and soap scum. Avoid using harsh chemicals or abrasive cleaners, as they can damage the surface of the tile. It is also important to keep the grout lines clean and free of dirt and debris to prevent staining.
Tiling a shower is a complex task that requires experience and skill. If you have experience with tiling or are willing to invest time in learning proper techniques, you may be able to install shower tile yourself. However, it is recommended to hire a professional to ensure a high-quality and long-lasting installation.
Getting Started
Where do you even begin when tiling a shower/bathtub combination?
With the information we'll be providing today, you should feel prepared to begin installing bathroom tiles.
When tiling a shower or bathtub, start at the back wall so that the grout seams on the sides can be concealed.
Here, we're going to get down to brass tacks.
Listed below is everything you'll need:
- Tuscan SeamClips (Blue)
- Laser Level
- Horseshoe Shims (1/16”)
- Pencil
- Sponge
- Tape Measure
- Ishii Big Clinker Tile Cutter
- Carpet Knife for Thin-Set Removal
- 4’ Level
- Tile Wet Saw (Rent or Buy)
- 1/4×1/4×1/4 Square Notched Trowel
- 5-Gallon Bucket for Water
- 5-Gallon Bucket for Thin-Set
- Ardex X77 Thin-Set (White)
Put some 1/16" spacers on the tub so it can expand and compress as needed.
Surprisingly, when filled with water, bathtubs actually grow in size.
If you leave a 1/16′′ space between the tub and the tile, the tile won't crack when the tub expands.
In addition, caulk can correctly fill the space and waterproof the tile-to-tub or tile-to-shower transition if there is a 1/16′′ gap.
Set the laser level on top of the tub and check the height with the 1/16" horseshoe shim.
Remember that you've already decided how big the tiles in the first row should be.
Use a wet saw or tile cutter to cut the first tile to size.
Our favourite huge tile cutter is the Big Clinker, which is made by Ishii.
Cut tiles as long as 24 inches in length. It's not cheap, but it's a good investment to rent or buy and resell on Craigslist.
Cut along the lines shown using Ishii's cutting wheel.
How to Tile a Shower?
After the old tile has been removed, a cement backer board should be installed in the shower.
Shower membranes and shower pans should be professionally installed. The shower base in our design is poured concrete.
Prepare the Shower Wall by Measuring and Dry-Laying Tiles
We included Crema Marfil into our design. An aged marble slab or tile. The tiles are pre-arranged in a variety of sizes on mats. We installed 2" x 2" tiles on the shower's ceiling and floor, and 2" x 4" tiles on the walls.
You can save time by laying down multiple tiles at once. Take some measurements and plan the tile layout ahead of time (Image 1).
In our renovation, we began by tiling the wall opposite the entrance to the shower. We made sure the 82-inch-long shower wall was perfectly vertical by measuring its height and width. If you want to set out your design efficiently, think of "panels," or three horizontal rows of tile.
The next step is to dry-lay the tile panels on the wall, including any ornamental borders, to get a feel for the vertical placement. You can calculate how many boards will fit, where to make your cuts, and where to begin setting.
Our project required a 48-1/2" wide back wall, and we used a mosaic border three inches wide to separate the middle and upper panels of the shower.
Plan out the exact placement of the panels to get an accurate measurement.
After the dry lay is complete, you can figure out where to start installing tiles from the bottom up. The total height of our project, including the mosaic border and multiple panels, is 84.5 inches. We were 72-and-a-half inches from the top of the shower when we began. Because of the necessary trimming, the remaining bottom panels are installed last.
Getting the Shower Ready for Tile
Take out everything inside the shower and start over: The ceiling and shower pan may also need to be removed. Do not use plastic since it will trap moisture and speed up the rotting process. Use a water-resistant paint or another paintable product instead.
Choose a vapour barrier and implement it in accordance with the manufacturer's guidelines: A concrete backer board with a moisture barrier behind it is necessary to prevent water from penetrating into the wall hollow and wall framing. Without a vapour barrier, the moisture from your shower could seep through the tiles and into the walls, encouraging the growth of mould and mildew.
- It can be useful to bond a plastic vapour barrier to the concrete floor but not the ceiling when installing it on an outside wall. Condensation that occurs behind the vapour barrier might cause the framing members to deteriorate if the insulation was put incorrectly or if the climate is particularly cold. To prevent this, ensure there is adequate ventilation in the area behind the vapour barrier during installation. Red Guard and similar roll-on products should be used.
- Wedi boards, an alternative to cement boards, are favoured by some. You can use regular drywall or cement board in place of a membranous barrier like Trugard or Kerdi.
Use a cement board as a solid support: Cement board installation is similar to drywall installation. Using a grinder fitted with a diamond bit, you cut it to size before finally fastening it to the studs. A 1/8-inch margin between panels is recommended, as is a tiny gap between the shower pan and the backer to prevent squeaking. Hitch Property Constructions offers a variety of tile refurbishment services in Melbourne.
- Cut the holes for the shower head and handles using a hole saw fitted with a carbide bit.
- Using shims, bring the cement board out to the desired thickness until it is flush with the tile lip of your shower pan. Composite shims should be used.
- Apply silicone caulk behind the board on the stud to seal the gap between the panels. You should also apply seam tape in the spaces where the seams meet.
Set up the drywall: Crown moulding installed close to the ceiling requires drywall to be installed at a depth of 12 to 18 inches (30.5 to 45.7 cm) rather than cement board. Crown moulding installation requires the use of moisture-resistant drywall, such as green board, because nails will not penetrate the cement backer.
- Drywall used as a backer for tiles would eventually break due to water seeping in through the grout. Because of this, it should be used only high up on the wall, away from any sources of moisture.
When the backer board meets the wallboard, feather the edges with seam tape and thin-set mortar: Seam tape and thin-set cement can be used to make the joint between the backer board and the wallboard disappear, creating the illusion of a seamless wall. Remember that the seam allowance should not exceed 3/16 inches.
Apply a water-resistant priming paint to the surfaces that will be tiled: A high-quality water-resistant exterior primer should be applied over the feathered wallboard and backer to seal the gap.
Installing the Tiles
Carefully outline the first course of tiles and mark them on the substrate: The arrangement of tiles in a shower enclosure becomes more crucial if its walls are not quite square or if accent tiles are to be used. Take a tile's height minus 1/2 inch from the bottom of the backing board ". You'll get a half-point for this "cover the ledge where the tiles and the shower pan meet.
Don't forget to factor in space for the grout lines! Use a sharpie or chalk to make a mark here, and then, with the aid of a level, extend the line across the shower enclosure. Using this as a reference, the top of the first row can be laid flat. If you want a good layout, use only dry tiles.
- Measuring the height and depth of the shower pan is another option for arranging the tiles in the first row. Cut the low end tile down to the level of the uncut tile by first making the cut place a full tile, marking it, and then cutting the high end tiles down to the level of the uncut tile.
- Little tiles and subpar grout joints can be avoided if the grout lines are kept away from the interior corners of the enclosure. Always cut on the inside corner if possible, and plan ahead.
Get some thin-set and make enough for the bottom row: Thin-set should have the consistency of peanut butter; much thicker and it will harden, and any thinner and it will be difficult to set the mortar securely and cleanly.
- Mix your thin-set mortar with the help of an electric drill and a mortar mixing tool. Doing so will guarantee uniformity and, eventually, superior quality. After seven minutes, give the mortar another stir.
- When tiling a shower or tub surround, never use mastic as the glue since it promotes the growth of mould.
Use a sponge to dampen the cement board, then apply the mortar: If you don't do this, the cement board will extract too much moisture from the thin-set, leaving you with a brittle set that is prone to cracking.
Thin-set should be applied to the tile's back and spread using a notched trowel. The term "back buttering" describes this action. To install tiles, first apply mortar to the backer board and back buttering. It's also much tidier now.
- When setting tiles, take care not to use too much mortar. Back buttering requires only a small amount in each corner and a tiny bit more in the centre. When it comes to skinny people, more isn't always better. You should only use a tiny bit of thin-set mortar in each corner, and back buttering is only necessary when working with a bigger tile (8" x 8" or more).
Arrange the first tile so that it is centred on the wall (or floor): It will look nice visually, and the tiles on either side will appear centred. To ensure that the mortar has effectively bonded to the tile and the backer board, it is important to press the tile onto the backer board after back buttering. Finally, tap each tile, especially the floor tiles, with a rubber mallet after giving it a slight twist.
- After pressing the tile onto the backer, any excess thin-set mortar should be wiped away. Although you will be sealing the joints between the tiles using grout and caulk, you should avoid leaving any thin-set on the edges of the tiles. If you find any oozing thin-set, excavate it. Use your finger or a Q-tip to remove any extra thin-set.
- Shims or other spacers can be used to separate the tile's underside from the shower pan lip. Shims can be made out of cardboard scraps. These shims and the caulk between the pan's rim and the tile's bottom can be removed once the mortar has cured.
Keep tiling, making sure to put spacers in between each tile: Grout lines created by spacers are easily visible. To provide an equal grout line, small spacers of 1/16" or 1/8" (or even larger) can be inserted at various points along the x and y axis of the tile.
Each subsequent row of tiles should be placed atop the row below it in the process: If you want to use the entire shower, keep going until you get to the top. Get the height of the previous row's cap. Use a level to mark the line, which will serve as a guide for the next row. Apply thinset with a notched trowel and set the tile so that it is just below the pencilled line. Put some spacers in every hole.
- If you want perfectly level grout lines, you should measure every third or fourth row.
Tiles should be left to dry for two days: This will verify that the mortar has successfully attached to the cement board backer and the tile backing.
Finishing up the Job
Put in tile grout: Prepare a batch of grout, then wait 5–7 minutes for it to dry. Sponge the area that needs grouting with water and then pour some grout there. Smooth it into the joints with a rubber float, attacking each joint at a 45-degree angle. After 30 to 40 minutes (as directed on the grout bag), use a moist sponge and a circular motion to remove any excess grout. Repeat with a fresh sponge until the floor is spotless.
- If the tiles still look cloudy after wiping, polish them with a fresh sponge to remove the residue.
- Before you grout the tiles, you should get rid of any spacers you utilised.
Before sealing, give the grout three days to fully cure: Finish by sealing the grout. Apply a small amount of liquid grout or grout sealer spray along the grout line and wipe it off. Once the grout has dried, you may see how well it resists water by placing a few drops onto the sealed area. Grout that has been properly sealed will cause water to bead up on top of it.
Seal any cracks or gaps. Use colour-coordinating grout caulk to seal the joints. Remember to move the caulking gun across the joint at a fast pace. Inexperienced caulkers typically work too slowly, resulting in excess caulk being spilt onto the floor. Also, keep in mind:
- Run the bead along the joint with an angled point.
- Pull the trigger of the caulking gun at the same rate that you move it along the joint. You must not remove the gun quickly but pull the trigger slowly, or the opposite.
- Caulk should be "bedded" by gently pressing down on it with a damp finger after it has been applied.
- It's important to choose grout chalk that blends in with the grout.
- If you are unhappy with how the caulk turned out, wait for it to dry and try again. Hitch Property Constructions performs a wide variety of residential remodelling services.
Conclusion
The tiles in a shower need to be watertight and aesthetically pleasing, so it is important to ensure that the floor, seams in corners and niches, and fasteners are waterproof before installing tiles. When tiling a shower or bathtub, start at the back wall so that the grout seams on the sides can be concealed. Use latex-modified thin-set mortar, not mastic, and use a 1/4-inch notched trowel to butter thin-set onto the back of each tile. The most important details are that a 5-gallon Bucket for Thin-Set, Ardex X77 Thin-Set (White), 1/16" spacers on the tub, caulk can be used to fill the space between the tub and the tile, and Crema Marfil is an aged marble slab or tile that can be pre-arranged in a variety of sizes on mats. To tile a shower, a cement backer board should be installed in the shower, shower membranes and shower pans should be professionally installed, and the shower base should be poured concrete. Measure the wall opposite the entrance to the shower and plan the tile layout ahead of time. Dry-lay the tile panels on the wall, including any ornamental borders. The most important details are to take out everything inside the shower and start over, choose a vapour barrier, use a water-resistant paint or another paintable product, use a cement board as a solid support, and use shims to bring the cement board out to the desired thickness. Hitch Property Constructions offers a variety of tile refurbishment services in Melbourne. The most important details are that silicone caulk should be applied behind the board on the stud to seal the gap between the panels, and that drywall should be installed at a depth of 12 to 18 inches (30.5 to 45.7 cm) rather than cement board. Seam tape and thin-set mortar should be used to make the joint between the backer board and the wallboard disappear, and a water-resistant priming paint should be applied to the surfaces that will be tiled. Finally, measuring the height and depth of the shower pan is another option for arranging the tiles in the first row. Little tiles and subpar grout joints can be avoided if the grout lines are kept away from the interior corners of the enclosure. Thin-set mortar should be applied to the tile's back and spread using a notched trowel. To install tiles, apply mortar to the backer board and back buttering. Back buttering requires only a small amount in each corner and a tiny bit more in the centre. To ensure that the mortar has effectively bonded to the tile and the backer board, it is important to press the tile onto the backer board after back buttering and tap each tile, especially the floor tiles, with a rubber mallet after giving it a slight twist. Shims or other spacers can be used to separate the tile's underside from the shower pan lip, and the caulk between the pan's rim and the tile's bottom can be removed once the mortar has cured. To create an equal grout line, small spacers of 1/16" or 1/8" can be inserted at various points along the x and y axis of the tile. Each subsequent row of tiles should be placed atop the row below it in the process, and the tiles should be left to dry for two days to verify that the mortar has successfully attached to the cement board backer and the tile backing. To put in tile grout, prepare a batch of grout, sponge the area that needs grouting with water and pour some grout there. After 30 to 40 minutes, use a moist sponge and a circular motion to remove any excess grout. If the tiles still look cloudy after wiping, polish them with a fresh sponge to remove the residue. Before sealing, give the grout three days to fully cure. The tiles in a shower need to be watertight and aesthetically pleasing, so it is important to ensure that the floor, seams in corners and niches, and fasteners are all waterproof before installing tiles. To seal any cracks or gaps, use colour-coordinating grout caulk and run the bead along the joint with an angled point. Caulk should be "bedded" by gently pressing down on it with a damp finger after it has been applied. If unhappy with how the caulk turned out, wait for it to dry and try again. When tiling a shower/bathtub combination, it is important to start at the back wall and use a 1/4-inch notched trowel to butter thin-set onto the back of each tile. You will also need Tuscan SeamClips, Laser Level, Horseshoe Shims, Pencil, Sponge, Tape Measure, Ishii Big Clinker Tile Cutter, Carpet Knife for Thin-Set Removal, Tile Wet Saw (Rent or Buy), 5-Gallon Bucket for Water, Ardex X77 Thin-Set (White), and 1/16" spacers on the tub. If there is a 1/16′′ gap between the tub and the tile, caulk can be used to waterproof the transition. The Big Clinker is a huge tile cutter made by Ishii that can cut tiles as long as 24 inches in length. Take measurements and plan the tile layout ahead of time to ensure the 82-inch-long shower wall is perfectly vertical. Dry-lay the tile panels on the wall, including any ornamental borders, to get a feel for the vertical placement.
Plan out the exact placement of the panels to get an accurate measurement. Choose a vapour barrier and implement it in accordance with manufacturer's guidelines. Red Guard and similar roll-on products should be used to bond a plastic vapour barrier to the concrete floor but not the ceiling when installing it on an outside wall. Ensure adequate ventilation in the area behind the vapour barrier during installation. Wedi boards are an alternative to cement boards, and can be used in place of a membranous barrier like Trugard or Kerdi.
Cement board installation is similar to drywall installation, with a 1/8-inch margin between panels and a tiny gap between the shower pan and the backer to prevent squeaking. Drywall used as a backer for tiles should be used only high up on the wall, away from any sources of moisture, and seam tape and thin-set mortar should be used to make the joint between the backer board and the wallboard disappear. Water-resistant priming paint should be applied over the feathered wallboard and backer to seal the gap. Tiling a shower or tub surround involves taking a tile's height minus 1/2 inch from the bottom of the backing board, measuring the height and depth of the shower pan, cutting the low end tile down to the level of the uncut tile, mixing thin-set mortar with an electric drill and a mortar mixing tool, using a sponge to dampen the cement board, and applying mortar to the tile's back and spread using a notched trowel. Back buttering requires only a small amount in each corner and a tiny bit more in the centre.
When setting tiles, take care not to use too much mortar. Back buttering is only necessary when working with a bigger tile (8" x 8" or more). To ensure that the mortar has effectively bonded to the tile and the backer board, it is important to press the tile onto the backer board after back buttering. Any excess thin-set mortar should be wiped away and shims or other spacers can be used to separate the tile's underside from the shower pan lip. To create an equal grout line, small spacers of 1/16" or 1/8" can be inserted at various points along the x and y axis of the tile.
Finally, tiles should be left to dry for two days to verify the mortar has successfully attached to the cement board backer and the tile backing. Sponge the area that needs grouting with water, smooth it into the joints with a rubber float, and remove any excess grout. Before sealing, give the grout three days to fully cure. Seal any cracks or gaps with colour-coordinating grout caulk. Caulk should be "bedded" by gently pressing down on it with a damp finger after it has been applied.
If unhappy with how the caulk turned out, wait for it to dry and try again. Hitch Property Constructions performs a wide variety of residential remodelling services.
Content Summary
- The tiles in a shower need to be watertight and aesthetically pleasing.
- When tiling a shower wall, it's important to ensure that the floor, seams in corners and niches, and fasteners are all waterproof before installing tiles.
- Setting the porcelain wall tile in a running bond or brick pattern is the next step in making sure it looks beautiful and stays put.
- If this is your first time tiling a shower, it's probably best to get some professional advice first.
- The idea is to avoid thin tiles at the bottom and top of the structure.
- Joint width can be kept uniform around the room by trimming the top course of tiles on all three walls.
- This produces ceiling and shower pan courses that are nearly identical in width, at 6 inches.
- Use latex-modified thin-set mortar, not mastic, when tiling a shower wall or other moist area.
- If you leave a 1/16′′ space between the tub and the tile, the tile won't crack when the tub expands.
- In addition, caulk can correctly fill the space and waterproof the tile-to-tub or tile-to-shower transition if there is a 1/16′′ gap.
- Set the laser level on top of the tub and check the height with the 1/16" horseshoe shim.
- Remember that you've already decided how big the tiles in the first row should be.
- Use a wet saw or tile cutter to cut the first tile to size.
- Cut tiles as long as 24 inches in length.
- After the old tile has been removed, a cement backer board should be installed in the shower.
- The shower base in our design is poured concrete.
- We included Crema Marfil into our design.
- We installed 2" x 2" tiles on the shower's ceiling and floor, and 2" x 4" tiles on the walls.
- Take some measurements and plan the tile layout ahead of time (Image 1).
- We made sure the 82-inch-long shower wall was perfectly vertical by measuring its height and width.
- After the dry lay is complete, you can figure out where to start installing tiles from the bottom up.
- The total height of our project, including the mosaic border and multiple panels, is 84.5 inches.
- We were 72-and-a-half inches from the top of the shower when we began.
- Because of the necessary trimming, the remaining bottom panels are installed last.
- Take out everything inside the shower and start over: The ceiling and shower pan may also need to be removed.
- Choose a vapour barrier and implement it in accordance with the manufacturer's guidelines: A concrete backer board with a moisture barrier behind it is necessary to prevent water from penetrating into the wall hollow and wall framing.
- Without a vapour barrier, the moisture from your shower could seep through the tiles and into the walls, encouraging the growth of mould and mildew.
- It can be useful to bond a plastic vapour barrier to the concrete floor but not the ceiling when installing it on an outside wall.
- To prevent this, ensure there is adequate ventilation in the area behind the vapour barrier during installation.
- Use a cement board as a solid support: Cement board installation is similar to drywall installation.
- A 1/8-inch margin between panels is recommended, as is a tiny gap between the shower pan and the backer to prevent squeaking.
- Cut the holes for the shower head and handles using a hole saw fitted with a carbide bit.
- Apply silicone caulk behind the board on the stud to seal the gap between the panels.
- Set up the drywall: Crown moulding installed close to the ceiling requires drywall to be installed at a depth of 12 to 18 inches (30.5 to 45.7 cm) rather than cement board.
- Drywall used as a backer for tiles would eventually break due to water seeping in through the grout.
- When the backer board meets the wallboard, feather the edges with seam tape and thin-set mortar: Seam tape and thin-set cement can be used to make the joint between the backer board and the wallboard disappear, creating the illusion of a seamless wall.
- Carefully outline the first course of tiles and mark them on the substrate: The arrangement of tiles in a shower enclosure becomes more crucial if its walls are not quite square or if accent tiles are to be used.
- Take a tile's height minus 1/2 inch from the bottom of the backing board ".
- You'll get a half-point for this "cover the ledge where the tiles and the shower pan meet.
- Don't forget to factor in space for the grout lines!
- Use a sharpie or chalk to make a mark here, and then, with the aid of a level, extend the line across the shower enclosure.
- Using this as a reference, the top of the first row can be laid flat.
- If you want a good layout, use only dry tiles.
- Measuring the height and depth of the shower pan is another option for arranging the tiles in the first row.
- Cut the low end tile down to the level of the uncut tile by first making the cut place a full tile, marking it, and then cutting the high end tiles down to the level of the uncut tile.
- Little tiles and subpar grout joints can be avoided if the grout lines are kept away from the interior corners of the enclosure.
- Get some thin-set and make enough for the bottom row: Thin-set should have the consistency of peanut butter; much thicker and it will harden, and any thinner and it will be difficult to set the mortar securely and cleanly.
- Mix your thin-set mortar with the help of an electric drill and a mortar mixing tool.
- Use a sponge to dampen the cement board, then apply the mortar: If you don't do this, the cement board will extract too much moisture from the thin-set, leaving you with a brittle set that is prone to cracking.
- Thin-set should be applied to the tile's back and spread using a notched trowel.
- To install tiles, first apply mortar to the backer board and back buttering.
- You should only use a tiny bit of thin-set mortar in each corner, and back buttering is only necessary when working with a bigger tile (8" x 8" or more).
- Arrange the first tile so that it is centred on the wall (or floor): It will look nice visually, and the tiles on either side will appear centred.
- To ensure that the mortar has effectively bonded to the tile and the backer board, it is important to press the tile onto the backer board after back buttering.
- Shims or other spacers can be used to separate the tile's underside from the shower pan lip.
- These shims and the caulk between the pan's rim and the tile's bottom can be removed once the mortar has cured.
- Keep tiling, making sure to put spacers in between each tile: Grout lines created by spacers are easily visible.
- To provide an equal grout line, small spacers of 1/16" or 1/8" (or even larger) can be inserted at various points along the x and y axis of the tile.
- Each subsequent row of tiles should be placed atop the row below it in the process: If you want to use the entire shower, keep going until you get to the top.
- Get the height of the previous row's cap.
- Use a level to mark the line, which will serve as a guide for the next row.
- Apply thinset with a notched trowel and set the tile so that it is just below the pencilled line.
- Put some spacers in every hole.
- If you want perfectly level grout lines, you should measure every third or fourth row.
- Tiles should be left to dry for two days: This will verify that the mortar has successfully attached to the cement board backer and the tile backing.
- Finishing up the Job Put in tile grout: Prepare a batch of grout, then wait 5–7 minutes for it to dry.
- After 30 to 40 minutes (as directed on the grout bag), use a moist sponge and a circular motion to remove any excess grout.
- Repeat with a fresh sponge until the floor is spotless.
- If the tiles still look cloudy after wiping, polish them with a fresh sponge to remove the residue.
- Before you grout the tiles, you should get rid of any spacers you utilised.
- Before sealing, give the grout three days to fully cure: Finish by sealing the grout.
- Apply a small amount of liquid grout or grout sealer spray along the grout line and wipe it off.
- Seal any cracks or gaps.
- Use colour-coordinating grout caulk to seal the joints.
- Remember to move the caulking gun across the joint at a fast pace.
- It's important to choose grout chalk that blends in with the grout.
- If you are unhappy with how the caulk turned out, wait for it to dry and try again.