If you're a homeowner with a damp or flooded basement, this post may be of use to you. If this is the case, we invite you to continue reading.
Waterproofing the area under a house can lessen the quantity of groundwater and crack-based water that enters the basement. It is possible to waterproof a basement in a variety of ways, including by using sealants and caulks on gaps between floorboards and walls, insulating around pipes, sealing stitching where concrete meets both these materials like brick or stucco, painting or sealing below window boreholes to prevent water from trying to come up through cracks in mortar joints, and installing downspouts away from your home's foundation wall.
FAQs About External Waterproofing
The most effective way to keep water out of your basement is to install an interior drainage system that minimises hydrostatic pressure. By installing drain tile along the joint where the floor meets the wall, where most water leakage occurs, you can capture water before it gets onto the basement floor.
However, concrete is porous. No, water isn't soaked up like a sponge, but concrete does allow water to seep through when there is enough. Concrete also cracks, which will be the first route of seeping water as it leaks through the slab.
There are two types of leaks, those you see and those you don't. While both can cause damage, undetected water leaks can go on for weeks or even months without being noticed.
Several different signs are associated with foundation leaks, including floor damage, buckling floors, foundation movement, door sticking and cracking walls. Poor drainage may also be the cause, requiring that a correct professional downspout or slope issues are present.
Water is absorbed into the ground when it rains until the earth is too saturated to soak up any more water. At this point, the water will begin to rise to the surface, causing hydrostatic pressure to build up against your foundation and basement floors, which leads directly to water seepage into your home.
Basement Waterproofing: A Step-by-Step Guide
Waterproofing a basement improperly or not at all can cause a number of issues. If seepage isn't stopped quickly and effectively, it might cause serious problems. Applying a coat or other product inside the basement so when issue is actually on the exterior walls is a common mistake. The best way to ensure that your basement stays dry will be revealed.
Look Around
If you want to keep water out of your basement, you'll have to excavate around the entire perimeter all the way to the foundation. The success of a waterproofed basement hinges, once again, on the proper application of the suitable substance over the walls.
Sand or crushed stone drainage, perforated pipe, or even other acceptable systems or materials must be erected at or below the region to be protected and emptied into an appropriate drainage system, either by gravity or by mechanical methods.
Explore For Cracks
Once you're done digging, you should wash the wall down and look for any broken spots that could be letting water in. Once these problems have been identified, hydraulic cement should be applied to the walls to seal any openings. The chemical features of hydraulic cement cause it to expand as it cures, filling in the gaps and spaces to minimise the risk of leaks.
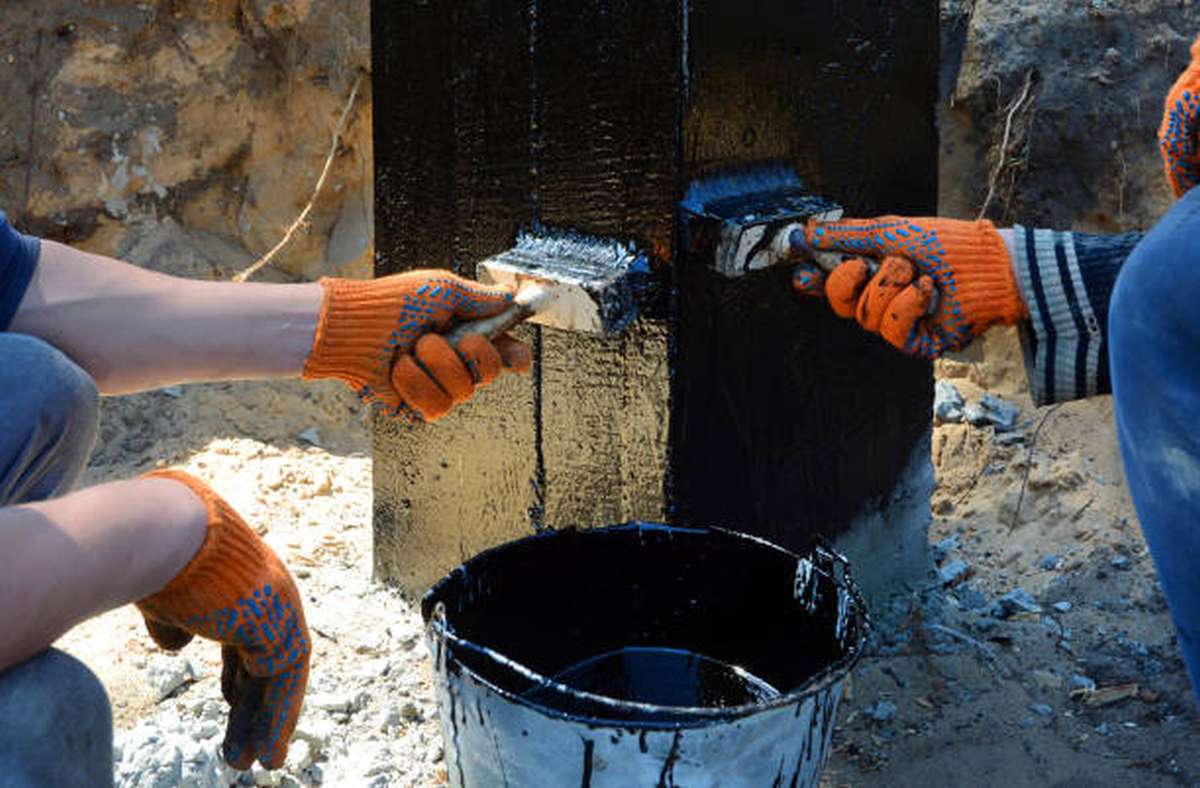
Sealant Should Be Used.
Coat all outside walls with a sealer made of cement. Sealants made with cement are versatile and can be applied to both concrete and masonry. Once it cures, this sealer will harden and prevent water from entering the concrete. This process would be used to conceal a little fissure that wasn't sealed with hydraulic cement in the prior phase.
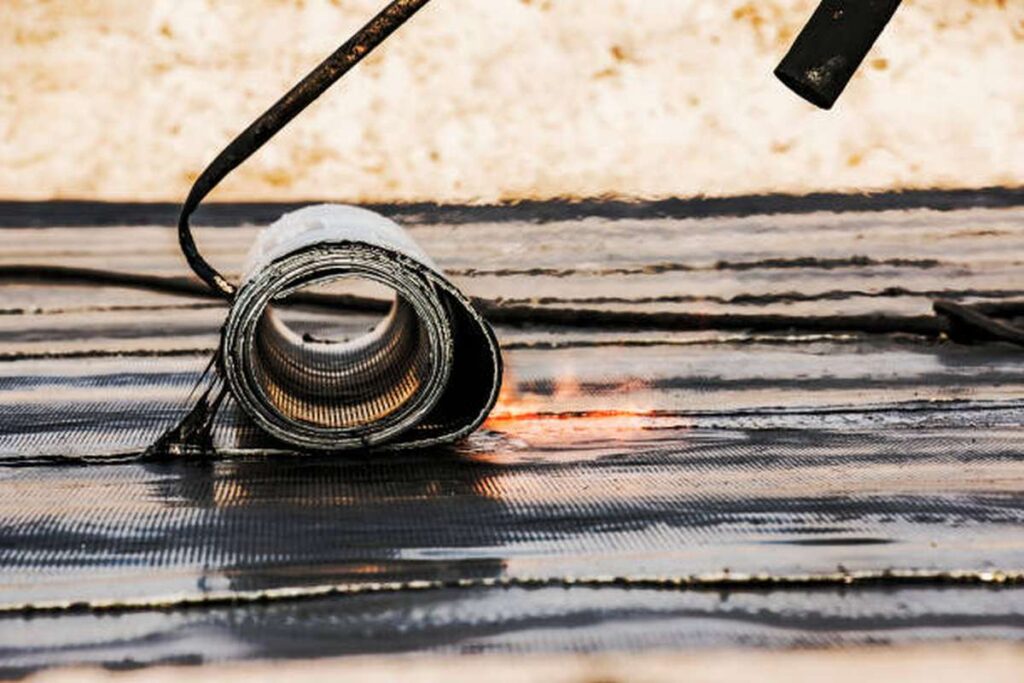
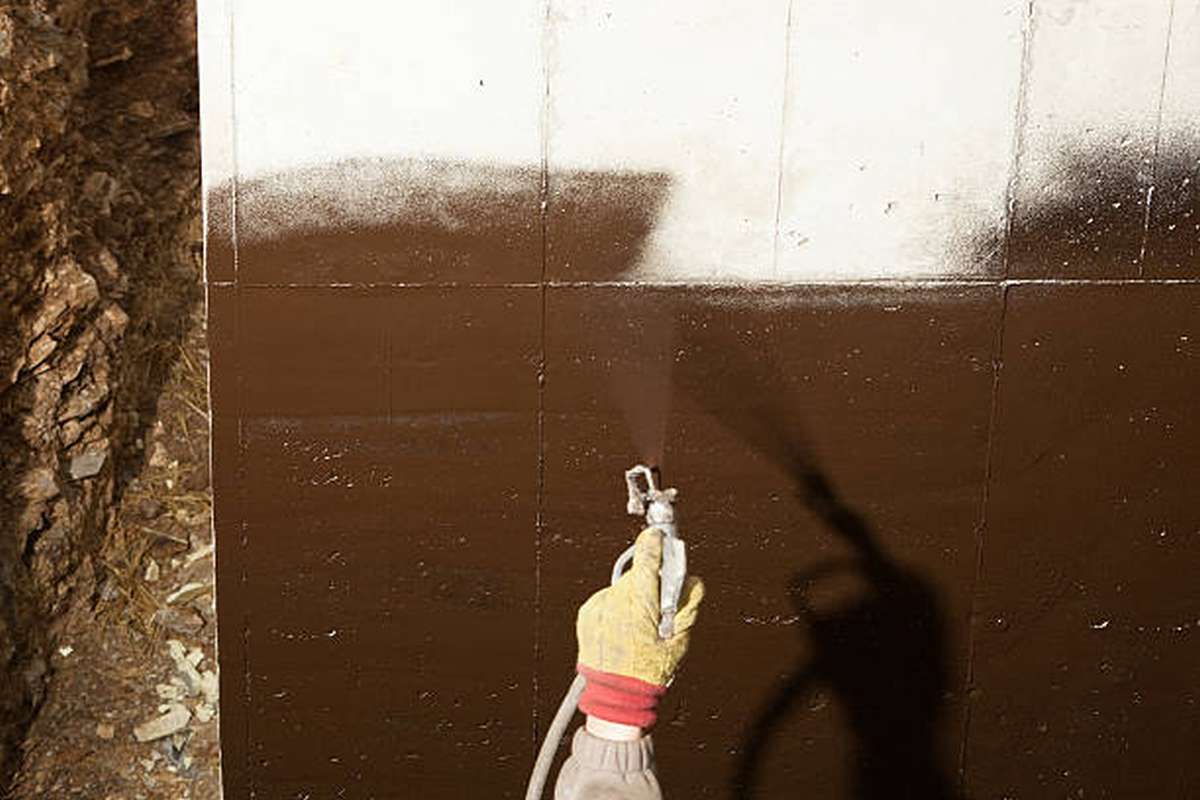
Use A Membrane
Put in a waterproof membrane. The membrane, a bitumen polyurethane substance, can be sprayed or troweled on in a thick layer to completely encapsulate the foundation wall and prevent water infiltration. Waterproofing is a strength of elastomeric membranes, which are produced from modified asphalt.
Elastomeric membranes' ability to sag and stretch to fill in gaps when new cracks appear is one of their primary advantages. Instead of using a damp-proofer product, which is more likely to fail, use a waterproofing product.
Set Up A Drainage Mat
Put down a dimpled drainage mat. The material utilised must provide space between both the wall and the substance itself for the moisture to escape and flow to the drain system. Cutting the drainage mat to the proper depth of the base is essential. It may also reduce lateral loads on the structure's underpinnings.
Finish The French Drain
Arrange the weeping tile or French drain. The pipe, which might be 4" in diameter, must be set up at the bottom of the footing, weeping water out from below its basement floor. Cleanouts should be installed for convenient access during routine maintenance.
Fill up the remaining space with gravel to finish installing the French drain. The recommended depth for gravel is 18 inches below grade for soil areas and 4 inches below grade for cement pours.
What You Shouldn't Do
When sealing a basement's walls and floor, you shouldn't do any of the following:
- Never resort to tar. As time passes, tar dries up and becomes brittle, finally cracking.
- Don't try to seal up dampness in your basement with plastic. Moisture will seep in as the plastic-like material peels.
- Limestone shouldn't be used as filler. Any drainage structures could become clogged because of the limestone that will be there. Make do with gravel.
How Long Do Basement Waterproofing Services Last?
Many homeowners have experienced the frustration of a leaking basement. The first thing you should do if water is seeping into your basement is track down the source of the problem. Check the humidity levels in your home to see if that's the cause of the dampness, or if water is coming in from the outside. Verify the functionality of your downspouts and gutters by clearing out any debris that may be clogging them. Also, make sure the soil grade surrounding your foundation is properly directing water away from the structure.
Waterproofing comes in many forms, so you can pick the one that best suits your needs. It may be necessary to make a substantial initial investment; but, doing so may end up saving you a lot of money in the future. You might well be unsure of how long your weatherproof will last, however, because that is a concern with any major purchase.
What Causes Basement Waterproofing Leaks?
Several waterproofing methods will be employed to address the various root causes of a damp basement. Your leaky basement is usually the result of a combination of factors, the most common of which are:
- Basement walls are cracking
- Substandard backfilling
- Issues with the structure's footing
- Stopped-up or clogged downspouts and gutters.
Waterproofing techniques will differ from homeowner to homeowner depending on the source of the moisture problem. Keeping a basement dry may require using more than one waterproofing technique, and this may be the case for some homes.
Methods Of Basement Waterproofing
Methods that are commonly used to waterproof a basement include:
- Primers and paints designed to repel water are used as sealants both inside and out.
- Injections of crack
- Waterproofing of exterior excavations includes measures like constructing a French sump pit.
- Waterproofing the inside of the excavated area, usually with the aid of a recirculating pump.
Thus, the effectiveness of a certain technique for waterproofing a basement will determine how long that method will survive. Waterproofing primers & crack injections, for example, are not long-term, reliable fixes.
The right waterproofing solution for your basement may be ensured by employing a professional, which will also increase the longevity of the product. You can get a long-lasting, low-maintenance waterproofing solution by employing excavation waterproofing techniques like a French drain.
How To Repair Common Basement Water Problems
In addition to preventing structural damage, improving air quality, reducing utility costs, and opening up the possibility of finishing the basement, waterproofing is a must. Find out what causes water damage in basements, how to cure it, and how much money you should budget for the project.
You probably do not require a professional to inform you that your basement has a moisture problem if you've noticed standing water, walls drips, fog, or mould and mildew. Tracing the root of the problem is a completely different challenge. Assuming the rest of the house is doing its job, a basement should be built to withstand the normal humidity level in its environment. When we wish to finish your basement, which necessitates a higher quality of moisture control, or when another home element calls in sick, problems arise.
According to data gathered by HomeAdvisor, the average cost to fix a water issue in a basement is $2,500. But, this estimation will change greatly depending on how well you can spot issues and fix them on your own. Basements can be built in a variety of ways, and some areas tend to have more issues than others. Let's take a look at a few external and internal factors that can cause dampness in a basement.
Clogged Gutters And Downspouts Outside
Energy.gov (the U.S. Department of Energy) notes that even a modest amount of rainfall on a roof can result in a significant amount of water loss. Insufficient or clogged gutters & downspouts will direct this flow into your basement, despite the fact that guttering is designed to deal with it.
Solution
The most typical external source of dampness in a basement is also the cheapest and least difficult to fix. Check the effectiveness of your system by going outside during a downpour. Rain gutters need to be big enough and sloped the right way to collect water without overflowing.
Water from downspouts should be directed away from the house's foundation and into a water container or another suitable location. Make a plan for regular upkeep that spans the entire year: Common cloggers include leaves and pollen, and in northern areas, winter checkups are crucial to prevent ice damage. It is also possible for roof damage to occur if water freezes in the gutters and expands, forcing ice under the shingles.
DIY Or Professional?
You'll be OK. For more information on gutters and downspouts, check out Energy.gov's comprehensive guide.
Cost
It costs around $3 to $40 per square foot to replace gutters and downspouts.
Outside: The Terrain Around The House
Rainwater can seep into your basement if the land around your home does not slope away from it.
Solution
Energy.gov advises utilising clay-based soil to make a moderate slope that is steepest near the foundation wall and gradually declines by 5 percent over a distance of 10 feet as you move out from the house towards the yard. If the dirt is already getting close to the shingle or siding, you may need to remove it prior to adding more soil so that you can leave a few feet of your block wall visible. Gardening plans should include rain gardens stocked with water-loving native plants rather than low-water use, high-maintenance exotics.
DIY Or Professional?
Unless it's something quite little, you probably shouldn't. Repairing or replacing basement window wells, if they are at fault, is a job best left to the experts. Although though filling in a low spot with soil may seem simple, achieving the proper slope may be challenging if your property is far off grade or if it is rather large. Trying to fix your water woes by making them worse for your neighbour is not a good idea.
Cost
A professional regrading of your property can set you between $1,000 and $3,000. Depending on the condition of the drain below, the cost to replace a window well it could range from $ 500 to $2 000.
Outside: Rising Water Tables And Seasonal Flooding
Housing developments situated in places with a high probability of flooding as a result of either natural flooding or seasonal groundwater increase. In the absence of a properly working drainage system, some houses may experience frequent and severe basement flooding. Because of the difficulty of diagnosis and the high cost of repair, this may be the most frustrating cause of basement moisture.
Solution
A drain (some drains) and, in many cases, a sump pump—a tiny mechanical pump housed in a specially designed pit in the basement—are used to deal with this type of water issue. Most modern homes have at least one drainage system, the largest and most effective of which is often located outside the house and beneath the foundation.
Let's say, for the sake of argument, that your home's outside drain tile system is broken or nonexistent. This could mean a lot of work, including excavating the soil surrounding your house, sealing and freezing the foundation, and possibly putting in a new drainage system with drain tiles pipes and fill. There are also interior drain systems, which save money on foundation excavation.
DIY Or Professional?
Even if you've already mended your gutters and graded the area, you should probably call in the pros to take a look at the situation. An enthusiastic do-it-yourselfer may be able to handle installing a sump pump. Even so, at the absolute least, you'll need to identify the location of your current utility lines and break through some concrete in order to make the pit. The interior and outside installation of a basement drain is a job best left to the experts.
Cost
A new outdoor drain tile new system can cost up to $15,000. Little blockages and pump stations repairs can cost as little as $100.
Outside: Groundwork
Foundations are surprisingly malleable for something as fundamental as a house. They take in air, calm down, and act in accordance with their environment. Since it is porous, concrete is susceptible to groundwater migration into arid regions due to capillary suction & vapour diffusion. This level of wetness rarely calls for a rowboat, but it might lead to mould and mildew in the basement. Cracks in the foundation's floors and walls, especially those that are only cosmetic, are common but usually not a cause for alarm. But, certain cracks will enable air or groundwater to flow into the basement, and this could be an indication of a more serious issue. The size, placement, and orientation of this factor are all crucial.
Solution
When discussing possible repairs to an exposed foundation, we addressed sealing the exterior. Interior barriers can be put in the shape of a barrier (a thick sheet pf plastic) or even a liquid substance that you paint on. It is common practise to construct a membrane barrier in conjunction with just an internal ring drain system, which expels any water that enters a drain.
It is important to think about sealing at the same time as basement waterproofing because there are requirements for the foundation that are met by finished walls and flooring. The issue of breaks: Epoxy, concrete materials, or polyurethane foam can be used to repair minor fractures. Wider cracks could be an indication of underlying problems that will need to be addressed, such as the need to stabilise and reinforce the foundation.
DIY Or Professional?
Effective liquid sealers are generally rich in VOCs; therefore, you can handle the sealing yourself, but you should employ proper ventilation and personal protection. Only tackle minor crack repairs on your own. If you see any cracks in your home greater than 3/16," or if your walls are horizontally expanding, bulging, or bowing, it's best to schedule an appointment with a structural engineer, as suggested by an article by Daniel DiClerico in Consumer Reports News. With such a No. 2 pencil, he examines the joints for damage: If you're able to press a pencil into the yellow paint, it's time to call in the pros.
Cost
If you hire a professional, sealing will cost you $500-$1,000, and mending tiny fractures in the foundation would cost you $250-$800. Repairing more serious foundation problems can cost $2,000. - $10,000 or more. HomeAdvisor cites a median cost of $600 for a foundation inspection report.
External Air Leaks
Finally, air leaks are a manageable external source of basement moisture. Rising wind air inside the house will force wet outdoor air through even the smallest cracks.
Solution
If we want to prevent air leaks, we need to use both sealants and insulation. In its do-it-yourself guide, ENERGY STAR suggests using caulk and spray polyurethane (depending on gap size) for seal all rim joists. All pipe and duct entries that come up from the basement and into the main floor if your home are located at the sill plate, where the walls meets the foundation.
DIY Or Professional?
Doing so is possible, and the cost of the necessary supplies is incredibly low (less than $100). To further motivate you, Consumer Reports says that sealing air leaks may save certain homes $400 on cooling and heating costs yearly.
Plumbing Leaks On The Inside
While we often think of plumbing leaks coming from fixtures like faucets and sinks, a damp basement can also be caused by a poorly constructed heating system or clogged HVAC drain lines. These later offenders are more troublesome because they are typically out of sight.
Solution
Routinely inspect the plumbing and HVAC system for any evident signs of leakage. For instance, check to see if your dryer vent is properly sized (and routed) and that it hasn't become separated within the wall. This is a fairly common problem.
DIY Or Professional?
Both. Regularly checking for even minor plumbing leaks is a must. It is possible that you may need to hire a professional to repair a clogged drain or to install new ductwork.
According to HomeAdvisor, the typical cost to fix a pipe leak is between $150 and $350.00, while the cost to install a dryer vent is between $80.00 and $200.00.
Conclusion
Waterproofing the area under a house can lessen the quantity of groundwater and crack-based water that enters the basement by using sealants and caulks, insulating around pipes, sealing stitching, painting or sealing below window boreholes, and installing downspouts away from the foundation wall. Waterproofing is a strength of elastomeric membranes, which can be sprayed or troweled on in a thick layer to completely encapsulate the foundation wall and prevent water infiltration. Waterproofing is essential for preventing structural damage, improving air quality, reducing utility costs, and opening up the possibility of finishing the basement. The average cost to fix a water issue in a basement is $2,500, but this can vary depending on how well you can spot issues and fix them on your own. Homeowners should use clay-based soil to make a moderate slope that is steepest near the foundation wall and gradually declines over a distance of 10 feet as they move out from the house towards the yard.
Repairing or replacing window wells is best left to the experts. Do-it-yourselfers may be able to install a sump pump, but the interior and outside installation of a basement drain is best left to the experts. Liquid sealers are high in VOCs, so it is important to employ proper ventilation and protection. The most important details are that if you see any cracks in your home greater than 3/16" or if your walls are horizontally expanding, bulging, or bowing, it is best to schedule an appointment with a structural engineer and hire a professional to repair them. To prevent air leaks, use sealants and insulation, caulk and spray polyurethane, and regular checking for plumbing leaks.
Content Summary
- If you're a homeowner with a damp or flooded basement, this post may be of use to you.
- Waterproofing the area under a house can lessen the quantity of groundwater and crack-based water that enters the basement.
- The best way to ensure that your basement stays dry will be revealed.
- Once these problems have been identified, hydraulic cement should be applied to the walls to seal any openings.
- Coat all outside walls with a sealer made of cement.
- Put in a waterproof membrane.
- Fill up the remaining space with gravel to finish installing the French drain.
- Don't try to seal up dampness in your basement with plastic.
- Thus, the effectiveness of a certain technique for waterproofing a basement will determine how long that method will survive.
- The right waterproofing solution for your basement may be ensured by employing a professional, which will also increase the longevity of the product.
- Find out what causes water damage in basements, how to cure it, and how much money you should budget for the project.
- Tracing the root of the problem is a completely different challenge.
- According to data gathered by HomeAdvisor, the average cost to fix a water issue in a basement is $2,500.
- Let's take a look at a few external and internal factors that can cause dampness in a basement.
- Insufficient or clogged gutters & downspouts will direct this flow into your basement, despite the fact that guttering is designed to deal with it.
- SolutionThe most typical external source of dampness in a basement is also the cheapest and least difficult to fix.
- Check the effectiveness of your system by going outside during a downpour.
- For more information on gutters and downspouts, check out Energy.gov's comprehensive guide.
- Repairing or replacing basement window wells, if they are at fault, is a job best left to the experts.
- In the absence of a properly working drainage system, some houses may experience frequent and severe basement flooding.
- Let's say, for the sake of argument, that your home's outside drain tile system is broken or nonexistent.
- The interior and outside installation of a basement drain is a job best left to the experts.
- SolutionWhen discussing possible repairs to an exposed foundation, we addressed sealing the exterior.
- Effective liquid sealers are generally rich in VOCs; therefore, you can handle the sealing yourself, but you should employ proper ventilation and personal protection.
- Only tackle minor crack repairs on your own.
- If you see any cracks in your home greater than 3/16," or if your walls are horizontally expanding, bulging, or bowing, it's best to schedule an appointment with a structural engineer, as suggested by an article by Daniel DiClerico in Consumer Reports News.
- CostIf you hire a professional, sealing will cost you $500-$1,000, and mending tiny fractures in the foundation would cost you $250-$800.
- External Air LeaksFinally, air leaks are a manageable external source of basement moisture.
- SolutionIf we want to prevent air leaks, we need to use both sealants and insulation.
- To further motivate you, Consumer Reports says that sealing air leaks may save certain homes $400 on cooling and heating costs yearly.
- SolutionRoutinely inspect the plumbing and HVAC system for any evident signs of leakage.