
There are a wide variety of products on the market that can be used to waterproof your home, both on the inside and the outside. An interior barrier is distinct from an exterior coating. Water damage can be prevented from occuring inside the house by installing interior barriers, while exterior coatings can do the same for the exterior. You should also be familiar with membrane liners, which provide a protective layer over any surface they are applied to. Homeowners can pick and choose among these various options to find the perfect one for their needs.
Frequently Asked Questions About Managing Roof Leaks
Most roof leaks are caused by one of five common factors: people, issues with seams, neglect, rooftop equipment, and weather. Prevention is, of course, better than repair. However, once you get to know the main offenders, you can develop a strategy to avoid problems before they arise.
There's no definite answer to how long you can leave a leaking roof before it causes damage. So many variables come into play here, so it's always best to play it safe and get your roof leak fixed as soon as possible.
The national average cost for roof leak repair is between $400 and $1,000, with most people paying about $750 for a minor to moderate leak issue on an asphalt shingle roof that requires patching and shingle replacement. At the low end of the price range, you can get a single, small roof leak fixed for about $150.
Renew flashing seals by chipping out the old mortar and caulking along the edges of the flashing. Next, use a special masonry caulk to seal the joints between the flashing and the chimney. Next, seal the seam between the cap and step flashing with a urethane roofing cement or silicone caulking compound, shown at right.
Your homeowner's insurance policy generally covers roof leaks and other damage to your roof, as long as the cause of the damage is not specifically excluded in your policy. However, if a leak occurs due to a lack of maintenance, you may have to pay for the repairs yourself.
Managing Roof Leaks
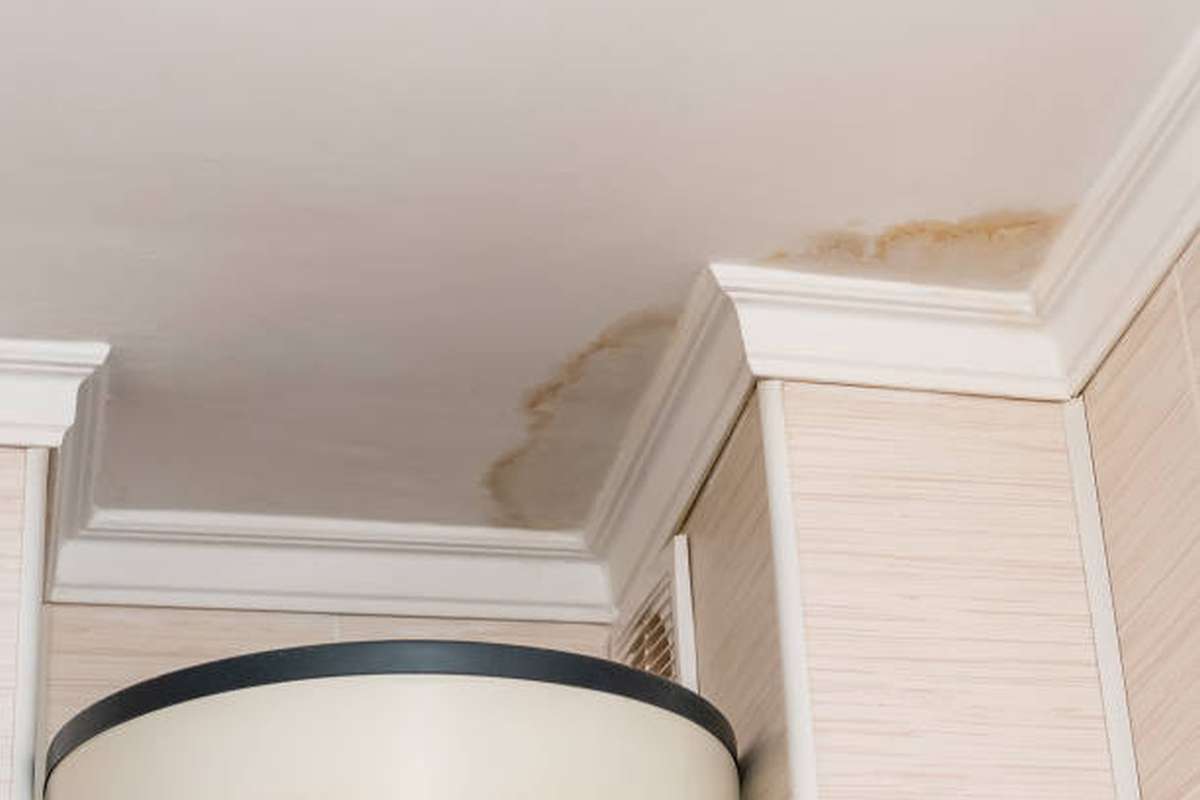
A roof that is leaking is not something to be taken lightly. Even roof leaks that don't seem very significant can result in significant water damage over time. If you track down that your roof is leaking, you should take immediate measures to mitigate the damage as much as you possibly can. Engage a qualified roofing contractor to analyse, identify, and instal a new leak-proof roof. If you find that your roof is leaking, you should not disregard the problem! Instead, you should get in touch with your roofing contractor as soon as possible, and in the meantime, you can manage roof leaks by following the procedures below.
Minimise Interior Damage
The first stage in handling a leaking roof is minimising the damage to the interior of your home. After calling a roofer to schedule a repair, or if it's the weekend or after hours, perform this step. This entails relocating the furniture, removing anything of value or sentimental significance from the space, and covering the floors and walls with watertight materials such as an extra tarp or plastic rubbish bags.
Before applying your waterproof coating to the floor, make sure that any standing water has been removed by soaking it up with some absorbent material. This will prevent moisture from becoming trapped against the surface. If water is dripping down an inside wall because of the leaky roof, you can also place a plastic barrier to the wall to prevent the water from entering.
If the ceiling appears to be sagging or bulging as though it were full of water, take the necessary precautions to safeguard the area around it and then make a small hole in the ceiling to let the water out. This will assist in preventing future damage to the drywall that is located around the area.
The next step is to position a large bucket or another container underneath the leak to collect the water as it falls. Be sure to cover the area around the container with protective plastic, and try not to leave it unattended for more than a reasonable amount of time. Even a large bucket can get full much more quickly than you might think it would.
Look Into The Crawlspace As Well As The Attic.
Grab a flashlight and proceed to the attic or crawlspace if you have access to either of those areas. It is possible to locate the source of the leak in your attic or crawlspace by observing where it first appears in the ceiling below. However, keep in mind that the path that water takes after escaping through a roof that is leaking can be misleading.
The path that water takes after escaping through a roof leak is not a straight line. Instead, water will normally migrate downwards from the damaged roof in the direction of the nearest joint when there is a roof leak. After reaching that point, the leak will locate an exit point, at which point it will produce the leak that you can see in your ceiling. This escape route is typically a weak place in the ceiling's drywall or the aperture for a fixture, such as a vent or ceiling lamp. Alternatively, it may be an opening in the roof.
Even if you discover the location where the water appears to be entering the attic or crawlspace, it will be difficult to determine the source of the leak in the roof itself due to the fact that this condition exists. However, this procedure can still assist you in better localising the spot at which water is getting into the house. It also gives you the ability to construct an additional barrier that prevents the water from rising to the ceiling.
In order to construct the barrier, first position a sheet of plywood over the joists in your crawlspace or attic and then position a huge bucket on top of the plywood to collect any water that may drip down. It is not a bright idea to put the bucket directly on the drywall that is located between the joists because it can crack when it is filled with water. Instead, make it a habit to climb the ladder on a regular basis to dump the water!
Use A Bottle Funnel To Divert The Water That Is Leaking.
A bottle funnel can be used to reroute water away from the home so that it does not require frequent emptying of a bucket or other container. This is an ideal solution for anyone who would prefer to avoid the hassle of doing so. In addition, the solution involving the bottle funnel can be implemented inside the house, where the water is coming in through the ceiling; nevertheless, for the greatest degree of efficacy in preventing water damage, it is best implemented in the attic.
Grab a large bottle or plastic jug that has been cleaned and dried out to use as a funnel for the roof leak. You will need to cut the bottle in half so that one end has a broad aperture and the other end has the bottleneck. After that, get a hose. It must reach from the leaky roof to the building's nearest window or exit.
Tape or glue one end of the hose to the funnel's bottleneck. The wide end of the funnel should be positioned over the leaking area, and using the same robust adhesive, it should be attached firmly in place. You should now be able to place the other end of the hose outside through a window or door, and the water should run through the funnel and safely exit the house.
Examine From A Distance
After you have temporarily mitigated the damage to the interior of your home, including the attic or crawlspace, it is time to examine the roof of your home while standing outside the structure. Once more, finding the origin of a leak from the spot in the ceiling where water is coming through might be challenging. Investigating the roof by itself can help you piece together the puzzle. It's possible that you'll be able to recognise potential issues from a close range, but it's also possible that you'll need to take a step back and examine the roof in its entirety.
You can accomplish this by using binoculars to "zoom in" on your roof while standing on the lawn or across the street from it. Because it can be difficult to view the top of your flat roof from the ground, this method is simpler and more successful when used to roofs that have slopes.
Using this method, it is possible that signs of damage will be visible, such as a tree limb that has fallen on the roof or a missing shingle; but, it is also possible that you will need to go inside for a closer look in order to determine the source of the leak.
Examine Your Roof For These Potential Sources Of Water Damage
Going up onto your roof to look about and figure out what's causing the leak in the first place is the next thing to do, but only if you're sure you can do it safely and securely. It is preferable to take care of a leaking roof from the ground level and wait for expert assistance to arrive if you have a roof that is particularly high up or has a steep slope. At the same time, if your roof is not too high off the ground and you have the gear necessary to adhere to roof safety procedures, you might decide to look into the matter on your own. As soon as you have climbed to the top of the roof, begin looking for the following possible sources of a leak:
Materials For Roofing That Are Either Old Or Brittle.
As a result of their inherent tendency to degrade over time, roofing materials gradually lose some of their water resistance and, as a result, their ability to protect the home from damage caused by precipitation. Look for areas of the roof that appear to have become extremely brittle or weathered over time (lifting edges, crumbling materials, melted tar).
The Flashing Has Been Damaged.
Flashing made of metal is used at roof junctions and transitions where there is either heavy water flow or the possibility of absorption. Flashing is an essential component in the process of preventing roof leaks in your house, and old or damaged flashing is one of the most common factors contributing to roof leaks.
Check for flashing around the borders of features like skylights and vents, as well as where the chimney passes through the roof. Flashing should also be present where the roof joins a dormer. Check the flashing to see if there are any pieces that have lifted because the caulking has dried out and cracked or sections that have moved out of position as a result of missing nails.
Shingles That Are Missing Or Have Risen Up.
If you have a roof that is covered in shingles, it is possible that it could sustain damage from storms that include high winds, heavy rain, or snow. Extremely windy conditions have the potential to lift a weak shingle and possibly totally rip it off the roof. In the area where a shingle is missing or has become loose on your roof, there is an increased risk of water infiltration. When you are checking the condition of your roof, you should glance at the shingles to ensure that they are all lying level and flat, and that none of them are missing.
Pooling Water On Flat Roofs.
If you have a flat roof, it is likely built of waterproof membranes and tilted at a very little angle (typically about a 1 percent slope) to help shed water from the surface of the roof. However, waterproofing materials can degrade over time or become damaged, resulting in a reduction in their ability to keep water out. If you have a flat roof, water that pools up or stands still is one of the most likely culprits behind roof leaks.
The Roof Is Covered In Debris.
A further way that stormy and windy weather can cause roof leaks is by causing a pile of debris, such as trash, on the roof. It's possible for things like leaves, pine needles, and twigs to come together to form a layer of debris that can trap water against the surface of the roof, which will eventually lead to it leaking through. Examine your roof for any accumulations of debris that might be the source of a leak.
In addition, search for larger debris such as tree limbs that may have fallen and caused damage to the roofing components by puncturing or otherwise weakening them.
Blocked Gutters.
It is essential to have gutters installed on your roof in order to prevent water from accumulating and penetrating the roofing components. In addition to this, they ensure that water, such as precipitation and melted snow, runs down the roof in the correct direction, which is downward. If the gutters on your home are clogged with leaves or other debris, then water won't be able to escape, which could lead to a leak in the roof.
Remove the Leaves and Any Other Small Debris
Sweep the debris off the roof gently, or reach into the gutter to dislodge the obstruction if you observe any leaves or other small debris stacking up on your roof or blocking gutters. If you see this, take action immediately. Be cautious to perform careful maintenance on your roof and gutters, as vigourous sweeping or shaking of gutters can cause much more significant damage to the structure.
Take Away Any Dead Branches And Tree Parts
Next, examine the area for any large tree branches that may have fallen and, if you find any, remove them with extreme caution while keeping an eye out for any underlying damage. You will be responsible for filling in any holes or repairing any damaged areas created by the falling limb. It is okay if there are times when you are unable to clear large debris or tree limbs from your property on your own. It is preferable to delegate this task to professionals because certain debris from the roof will need to be broken up into smaller pieces.
If you are unable to remove a tree limb in a secure manner—for instance, if you are unable to lift the limb without becoming unstable, or if moving the limb could cause additional damage to the roof—simply cover the area as best you can to prevent additional water from entering through the roof. If you are unable to remove a tree limb in a secure manner, cover the area as best you can.
Remove any debris and soak up any water that has pooled.
If you discover a spot or numerous spots where water has pooled or is standing on your flat roof (or low-sloped roof), you should carefully sweep the water downwards off of the roof. If you have a flat roof that is easily scratched and gouged, use a soft broom and sweep gently. This is crucial for flat roofs.
Be careful not to step on or apply pressure to the region where water has pooled, as it may be weakened as a result of the water. You can use a towels or map to soak up any pooled water that is still present in order to further decrease the possibility for water damage.
Using A Tarp Or Plastic, Cover The Area.
Whether you notice a shingle that is damaged, water that is gathering on the roof, or a tree limb that has fallen, you will need to make a temporary repair to the area until assistance can arrive. You can accomplish this task on your own in the quickest and most efficient manner by using a tarp (or a sheet of polythene sheeting) and many wooden boards measuring two by four inches.
To begin, place two boards on either side of the plastic sheet to create a sandwich. The next step is to nail the two boards together on either side, which will ensure that the plastic sheet stays in place securely. Pull the sheet tight to cover the area, then lay the boards level.
- If your roof is level, you may simply stretch the tarp out evenly across the damaged area, leaving plenty of room on both sides of the tarp. Place the boards such that they will help hold the covering in place.
- If you have a roof that slopes in one direction, you can secure the covering in place by placing one pair of planks (one side of the tarp) over a peak in the roof in that direction.
Putting a tarp over your roof to temporarily stop a leak should be done carefully so as not to damage the shingles or place undue stress on any one area of the roof. In addition, you should avoid nailing or stapling the tarp directly to the materials that make up the roof, since this can lead to additional leaks.
Be sure that the boards are dense enough on all sides to effectively hold the sheet in place and prevent the sheet from being lifted by the wind from underneath. It is possible for your roof as well as the roofs of your neighbours to sustain damage if the boards are not securely fastened. After you have set up the tarp, you will need to monitor the situation on a regular basis, particularly if you have a flat roof, to ensure that water does not collect inside the tarp itself.
Be Sure to Keep These Rooftop Safety Tips in Mind
Be sure to understand and adhere to these rooftop safety recommendations before stepping up on your roof to look for the source of a leak or to temporarily patch a leaky roof. Even if you do not have the appropriate equipment, you should make every effort to control the leak both within the house and on the ground level until expert assistance arrives.
Don't take risks.
If you have a phobia of heights, a particularly steep and high-up roof, or a roof made of slate or tile, it is better to control roof leaks as best you can from within the home and the attic instead of going up on the roof. This is necessary if you have a roof made of slate or tile.
In the event that you are not adequately prepared, repairing a roof leak is not worth the risk of injury to both yourself and your roof that it could entail.
Hold off till the weather improves.
When your roof leaks, it's likely that it's rained extensively recently. You should never go up to the roof until the weather has improved and it is no longer raining, windy, or displaying signs of lightning. You shouldn't go up there until the weather improves, even though it's tempting.
Always work in pairs or groups.
It is strongly discouraged that you ascend to the top of your roof by yourself. In any accident, you need outside help. When you need goods brought up to you from below, having a partner who can act as a middleman might also be advantageous.
Make sure that you correctly use your ladder.
Check the condition of your ladder and fix it if necessary. Place it on a surface that is stable and level. To ensure that your ladder is not difficult to reach when descending, you should extend it so that it is at least three rungs above the edge of your roof.
In order to prevent the ladder from becoming unstable while you are climbing it and going down it, you should ask someone to hold the base of the ladder for you. You can also prevent the ladder from moving by attaching tie-down straps to the gutter spikes and securing them to the ladder. It is important to not bring anything up or down the ladder with you.
Put on the appropriate clothing.
When you go up on the roof, you should always wear sturdy shoes or boots that have good traction and soles made of rubber. This will assist prevent you from falling. When working on rooftops that are more than 10 feet high, workers are required to wear a safety harness in several states. If there is sunshine, you should also protect yourself from the sun's potentially harmful rays by donning a shirt with long sleeves and using sunscreen.
What Are The Consequences Of Ignoring A Roof Leak?
It is important to have knowledge of how to make temporary repairs to roof leaks and how to manage water damage until help arrives. However, hiring a qualified roofing professional as quickly as possible to repair the damaged roof is of even greater importance. Here is what can occur if you choose to ignore a roof leak instead of repairing it, even if it is a relatively minor one.
More expensive repairs.
Avoiding a leak won't help. On the other hand, ignoring a leaking roof will invariably result in more expensive repair bills in the future once the damage has become more severe.
Mould.
Neglect a roof leak can lead to mould remediation, which is costly and unpleasant. Mold is not only dangerous to the structure of your home, but if it is allowed to grow unchecked, it can also cause allergic reactions and illness in people as well as in their pets.
It resulted in a shorter lifespan for roofs.
Changing out a roof is a labor-intensive project that no one wishes to undertake too frequently because of its difficulty. A roof that has a history of persistent water damage will need to be replaced much more quickly than one that is in good condition but will eventually need to be replaced.
Different Kinds Of Materials That Are Used For Waterproofing
The process of making an item or structure waterproof or water-resistant, so that it remains relatively unaffected by water or resists the ingress of water under specified conditions, is known as waterproofing. This process can also be referred to as water-proofing. These items are suitable for use in damp environments as well as underwater up to certain depths. The terms water-resistant and waterproof are frequently used to refer to the infiltration of water in its liquid state and possibly under pressure. On the other hand, the term "damp proof" refers to the resistance to humidity or dampness. The following is a list of the many different kinds of materials that can be used for waterproofing. The following is a guide to the various types of materials that are used in the process of waterproofing.
Polyurethanes
In order to produce polyurethanes, a polyol, which is defined as an alcohol containing more than two reactive hydroxyl groups per molecule, is reacted with either a diisocyanate or a polymeric isocyanate in the presence of appropriate catalysts and additives. Because polyurethane can be produced using a wide variety of diisocyanates and a wide range of polyols, a wide spectrum of materials can be produced to meet the requirements of various applications.
Polyurethane, also known as PUR and PU, is a type of polymer that is made up of organic units that are linked together using carbamate (urethane) links. There are both thermosetting polyurethanes, which do not melt when heated, and thermoplastic polyurethanes, which do melt. The majority of polyurethanes are thermosetting polymers. The traditional and most common method for the formation of polyurethane polymers involves the reaction of a di- or triisocyanate with a polyol. Polyurethanes are considered to be alternating copolymers due to the fact that they are composed of two distinct types of monomers, each of which polymerizes in turn. Both the isocyanates and the polyols that are utilised in the production of polyurethanes contain, on average, two or more functional groups within each individual molecule. Polyurethanes are utilised in the production of a variety of products, including high-resilience foam seating, rigid foam insulation panels, microcellular foam seals and gaskets, durable elastomeric wheels and tyres (such as roller coaster, escalator, shopping cart, elevator, and skateboard wheels), automotive suspension bushings, electrical potting compounds, high-performance adhesives, surface coatings and sealants, synthetic fibres, carpet underlay, and hard-plastic parts, among other things Polyols and di- and tri-isocyanates are the primary components that go into the production of polyurethane. The processing of the polymer can be aided by the addition of other materials, and the properties of the polymer can be altered by such additions.
Coating of Cementitious Material
A cementitious coating is a coating that has Portland cement as one of its components and is held on the surface by a binder. Cementitious coating is also known as a cement-based coating. Cementitious coatings offer substrates resistance to corrosion; for instance, steel can be protected from corrosion by keeping the pH level above 4.0 at the metal/coating interface. This is because steel corrodes at a slower rate in this pH range, and cementitious coatings take advantage of this phenomenon. The cementitious coating is a cementitious modified polymer coating that is thixotropic, two-component, and cementitious. Both concrete and steel benefit from the coating's excellent adhesion properties. This coating not only defends against the damaging effects of aggressive acid gases, moisture, and chlorides, but it also is resistant to chemical assaults on concrete and other substrates. The substrate is covered with a coating that is highly elastic, hard, and alkaline as a result of this coating. In ground conditions that are contaminated with sulphate, the cementitious coating provides protection for the concrete.
The cementitious coating can be utilised for the purpose of structural waterproofing, both internally and externally, of concrete and other mineral substrates. In addition to being helpful for roofs and decks, it is also useful for underground structures. Additionally, the cementitious coating can protect highways and coastal structures from an environment containing chlorides, and it can also increase the durability of reinforced concrete.
EPDM Rubber
EPDM rubber, commonly known as ethylene propylene diene monomer rubber, has several uses. According to ASTM standard D-1418, EPDM is classified as an M-Class rubber; the M class is comprised of elastomers that have a saturated polythene chain (the M deriving from the correct term polymethylene). EPDM is a type of rubber that is produced by combining ethylene and propylene with a diene comonomer that enables crosslinking to occur through the vulcanisation of sulphur. EPR, also known as ethylene-propylene rubber, is an older relative of EPDM. Unlike EPDM, EPR does not contain any diene units and can only be crosslinked through the use of radical methods, such as peroxides. Ethylidene norbornene (ENB), dicyclopentadiene (DCPD), and vinyl norbornene are the three types of dienes that are utilised in the production of EPDM rubbers (VNB). EPDM is produced from polythene that has had between 45 and 85 weight percent of propylene copolymerized into it. This is done to reduce the formation of the typical polythene crystallinity.
EPDM is a semi-crystalline material that has ethylene-type crystal structures at higher ethylene contents. However, when the ethylene content gets closer to 50 weight percent, the material essentially becomes amorphous. Rubbers with saturated polymer backbones, such as EPDM, have a much better resistance to heat, light, and ozone than unsaturated rubbers, such as natural rubber, SBR, or polychloroprene. Natural rubber is the most common type of unsaturated rubber (Neoprene). As a result, EPDM can be engineered to withstand temperatures up to 150 degrees Celsius, and if it is properly engineered and used outside, it can withstand the elements for many years or even decades without degrading. In addition, EPDM has excellent properties even when exposed to temperatures as low as -40 degrees Celsius; depending on the grade and the formulation, EPDM maintains its elasticity down to these temperatures. A roll of fleece-backed EPDM flashing, which is used for waterproofing roofs and other surfaces. As with most rubbers, EPDM is always combined with carbon black, calcium carbonate, and paraffinic oils. Furthermore, EPDM only possesses useful rubbery properties after being crosslinked. Crosslinking happens most commonly through a process called vulcanisation with sulphur, but it can also be achieved through the use of peroxides (for improved heat resistance) or phenolic resins. Foams, wire, and cable can sometimes be produced through the utilisation of electron beams and other forms of high-energy radiation.
Bitumen
Both residential and commercial structures can benefit from the protection provided by bituminous waterproofing systems. Bitumen, also known as asphalt or coal-tar pitch, is a substance that is a mixture of organic liquids that are extremely sticky, viscous, and waterproof. Bitumen is also known as a pitch. Roofing felt or roll roofing products are two examples of the types of roofing products that can be constructed using these systems.
The construction of roads accounts for the majority of bitumen's applications (about 70 percent), where it is utilised as the adhesive or binder that is combined with aggregate particles to produce asphalt concrete. Another one of its primary applications is in the production of bituminous waterproofing products, such as roofing felt and sealant for flat roofs. The properties of bitumen alter depending on the temperature, which means there is a certain temperature range in which the viscosity allows for adequate compaction by providing lubrication between particles while the process is being carried out. However, because of the low temperature, the aggregate particles are unable to move, and it is therefore impossible to achieve the required density.
Roofing Felt
The base material that is used in the production of roof shingles and roll roofing is roofing felt, which is comparable to tar paper. These bitumen compositional membranes have been used for decades as waterproof coverings in residential and commercial roofs. Each membrane is composed of two layers. The first layer of the underside is a solid background made of a polymer membrane, which is frequently reinforced with glass fibres. The self-protective top layer is composed of mineral granules, and a bituminous mixture serves to encase both of these layers in its entirety. Felt paper is typically used as an underlayment (sarking) beneath other building materials, most notably roofing and siding materials, and it is one type of membrane that is utilised in asphalt built-up roofing (BUR) systems. Other typical applications for felt paper include the following: The reasons for this are to "...detach the roof covering from the roof deck...direct water away from the building... [and] provide additional protection from the weather...." A roof that is required to meet Underwriters Laboratory (UL) fire ratings must have a rapid application of roofing underlay because it protects the roof deck during construction until the roofing material is applied. In re-roofing applications, the separation of the roof covering from the roof deck protects the roof covering from the resins that are present in some sheathing materials. Additionally, the separation cushions unevenness caused by old nails and splinters. Additionally, the underlayment repels water that may penetrate the roof covering as a result of a common leak, a leak caused by wind-driven rain or snow, wind damage to the roof covering, or ice dams. All of these types of water intrusions are prevented by the underlayment. However, the installation of underlays can raise the temperature of the roof, which is the primary factor in the accelerated ageing of asphalt shingles. Additionally, felt paper creases when it gets wet, which can (occasionally) be seen through asphalt shingles. If an underlay is not installed, the warranty on the roof covering may be null and void.
Asphalt Mastic (Mastic)
Mastic asphalt, also known as MA, is a dense mixture that is made up of coarse aggregate, sand, fine limestone aggregate, filler, and bitumen. It may also contain additives (for example, polymers, waxes). The proportion of empty space in the mixture is purposefully kept to a minimum. However, the amount of binder used is adjusted in such a way that the voids are filled, and there is a possibility that there may even be a slight surplus of binder. It is possible to pour mastic asphalt, and it can also be spread when it is at its working temperature. There is no need for on-site compaction with this.
It is one of the few membranes that can handle consistent heavy foot and vehicular traffic, including Heavy Goods Vehicles, and still maintain its waterproof integrity due to its durability and seamless application. This makes it one of the few membranes that can handle HGVs. Because there is no application that is too complicated, it is also simple to repair in the event that alterations or damage occur. The fact that mastic asphalt can be laid down quickly is yet another significant benefit of using this material, as it helps keep the overall costs of the project in check. In addition to this, it rapidly cools, allowing foot traffic to resume within two to three hours, depending on the temperature of the surrounding environment.
The waterproof membrane is quickly becoming the material of choice for a variety of different buildings, including schools, offices, shopping centres, hotels, and even churches, as it provides such excellent wear against the extremes of weather and has a life expectancy of at least 50 years. In addition, the membrane has a life expectancy of at least 50 years.
Thermoplastic
A thermoplastic, also known as a temperature softening plastic, is a type of plastic polymer that, when heated to a specific temperature, softens and can be moulded, but returns to its rigid state when cooled. The molecular weight of most thermoplastics is relatively high. As the temperature rises, the intermolecular forces that hold the polymer chains together become progressively more weakened, resulting in the formation of a viscous liquid. Thermoplastics can be reshaped when they are in this state. They are typically used to produce parts by employing a variety of polymer processing techniques such as injection moulding, compression moulding, calendering, and extrusion when they are in this state. The curing process of thermoplastics results in the formation of chemical bonds that cannot be broken, in contrast to the thermosetting polymers (also known as "thermosets"). When subjected to high temperatures, thermosets do not melt but instead decompose and do not reform after being cooled.
Waterproof TPU fabrics are created by adhering a thermoplastic polyurethane membrane to a base textile, such as a fabric made of nylon or polyester, in order to produce a wide variety of high-performing materials that are able to keep their flexibility while also being durable and watertight.
TPU possesses an impressively long list of desirable material characteristics. It is resistant to chemicals, ozone, oxygen, oil, and fuel, as well as abrasion and tearing, and it has excellent bending and tensile strength, a large elongation break, low-temperature resistance, and a low long-term deformation rate. Additionally, it is resistant to tearing. TPU fabrics keep the base material's flexibility as well as its pliability and softness. The combination of these characteristics results in technical textiles that are capable of withstanding extensive wear as well as environmental stressors in a wide variety of applications. In addition, textiles that have been coated with TPU are resistant to UV rays, can withstand severe weather and environmental conditions, and can withstand abrasions as well as punctures. When used in conjunction with seals that are glued or welded, these fabrics have an excellent capacity for holding air and liquid.
Waterproofing Membrane in Sheet Form
These are membranes that are delivered to the location in the form of rolls, as the name of the product suggests. After that, these are unfolded and laid out on a stable surface. The bituminous waterproofing membrane is the type of sheet-based membrane that is used the most frequently. Blowtorches are utilised in the process of adhering this kind of membrane to the substrate using a hot tar-based adhesive.
Additionally, the same hot adhesive is used to join adjacent membranes together to form joints. After that, a joint that is waterproof is created by overlapping the sheets by approximately 100 millimetres (four inches). In order to join certain membranes, first they are melted with a hot air gun, and then the melted membranes are laid over one another on the sheet that was previously laid. When using this kind of membrane, the joints between the sheets are extremely important and have to be done perfectly to prevent leakage.
PVC Membrane for Waterproofing Applications
After the polyvinyl chloride (PVC) resin, the polyvinyl chloride (PVC) waterproofing volume material joins processing assistants and so on plasticiser, anti-ultraviolet ray medicinal preparation, anti-aged medicinal preparation, stabiliser, and then it squeezes out the law production formation the high polymer waterproofing volume material. This material has one performance that is outstandingly high quality. Due to the fact that this product makes use of a one-of-a-kind product formula, the product life has significantly surpassed that of the available waterproofing material; the lifespan of the entire waterproofing system is substantial; the lifespan of the roofing exceeds for 30 years, the lifespan of the underground surpasses for 50 years, and the lifespan of the civil engineering obtains widespread application in the construction industry.
The polyvinyl chloride waterproofing membrane, also known as PVC, is a modern roofing material that is made of high-quality flexible polyvinyl chloride that has been plasticized. There are both reinforced and unreinforced membranes available, and their use is determined by the application area. Roofs can be waterproofed with a membrane that is reinforced with polyester mesh or glass fibre, and this membrane is typically used for the purpose of waterproofing the roofs of buildings. The longevity of reinforced membranes is significantly increased. Membranes that are not reinforced are more flexible, have a high resistance to tearing, and are capable of waterproofing subterranean structures, tunnels, and swimming pools. It is important to emphasise the vapour permeability of the PVC waterproofing membrane because it is one of the characteristics of this material. Because of this property, the material has the potential to allow moisture to escape from the attic space of the building.
Liquid Applied Membranes
Liquid applied membranes arrive at the job site in liquid form, which is then sprayed or brush-applied on the surface; the liquid then cures in the air to form a joint-free, seamless membrane. Liquid applied membranes are also known as spray-on membranes. By applying a greater quantity of the liquid chemical to a given area, one can adjust the layer's thickness. To prevent the formation of cold joints, a contractor will finish the entire area that needs to be waterproofed in a single day because the application process takes very little time. However, if a very large area needs to be treated over the course of multiple days, cold joints can be easily created by layering the new membrane over the old one and overlapping them. The chemical will readily adhere to itself in this situation.
Since there are no joints in these, they are generally regarded as being of higher quality than sheet-based membranes. On the other hand, application requires caution in order to achieve the desired degree of thickness. If the membrane is too thin, it has the potential to tear or break. In addition to this, the membrane's adhesion to the concrete must be of a high quality. Sand broadcasting is used to create a rough surface on a waterproofing membrane prior to the application of a concrete screed (layer) on top of the membrane. This involves spreading a thin layer of sand over the wet membrane by hand (before the membrane has completely hardened), so that the sand adheres to the membrane and provides a rough surface to which the concrete can adhere. This step is done before the membrane has fully hardened.
What Exactly Is Meant By The Term "Waterproofing Membrane"?
A thin layer of material that is used to prevent water from coming into contact with another material that is placed on top is called a waterproofing membrane. It is possible for waterproofing membranes to have an adhesive backing or to simply be laid on top of the material that they are meant to protect. Waterproofing membranes can be fabricated from a wide variety of materials, and they are offered for sale in a wide range of dimensions and levels of thickness.
There are a variety of applications for waterproofing membranes, including covering concrete, which is one example. At the same time, it is being shaped to stop water from compromising the structural integrity of the concrete or the coating on products that will be submerged in water and where there is a risk of corrosion.
Conclusion
In order to redirect water away from the leaking roof, you can use a bottle funnel. Installing it in the attic will provide the greatest protection against water damage. If you're standing on the street or in the yard, you can "zoom in" on your roof with binoculars. You should check your roof for any signs of damage, such as a missing shingle or a branch that may have fallen on your roof. You should inspect the roof for any spots that are particularly brittle or worn.
Among the many causes of roof leaks, flashing that has aged or been damaged is a prominent culprit. Wind damage from extreme conditions might result in leaks in the roof. Check for debris buildups on your roof, as these could be the cause of a leak. Gutters should be placed such that water flows off the roof rather than pooling and soaking the materials below. Check the area for any downed huge tree limbs, and if you discover any, remove them carefully while keeping an eye out for deeper problems.
Cover the area as best you can if you can't safely remove the tree branch. Care must be taken when placing a tarp over a leaky roof so as not to harm the shingles or put too much pressure on a single spot. If the boards aren't properly fixed, they could come loose and cause damage to your roof or your neighbours'. Leaks in the roof are best managed from the safety of the house and the attic if you suffer from a fear of heights. Join forces wherever possible.
Ensure that the ladder is in good working order and that you know how to properly use it. Knowing how to make quick fixes to roof leaks is crucial. Avoid the unpleasant and expensive task of mould treatment by fixing any leaks immediately. Roofing that has been prone to water leaks should be replaced sooner than a roof that is otherwise in good shape. To waterproof something is to make it resistant to water or water damage.
Being water-proof or damp-proof are other names for waterproofing. Listed below are some examples of the materials utilised in this procedure. Polyurethane (PUR) and polyurethane (PU) are both names for the same polymer. All of its organic building blocks are held together via carbamate bonds. High-resilience foam seating and stiff foam insulation panels are only two examples of the many uses for polyurethanes in modern manufacturing.
Substrates can be protected from corrosion by cementitious coatings. The coating's superb adhesive capabilities are useful on both concrete and steel. Cementitious coatings can be used to make concrete and other mineral substrates watertight. It also has the potential to lengthen the life of reinforced concrete. At greater ethylene concentrations, the semi-crystalline EPDM takes on a structure similar to that of ethylene.
It is possible to design EPDM to withstand temperatures as high as 150 degrees Celsius. Bitumen is a compound of organic liquids that is both waterproof and highly sticky and viscous. Most bitumen uses are in the road-building industry (about 70 percent). The manufacturing of bituminous waterproofing goods, such as roofing felt and sealant for flat roofs, is another one of its principal uses. Bitumen is utilised as the foundation for both roof shingles and roofing rolls.
Felt paper is commonly used as an underlayment for roofing and siding materials. It's a common membrane used in BUR (built-up roofing) systems that use asphalt. Before the roofing material is put, the roof deck must be protected by underlayment. Mastic asphalt is a durable membrane that can withstand high volumes of both foot and vehicle activity. In only a few hours, it will have cooled down enough to allow pedestrian traffic to continue normally.
The waterproof membrane is rapidly replacing other materials in construction. There is a plastic called a thermoplastic that can be shaped when heated but hardens again when cooled. Thermoplastic polyurethane (TPU) fabrics are made by bonding a TPU membrane to a foundation fabric. They retain their pliability alongside toughness and waterproofness. The most common type of sheet-based membrane is the bituminous waterproofing membrane.
Blowtorches are used to adhere this membrane to the substrate. One performance in particular stands out as particularly impressive for this material. Polyvinyl chloride (PVC) waterproofing membranes are widely used in contemporary roofing. It is possible to find membranes with or without reinforcements. A contractor will complete the entire area that needs waterproofing in one day to avoid cold joints.
In order to reach the necessary thickness, sand must be carefully applied while creating a rough surface on a waterproofing membrane before applying a concrete screed (layer). A membrane that is too flimsy risks rupturing, as its strength decreases with increasing thickness.
Content Summary
- You may redirect the leaking water with a bottle funnel.
- Grab a large, dry container or plastic jug to serve as a funnel for the dripping roof.
- Then, go get a hose and start spraying.
- Attach the hose's opening to the top of the funnel using tape or adhesive.
- Check It Out From Afar
- After securing the interior of your home (including the attic or crawlspace) for the time being, you should inspect the roof from the exterior.
- Signs of damage, such as a tree limb that has fallen on the roof or a missing shingle, may be immediately apparent using this method, but it is also conceivable that you will need to go inside for a closer look in order to identify the source of the leak.
- Investigate These Possible Causes Of Roof Leaks
- The next step is to climb up onto the roof, but only if you are confident in your ability to do so safely and securely, in order to investigate the source of the leak.
- After reaching the roof's peak, you should check for leaks in the following places:
- Damaged or outdated roofing materials.
- Old or damaged flashing is a typical cause of roof leaks, so replacing it is an important part of keeping water out of your home.
- You should inspect the flashing around any roof penetrations, such as the chimney or a skylight.
- Your roof is more likely to leak in the region where a shingle is missing or has fallen loose.
- Check for debris buildups on your roof, as these could be the cause of a leak.
- Installing gutters is crucial for keeping water off of your roof and away from the shingles and flashing.
- Roof leaks can occur if water is unable to escape through clogged gutters.
- If you see leaves or other small debris piling up on your roof or blocking your gutters, gently sweep it off the roof or reach into the gutter to eliminate the impediment.
- Be cautious to do attentive maintenance on your roof and gutters, as vigourous sweeping or shaking of gutters can cause much more substantial damage to the structure.
- It's fine if you need help from a professional every once in a while if you can't get to a big pile of junk or a downed tree limb on your own.
- Cover the area as best you can if you can't safely remove the tree branch.
- Pick up the litter and mop up the standing water.
- In the event that you find a pool of water or several areas where water is standing on your flat (or low-sloped) roof, you should carefully sweep the water downwards off the roof.
- The quickest and easiest way to do this on your own is using a tarp (or a sheet of polythene sheeting) and lots of two-by-four-inch hardwood boards.
- Build a "sandwich" by stacking two boards on either side of the plastic sheet.
- Pull the sheet tight to cover the space, then set the boards level.
- Place the boards such that they will help hold the covering in place.
- Care must be taken when placing a tarp over a leaky roof so as not to harm the shingles or put too much pressure on a single spot.
- If the boards aren't properly fixed, they could come loose and cause damage to your roof or your neighbours'.
- Before climbing up on your roof to investigate a leak or do a quick repair, be sure you fully grasp and strictly adhere to these safety guidelines.
- Be cautious.
- I would suggest waiting until the weather improves.
- Getting on top of your roof by yourself is not a suggestion that should be taken lightly.
- Verify that you are employing the ladder properly.
- Take a look at your ladder and correct any problems you see.
- Shoes or boots with adequate traction and rubber soles are essential for any trip to the roof.
- There are a number of states that mandate the use of safety harnesses for anyone working on a roof higher than 10 feet.
- However, it is even more crucial to swiftly hire a certified roofing professional to restore the damaged roof.
- Here's what may happen if you overlook a roof leak, even a small one, rather than fixing it.
- Extra costs for repairs.
- Leak prevention is useless.
- Mould.
- If you ignore a roof leak, you'll have to deal with the unpleasant and expensive task of mould cleanup.
- Waterproofing refers to the process of treating an object or building to make it impervious to, or resistant to the intrusion of, water under predetermined conditions.
- The term "water-proofing" can be used interchangeably with this method.
- These objects can be used underwater to a specific depth and are also resistant to the effects of humidity.
- Most of the time, when people talk about water infiltration, they're referring to liquid water that may be under some degree of pressure, hence the terms water-resistant and waterproof are commonly employed.
- Several types of waterproofing materials are described below.
- This article serves as a reference for the many waterproofing materials available today.
- Polyurethane's versatility in production allows for a wide range of materials to be manufactured to fulfil the needs of a wide variety of applications, as it can be made utilising a wide variety of diisocyanates and polyols.
- Thermoset polymers account for the vast bulk of all polyurethanes.
- Polyurethane polymers are typically formed by reacting a di- or triisocyanate with a polyol, which is the standard and most widely used technique.
- Polymers can have their processing facilitated and their characteristics modified by the use of supplementary components.
- Construction using Cementitious Layers
- Cement-based coating is another name for cementitious coating.
- When compared to unsaturated rubbers like natural rubber, SBR, or polychloroprene, the resistance to heat, light, and ozone in rubbers with saturated polymer backbones like EPDM is significantly higher.
- A spool of EPDM flashing with a fleece backing, ideal for use in preventing water seepage through roofs and other porous surfaces.
- Bitumen
- Bituminous waterproofing technologies are effective in protecting both commercial and residential buildings.
- These techniques can be used to create a wide variety of roofing materials, including roofing felt and roll roofing.
- The manufacturing of bituminous waterproofing goods, such as roofing felt and sealant for flat roofs, is another one of its principal uses.
- Felt Material For Roofs
- Roofing felt, which is similar to tar paper, is used as a base material in the manufacturing of roof shingles and roll roofing.
- For many years, roofs on homes and businesses have relied on bitumen composite membranes for their waterproofing capabilities.
- Felt paper is one kind of membrane used in asphalt built-up roofing (BUR) systems, and it is often utilised as an underlayment (sarking) beneath other building materials, especially roofing and siding materials.
- The resins inherent in some sheathing materials can be harmful to roof coverings during re-roofing installations if they come into contact with them.
- The underlayment serves to stop any and all of these water leaks.
- However, underlays can increase roof temperature, the principal reason in the accelerated ageing of asphalt shingles, thus care must be taken when installing them.
- Felt paper wrinkles when wet, making its presence known even through asphalt shingles.
- The roof covering's warranty may be voided if an underlay is not placed.
- Bitumen with Cement (Asphalt Mastic) (Mastic)
- Often abbreviated to "MA," mastic asphalt is a dense blend of coarse aggregate, sand, fine limestone aggregate, filler, and bitumen.
- Mastic asphalt can be poured and distributed when it is at its working temperature.
- It's one of the only waterproof membranes that can withstand regular, heavy foot and vehicle traffic, including HGVs, without compromising its waterproof integrity.
- Additionally contributing to the project's bottom line favourably is the rapidity with which mastic asphalt can be installed.
- Since the waterproof membrane provides such outstanding wear against the extremes of weather and has a life expectancy of at least 50 years, it is rapidly becoming the material of choice for a wide range of diverse buildings, including schools, businesses, shopping centres, hotels, and even churches.
- Thermoplastic
- To make a wide range of high-performance materials that are flexible while also being robust and impermeable, a thermoplastic polyurethane membrane is adhered to a base textile, such as a fabric made of nylon or polyester.
- The most common type of sheet-based membrane is the bituminous waterproofing membrane.
- The seams between sheets of this membrane are crucial and must be completed with precision to avoid leaks.
- Today's latest roofing materials, such as the PVC waterproofing membrane, are fabricated from plasticized polyvinyl chloride of the highest quality.
- One of the features of PVC waterproofing membrane is its vapour permeability, which should be emphasised.
- Membranes that are applied in the form of a liquid are also commonly referred to as spray-on membranes.
- The thickness of a layer can be altered by applying more of the liquid chemical to a smaller or larger region.
- A membrane that is too flimsy risks rupturing, as its strength decreases with increasing thickness.
- The membrane's ability to adhere to the concrete surface must also be of the highest standard.
- Prior to placing a concrete screed (layer) over a waterproofing membrane, a rough surface is created by disseminating sand over the membrane.
- Waterproofing membranes can be adhered to the surface they are protecting or simply put on top of the material.
- Waterproofing membranes are available for purchase in numerous diameters and thicknesses, and can be made from a wide range of materials.