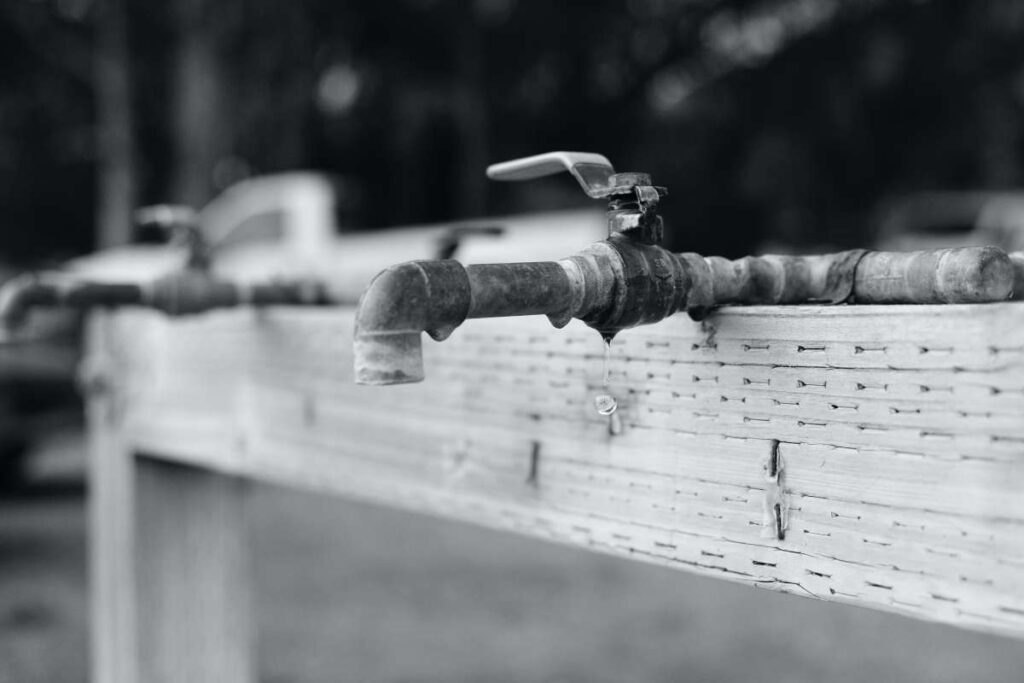
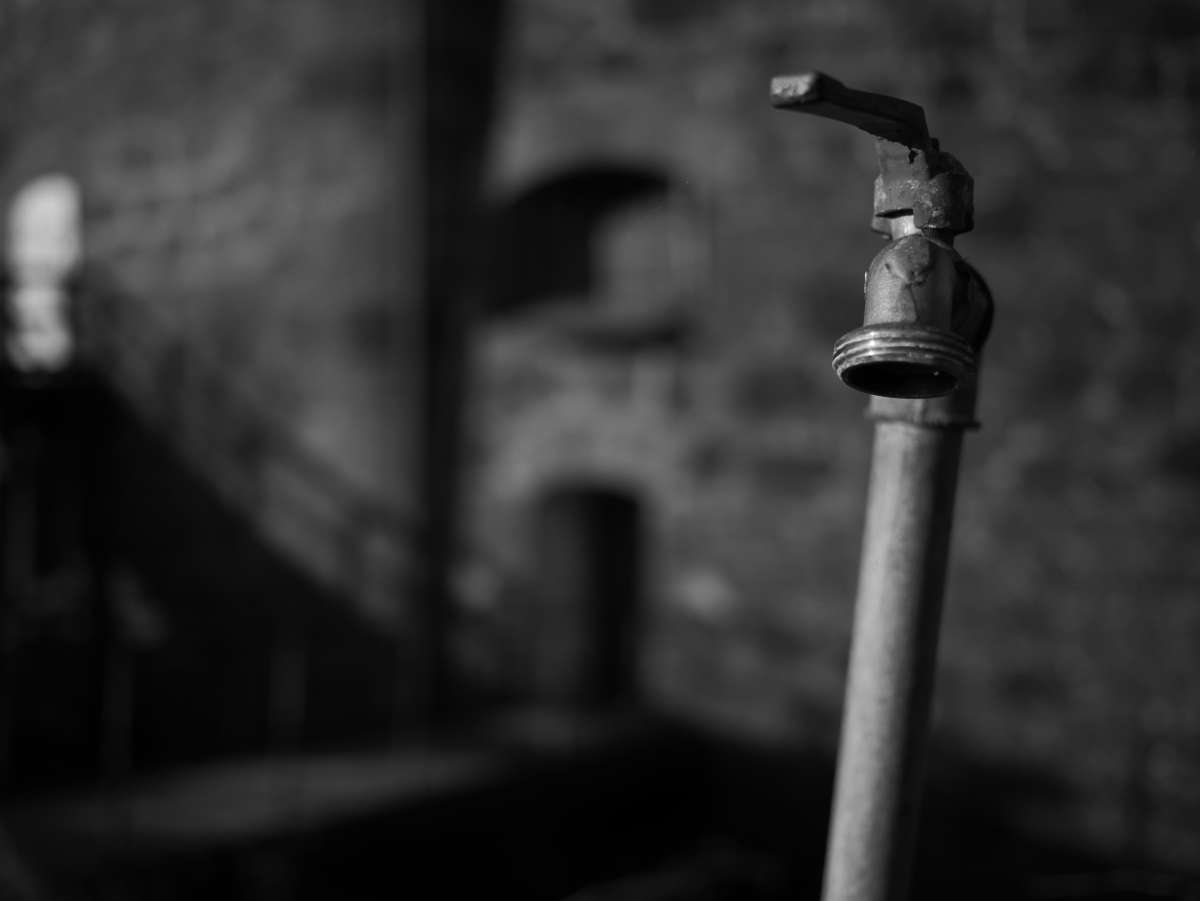
If your kitchen or bathroom faucet is dripping, you should fix it immediately. Every little bit of water that goes to waste adds up, but the good news is that the fix can be easy enough for a casual DIYer to implement.
The purpose of this article is to provide guidance on mending a dripping sink. With the correct skills and equipment, it's actually rather simple.
If you have any experience with plumbing at all, you should be able to follow along with us as we go through each step.
A dripping single-lever kitchen faucet can be fixed in a matter of minutes. Join us while we demonstrate. Even a plumbing amateur can complete the repair with relative ease.
Tools Required
- Slip joint pliers
- Allen wrench
- 4-in-1 screwdriver
- Pliers
Materials Required
- O-ring seals
- Faucet repair kit
It may seem difficult to fix your own faucet, but modern faucets are actually rather simple to repair once you know the essentials. Finding the appropriate replacement parts is typically the most challenging aspect of fixing a leaking faucet.
The three most common kinds of single-lever faucets are rotary ball, cartridge, and ceramic disc; in this post, we'll tell you where to locate replacement components and show you how to fix a dripping spout.
The methods we demonstrate for fixing a leaky kitchen faucet are also applicable to the vast majority of single-lever bathroom faucets.
We'll also demonstrate how to repair leaky faucets and seal the area surrounding the spout's foundation.
The specific equipment required to fix a leaking faucet will vary slightly from one kind of faucet to the next.
In all likelihood, an Allen wrench will be required to take the handle off. In order to be ready for any kind of dripping sink, you should invest in a set of tiny Allen wrenches. Large slip-joint pliers and screwdrivers are also typically needed for fixing things.
Leaky Faucet Repair Procedures

Rotary Ball Faucet Anatomy
See how a rotary ball faucet is put together in the diagram below.
Note: The ball, springs, seats, and O-rings for the spout, as well as a tiny repair tool, can be found in a repair kit, which we advise you to purchase. This toolkit has everything you need to fix just about anything.
Loosen the Allen Screw
The water supply should be cut off to the faucet that is leaking.
To gain access to the Allen screw, raise the handle and take off the ornamental cover.
Lift the handle off the stem by turning the screw anticlockwise until it is free enough to do so.
Note: If water is dripping from the base of the faucet's handle, you can try tightening the adjustment ring to stop the leak without having to replace the handle.
Use the provided spanner to rotate it clockwise. The seats and springs should be replaced if water is dripping from the faucet's spout.
Remove the Cap
The cap can be removed with slip-joint pliers by rotating it in a counter - clockwise direction.
Take Out the Rotating Ball
- Take off the plastic cam and pack.
- Pull the ball out to examine it.
- If the ball is damaged in any way (crazing, cracks, etc.), you should get a new one.
Get Rid of the Old Seats, and Change the Springs
- With a screwdriver, remove the two rubber seats and the springs.
- New rubber seats can be pressed into place over the top of the springs by using a fingertip.
- Drop the ball into the socket so that the groove faces the pin.
- Place the plastic cam over the ball, making sure the lug lines up with the notch in the valve body.
- Place the cap with the adjustment ring on top and screw it on as tightly as possible using the slip-joint pliers.
- Check for leaks by turning on the water supply.
Helpful Hint: Use the spanner to tighten the adjustment ring if water is leaking around the ball stem. Just switch out the faucet's handle if it starts dripping again.
You Can Fix Your Faucet by Following These Simple Steps
Find the source of the dripping water by carefully inspecting the faucet before proceeding. Fixing a leak at the base of the spout is different from fixing a leak at the fixture's tip.
Then, stop the faucet from dripping by cutting the water supply to it. The shutoff valves are most likely located under the sink. In the event that those don't work or you don't have any, you'll need to turn off the water supply to your entire property.
After turning off the water, open the faucet halfway to release pressure and double-check that it is completely turned off. Then, use rags or strainer baskets to plug the holes in the sink so that no little parts fall in.
As you disassemble, please pay careful attention to the parts' order and alignment. You can avoid forgetting any of the steps by recording them with a digital camera or video camera.
Keep the pieces in the sequence in which they were taken apart. When you have all the information, you can check the inside of the valve for worn gaskets or mineral deposits.
To clean the surface, use a soft cloth or a fine nylon abrasive pad. Soaking mineral deposits in vinegar will help loosen them.
Water pressure is reduced when pores in the faucet body are clogged. You can clean them with a penknife or tiny screwdriver.
A rag can be used to catch any dislodged debris from cleaning and inspecting the faucet before the worn pieces are replaced and the faucet is reassembled.
After reassembly, the faucet should be opened halfway before the shutdown valves are fully extended to turn on the water supply.
Don't close the sink's water supply until all the air has been released from the pipes. If water pressure is low and the faucet seems to be leaking, check the aerator. Take apart the aerator and scrub it thoroughly.
Take the Broken Parts to the Store and Ask for New Ones to Be Installed
The name of the manufacturer is usually imprinted on the spout. As an added bonus, knowing this will aid in tracking down replacement components. The worn components should be taken to the store whenever possible.
You may find repair kits for your Delta or other rotary ball faucet at most home improvement outlets. Cartridges and repair kits for Moen faucets that use these cartridges are also widely available.
But, if you have a disc-type faucet or a different brand, you may need to acquire components online because there are simply too many possible configurations for stores to offer them all.
Finding a replacement cartridge for a faucet is easier if you know the model number or name of the faucet. If it doesn't work, you'll need to bring the cartridge into the shop so they can compare it to a picture in the parts book.
You can also get useful replacement components in stores that specialise in plumbing supply. Call the faucet's maker for assistance locating replacement components.
Cartridge-Style Faucet Anatomy
- Cartridge-style faucet parts and assembly.
Remove the Allen Screw
- Carefully use a knife to take off the top of the handle.
- To take it off the handle, you'll need to turn the Allen screw counter - clockwise.
Remove the Metal Handle Adapter
- Remove the dome from under the handle by unscrewing it.
- The metal handle adapter can be removed by unscrewing its screws.
- Release the plastic pivot stop.
Pull the Retainer Nut Out
- Using big slip-joint pliers, unscrew the retainer nut by rotating it in a counter - clockwise direction.
Detach the Retaining Clip
- Remove the brass clip holding it together by prying it out with a screwdriver.
- In order to keep the clip from falling out of your pocket, you should use pliers to extract it.
Twist Loose the Cartridge
- To remove the cartridge, place the plastic spanner cap that came with the replacement cartridge over it and twist.
Replace Worn Parts and Reassemble the Faucet
- Grab the cartridge stem with pliers and pull it straight up and out.
- Get rid of the broken parts and replace them.
Reassemble the Faucet
Put the faucet back together in the reverse order. After the cartridge has been inserted, the stem can be pulled up.
Note:
- You may have to twist the cartridge slightly to line it up for the brass retainer clip.
- Use the plastic spanner cap or the tips of needle-nose pliers to rotate the cartridge.
- Slide the brass clip into the slots in the valve body to hold the cartridge in place.
- Look for the small notch on top of the stem and rotate until the gap faces you. Finally, install the remaining parts and reattach the handle.
- Here's where the included stem instructions come in handy.
- Test the faucet.
- If the hot and cold water is reversed, remove the handle, dome assembly and handle adapter and rotate the stem 180 degrees.
FAQS About Repairing a Faucet
One way to check for a leaking faucet is to turn off all the water in your home and monitor your water meter. If the meter continues to run, even when all water is turned off, it's likely that you have a leak somewhere in your home. You can also check for visible signs of leaking around the base of the faucet or underneath the sink.
It's possible to fix a leaky faucet yourself if you have the right tools and some basic plumbing knowledge. However, if you're unsure of your abilities or if the problem is more complicated, it's best to hire a professional plumber.
The tools you'll need to fix a leaky faucet depend on the type of faucet you have. Generally, you'll need a set of wrenches, a screwdriver, pliers, and possibly a specialized tool like a faucet valve seat wrench.
It's usually more cost-effective to repair a leaky faucet rather than replace it. However, if the faucet is old or severely damaged, it may be more practical to replace it altogether.
The amount of time it takes to fix a leaky faucet depends on the complexity of the problem and the type of faucet. Simple repairs can be completed in as little as an hour, while more complicated repairs may take several hours or require multiple visits from a plumber.
All About Cartridge-Style Faucet Repairs
Several faucet brands employ a cartridge of some type. We demonstrate the procedure using a Moen cartridge, but it applies equally well to cartridges from other manufacturers.
Removing the cartridge and replacing the O-rings, if necessary, or replacing the cartridge entirely should fix any dripping at the spout or hot/cold mixing issues.
Take the cartridge to the home centre or hardware store to find a replacement.
Moen faucet replacement cartridges come with a plastic spanner cap that may be twisted and loosened to make the cartridge easier to remove.
Don't be shocked if the cartridge seems stuck. To extract it might require a lot of effort. Difficult cartridges may necessitate the employment of a specific cartridge-pulling tool.
Ceramic Disc Faucet Anatomy
- A ceramic disc faucet's parts and assembly.
Unscrew the Handle
- Pry off the ornamental screw cover with your fingernail or the tip of a knife.
- Turning the screw counter - clockwise with an Allen wrench will allow you to remove the handle.
- Liftoff the handle.
- Unscrew or unclip the cap.
Remove the Disc Cartridge
- The disc cartridge can be removed from the faucet body by removing the screws holding it in place.
Replace the Seals in the Cartridge
- Check the cartridge for mineral deposits, and give it a thorough cleaning if necessary.
- The rubber seals should be replaced once you've finished.
Replace the O-ring Seals
- Take out the plastic disc (on some faucets) and replace the O-rings under it.
- Check the openings in the faucet body and clean them out if they're clogged.
Ceramic Disc Faucets 101
Cartridges are one kind of valve, and ceramic disc valves are another. Discs inside the cartridge control the water flow.
This valve is extremely durable and dependable, requiring little maintenance. The cartridge is also often covered by a manufacturer's lifetime warranty. Find out if the company offers a guarantee in case yours breaks.
Problems with the cartridge's rubber seals or a broken disc within can cause leaks. It's recommended to start by changing the seals and reassembling the faucet because it's hard to see a fractured disc and it's expensive to replace the disc cartridge.
If the problem persists, you'll need to remove the disc cartridge from the faucet and send it in to be replaced.
Faucets with ceramic discs may have been more prone to breaking in their earlier iterations if exposed to a strong blast of air pressure.
That's why it's crucial to keep the faucet ajar while turning the water back on. By doing so, pressure in the lines is reduced.
When the water is flowing freely, you can turn off the tap. To protect against air blasts and abrasive debris that may be displaced from the interior of pipes, manufacturers have strengthened the ceramic discs in modern faucets.
Repair a Spout Leak
Remove the handle and cartridge.
Twist and pull up on the spout to remove it and expose the O-ring seals.
Helpful Hint:
The sprayer's water supply can be adjusted with the diverter valve. Their shape and placement under the spout can vary widely between different manufacturers.
If your sprayer isn't doing its job, try cleaning it with vinegar before you buy a new one. If that doesn't work, it could be because the diverter valve is stuck.
If it doesn't, remove it and try cleaning it by hand or by contacting the manufacturer.
Replace the O-Rings
- Slip the tip of a screwdriver under the O-rings to slide them out of the groove.
- Install the new O-rings and lubricate them with the plumber's grease.
- Reinstall the spout.
Basics of a Leaky Faucet
Worn O-rings under the tap are the source of leaks around the spout's foundation. Unfortunately, replacing these O-rings typically entails nothing more than jiggling and pulling up on the tap.
The spout of a leaking faucet may also require removal of the handle and other components. Keep at it. It's possible the fixture is being obstinate.
Many faucets come with replacement spout O-ring kits, or you can just take your old O-rings to a hardware or plumbing supply store to have them matched up with new ones.
Don't forget to grab a tube of plumber's grease the size of a tube of toothpaste while you're there.
Why Does a Leaking Faucet Occur?
Cartridge faucets, compression faucets, ceramic disc faucets, and ball faucets are the four main types. Rubber washers that press on the valve seat in a compression faucet eventually wear out and need to be replaced.
The O-ring or neoprene seal, depending on the type of leaky faucet, must be changed. Each of these corrections will be discussed in greater depth below.
What Can Be Done About a Leaking Faucet?
Turn off the water supply to the sink first. The next step is to place a rag over the drain to catch any loose pieces, and to pick a location nearby to arrange the components in the sequence in which they will be removed.
If the fixture has mineral deposits, have some distilled white vinegar and a soft scouring pad handy, and protect the wrench's jaws with duct tape in case you drop it.
Fixing a Leaking Cartridge Faucet
- You need to pry off the handle's decorative cap, unscrew the handle, then pull it backwards while tilting it backwards.
- Pull the cartridge straight up if there is a threaded retention clip holding it down; otherwise, use needle-nose pliers to undo the clip.
- Take the spout apart and use a tool knife to remove the worn out O-rings. Apply some plumber's grease that is safe to use around heat to the new O-rings.
- The length of the old and new cartridges must be the same for a successful cartridge swap. Examine the base of the stem where the handle is supposed to go.
Fixing a Leaking Compression Faucet
- If your compression faucet is dripping, try replacing the seat washer. Remove the decorative cap off the handle by prying it off with a small angled screwdriver or utility knife to reveal the screws holding it on.
- To remove the handle, unscrew it with a screwdriver and then just pull it off.
- To remove the packing nut and the stem from the faucet body, you will need a crescent wrench and an adjustable wrench, respectively.
- The seat washer can be accessed by unscrewing it from the stem's base.
- Apply plumber's grease, which is safe to use around heat, to the washers.
- Leaky handles can be fixed by removing the stem from the packing nut and replacing the O-ring. O-rings come in a variety of sizes, from 3/8 to 5/8 inches, and you'll need to find the one that best fits your faucet's opening. Apply plumber's grease to the new O-ring.
- The washer is held in place by a retainer, a disc with a hole in the centre. Grind the old retainer down to a flush surface and put in a new one if it's broken. If your faucet continues to leak, the seat may be pitted.
- Take off the top of the seat's stem and smooth it out with some emery cloth.
- If the old seat can't be fixed, a new one should be purchased.
Fixing a Leaking Ceramic Disk Faucet
- You can get to the set screw by pulling the handle back. Remove the handle by unscrewing it.
- To get to the disc cylinder, you'll need to take off the escutcheon cover, undo the screws holding it in place, and pull it up and out.
- Remove the neoprene seals from the cylinder with a flathead screwdriver. If the seals are broken, you should get new ones.
- To clean the cylinder holes, use distilled white vinegar and a soft scouring pad.
- Reinstall the seals and reassemble the faucet.
- To prevent the ceramic disc from shattering, turn the handle to the "on" position slowly as the water is turned back on.
- In the rare case that you need to replace the entire cylinder (which is highly unlikely), do so now and fasten it in place using the new mounting screws.
Fixing a Leaking Faucet Ball-Type
The number of moving pieces in a faucet like this makes pinpointing the source of a leak difficult. Investing in a replacement kit and installing brand new components can save you time and effort.
- Use a pocket knife to peel off the little index cover off the side of the faucet and reveal the hex-head screw.
- With a hex key wrench, undo the screw holding the faucet handle in place.
- Take off the cap as well as the collar with a pair of adjustable pliers.
- Using the tool included in the repair kit, take apart the faucet's cam, washer, and rotating ball.
- Needle-nose pliers can be used to access the rubber seats and springs inside the faucet body.
- Put a fresh rubber seat and spring on the end of a pencil, then slide it into the sink's spout.
- Put in the second seat and spring in the same way.
- Replace the stainless steel ball into the faucet body so that the keyway lines up with the tab on the inside of the unit.
- A new rubber gasket and cam cover should be attached to the top of the stainless steel ball.
- Put the cap's keyway into the matching slot.
- Replace the faucet's top cap assembly by hand-tightening the screws.
- Make sure the nut is snug against the stainless steel ball by tightening it with a spanner wrench.
Conclusion
The purpose of this article is to provide guidance on mending a dripping sink with the correct skills and equipment. A dripping single-lever kitchen faucet can be fixed in a matter of minutes with the help of slip joint pliers, Allen wrenches, 4-in-1 screwdrivers, pliers, and materials such as o-ring seals. Finding the appropriate replacement parts is typically the most challenging aspect of fixing a leaking faucet, but the three most common kinds are rotary ball, cartridge, and ceramic disc. Leaky faucets can be repaired with a rotary ball faucet repair kit, which includes the ball, springs, seats, and O-rings for the spout. The most important details are that the faucet should be replaced if water is dripping from the base of the spout, the cap should be removed with slip-joint pliers, the ball should be replaced with a new one, and the shutoff valves should be located under the sink.
Additionally, it is important to check for leaks by turning on the water supply, use the spanner to tighten the adjustment ring if water is leaking around the ball stem, and turn off the water supply to the entire property. The most important details are to check the inside of the valve for worn gaskets or mineral deposits, clean the surface with a soft cloth or a fine nylon abrasive pad, remove the Allen Screw, take the broken parts to the store and ask for new ones to be installed, take the worn components to the store whenever possible, find repair kits for Delta or other rotary ball faucets, acquire components online, and call the faucet's maker for assistance locating replacement components. Pull the Retainer Nut Out, Detach the Retaining Clip, Twist Loose the Cartridge, Replace Worn Parts and Reassemble the Faucet. Test the faucet by removing the handle, dome assembly and handle adapter and rotating the stem 180 degrees. Moen faucet replacement cartridges come with a plastic spanner cap that may be twisted and loosened to make the cartridge easier to remove.
Difficult cartridges may require the employment of needle-nose pliers. The disc cartridge can be removed from the faucet body by removing the screws holding it in place, replacing the seals, replacing the O-ring seals, and cleaning the openings. To repair a spout leak, it is recommended to remove the handle and cartridge, twist and pull up on the spout to remove it, and adjust the diverter valve with vinegar before buying a new one. Worn O-rings under the tap are the source of leaks around the spout's foundation. To fix a leaking faucet, turn off the water supply, place a rag over the drain, arrange components in the sequence in which they will be removed, and use a tool knife to remove the worn out O-rings.
Additionally, the O-ring or neoprene seal must be changed, and the length of the old and new cartridges must be the same for a successful cartridge swap. The most important details in this text are the steps to fix a leaking ceramic disk faucet. To remove the handle, unscrew it with a screwdriver and pull it off, the seat washer can be accessed by unscrewing it from the stem's base, and the stem can be replaced by removing the stem from the packing nut and replacing the O-ring. To clean the cylinder holes, use distilled white vinegar and a soft scouring pad. If the old seat can't be fixed, a new one should be purchased.
Reinstall seals and reassemble the faucet, turn the handle to the "on" position slowly, and fasten it in place using new mounting screws. Take apart the cam, washer, and rotating ball, remove the rubber seats and springs, replace the stainless steel ball with a new rubber gasket and cam cover, and replace the top cap assembly with a spanner wrench. Investing in a replacement kit and installing brand new components can save time and effort.
Content Summary
- If your kitchen or bathroom faucet is dripping, you should fix it immediately.
- The purpose of this article is to provide guidance on mending a dripping sink.
- With the correct skills and equipment, it's actually rather simple.
- A dripping single-lever kitchen faucet can be fixed in a matter of minutes.
- Even a plumbing amateur can complete the repair with relative ease.
- Finding the appropriate replacement parts is typically the most challenging aspect of fixing a leaking faucet.
- The three most common kinds of single-lever faucets are rotary ball, cartridge, and ceramic disc; in this post, we'll tell you where to locate replacement components and show you how to fix a dripping spout.
- The methods we demonstrate for fixing a leaky kitchen faucet are also applicable to the vast majority of single-lever bathroom faucets.
- We'll also demonstrate how to repair leaky faucets and seal the area surrounding the spout's foundation.
- The specific equipment required to fix a leaking faucet will vary slightly from one kind of faucet to the next.
- In order to be ready for any kind of dripping sink, you should invest in a set of tiny Allen wrenches.
- Large slip-joint pliers and screwdrivers are also typically needed for fixing things.
- Note: If water is dripping from the base of the faucet's handle, you can try tightening the adjustment ring to stop the leak without having to replace the handle.
- The seats and springs should be replaced if water is dripping from the faucet's spout.
- With a screwdriver, remove the two rubber seats and the springs.
- Check for leaks by turning on the water supply.
- Helpful Hint: Use the spanner to tighten the adjustment ring if water is leaking around the ball stem.
- Just switch out the faucet's handle if it starts dripping again.
- Find the source of the dripping water by carefully inspecting the faucet before proceeding.
- Fixing a leak at the base of the spout is different from fixing a leak at the fixture's tip.
- Then, stop the faucet from dripping by cutting the water supply to it.
- The shutoff valves are most likely located under the sink.
- Keep the pieces in the sequence in which they were taken apart.
- When you have all the information, you can check the inside of the valve for worn gaskets or mineral deposits.
- A rag can be used to catch any dislodged debris from cleaning and inspecting the faucet before the worn pieces are replaced and the faucet is reassembled.
- If water pressure is low and the faucet seems to be leaking, check the aerator.
- Take apart the aerator and scrub it thoroughly.
- The worn components should be taken to the store whenever possible.
- You may find repair kits for your Delta or other rotary ball faucet at most home improvement outlets.
- Finding a replacement cartridge for a faucet is easier if you know the model number or name of the faucet.
- You can also get useful replacement components in stores that specialise in plumbing supply.
- Call the faucet's maker for assistance locating replacement components.
- Using big slip-joint pliers, unscrew the retainer nut by rotating it in a counter - clockwise direction.
- Remove the brass clip holding it together by prying it out with a screwdriver.
- To remove the cartridge, place the plastic spanner cap that came with the replacement cartridge over it and twist.
- Grab the cartridge stem with pliers and pull it straight up and out.
- Get rid of the broken parts and replace them.
- Reassemble the Faucet Put the faucet back together in the reverse order.
- Note: You may have to twist the cartridge slightly to line it up for the brass retainer clip.
- Use the plastic spanner cap or the tips of needle-nose pliers to rotate the cartridge.
- Slide the brass clip into the slots in the valve body to hold the cartridge in place.
- Finally, install the remaining parts and reattach the handle.
- Test the faucet.
- If the hot and cold water is reversed, remove the handle, dome assembly and handle adapter and rotate the stem 180 degrees.
- We demonstrate the procedure using a Moen cartridge, but it applies equally well to cartridges from other manufacturers.
- Removing the cartridge and replacing the O-rings, if necessary, or replacing the cartridge entirely should fix any dripping at the spout or hot/cold mixing issues.
- Take the cartridge to the home centre or hardware store to find a replacement.
- Moen faucet replacement cartridges come with a plastic spanner cap that may be twisted and loosened to make the cartridge easier to remove.
- The disc cartridge can be removed from the faucet body by removing the screws holding it in place.
- Check the cartridge for mineral deposits, and give it a thorough cleaning if necessary.
- Take out the plastic disc (on some faucets) and replace the O-rings under it.
- Check the openings in the faucet body and clean them out if they're clogged.
- Cartridges are one kind of valve, and ceramic disc valves are another.
- Discs inside the cartridge control the water flow.
- Problems with the cartridge's rubber seals or a broken disc within can cause leaks.
- If the problem persists, you'll need to remove the disc cartridge from the faucet and send it in to be replaced.
- That's why it's crucial to keep the faucet ajar while turning the water back on.
- When the water is flowing freely, you can turn off the tap.
- Repair a Spout Leak Remove the handle and cartridge.
- Helpful Hint: The sprayer's water supply can be adjusted with the diverter valve.
- Worn O-rings under the tap are the source of leaks around the spout's foundation.
- The spout of a leaking faucet may also require removal of the handle and other components.
- It's possible the fixture is being obstinate.
- Many faucets come with replacement spout O-ring kits, or you can just take your old O-rings to a hardware or plumbing supply store to have them matched up with new ones.
- The O-ring or neoprene seal, depending on the type of leaky faucet, must be changed.
- Turn off the water supply to the sink first.
- Take the spout apart and use a tool knife to remove the worn out O-rings.
- Apply some plumber's grease that is safe to use around heat to the new O-rings.
- To remove the packing nut and the stem from the faucet body, you will need a crescent wrench and an adjustable wrench, respectively.
- The seat washer can be accessed by unscrewing it from the stem's base.
- Leaky handles can be fixed by removing the stem from the packing nut and replacing the O-ring.
- Apply plumber's grease to the new O-ring.
- The washer is held in place by a retainer, a disc with a hole in the centre.
- If your faucet continues to leak, the seat may be pitted.
- Take off the top of the seat's stem and smooth it out with some emery cloth.
- Remove the handle by unscrewing it.
- Remove the neoprene seals from the cylinder with a flathead screwdriver.
- Reinstall the seals and reassemble the faucet.
- To prevent the ceramic disc from shattering, turn the handle to the "on" position slowly as the water is turned back on.
- The number of moving pieces in a faucet like this makes pinpointing the source of a leak difficult.
- Investing in a replacement kit and installing brand new components can save you time and effort.
- With a hex key wrench, undo the screw holding the faucet handle in place.
- Take off the cap as well as the collar with a pair of adjustable pliers.
- Using the tool included in the repair kit, take apart the faucet's cam, washer, and rotating ball.
- Replace the stainless steel ball into the faucet body so that the keyway lines up with the tab on the inside of the unit.
- A new rubber gasket and cam cover should be attached to the top of the stainless steel ball.
- Replace the faucet's top cap assembly by hand-tightening the screws.